Shimoda Explore V2 35 Backpack Review
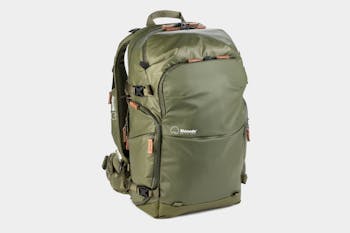
The Shimoda Explore V2 35 Backpack does everything you’d expect from a camera bag and more while not looking overtly like a photography pack.
Our Verdict
Save time. Get access to brief summaries of our reviews so you can browse and make decisions more efficiently.
Pros
- Tons of efficient internal organization gear
- Durable and water-resistant materials for rugged adventures
- Adjustable shoulder straps and back panel for customized comfort
Cons
- Bag features and size can feel bulky for 35L
- The sternum strap is small for a bag this large
- Hip belt takes up lots of room in the pack if removed in transit
Technical Details
-
Capacity
35l
-
Weight (lb)
4.4 lb (2 kg)
-
Dimensions
21.2 in x 11.6 in x 7.8 in (53.8 x 29.5 x 19.8 cm)
-
Notable Materials
Ripstop Nylon, Polyethylene, EVA, EVA Foam, YKK Buckles, YKK Zippers, Duraflex Hardware
-
Manufacturing Country
China
-
Laptop Compartment Size
16"
-
Warranty Information
Buying Options
Full Review
Get up to 10% off Shimoda • Join Pack Hacker Pro
As we write this, the Shimoda Explore V2 Backpack is the most talked about travel camera bag in our Pack Hacker Pro Community. Three of our Pros discussed it a ton, and when more than one member talks about a piece of gear, that piques our interest. We were excited about its highly water-resistant design and capacity for a ton gear from the git-go. Can it live up to the hype? Let’s find out!
External Components
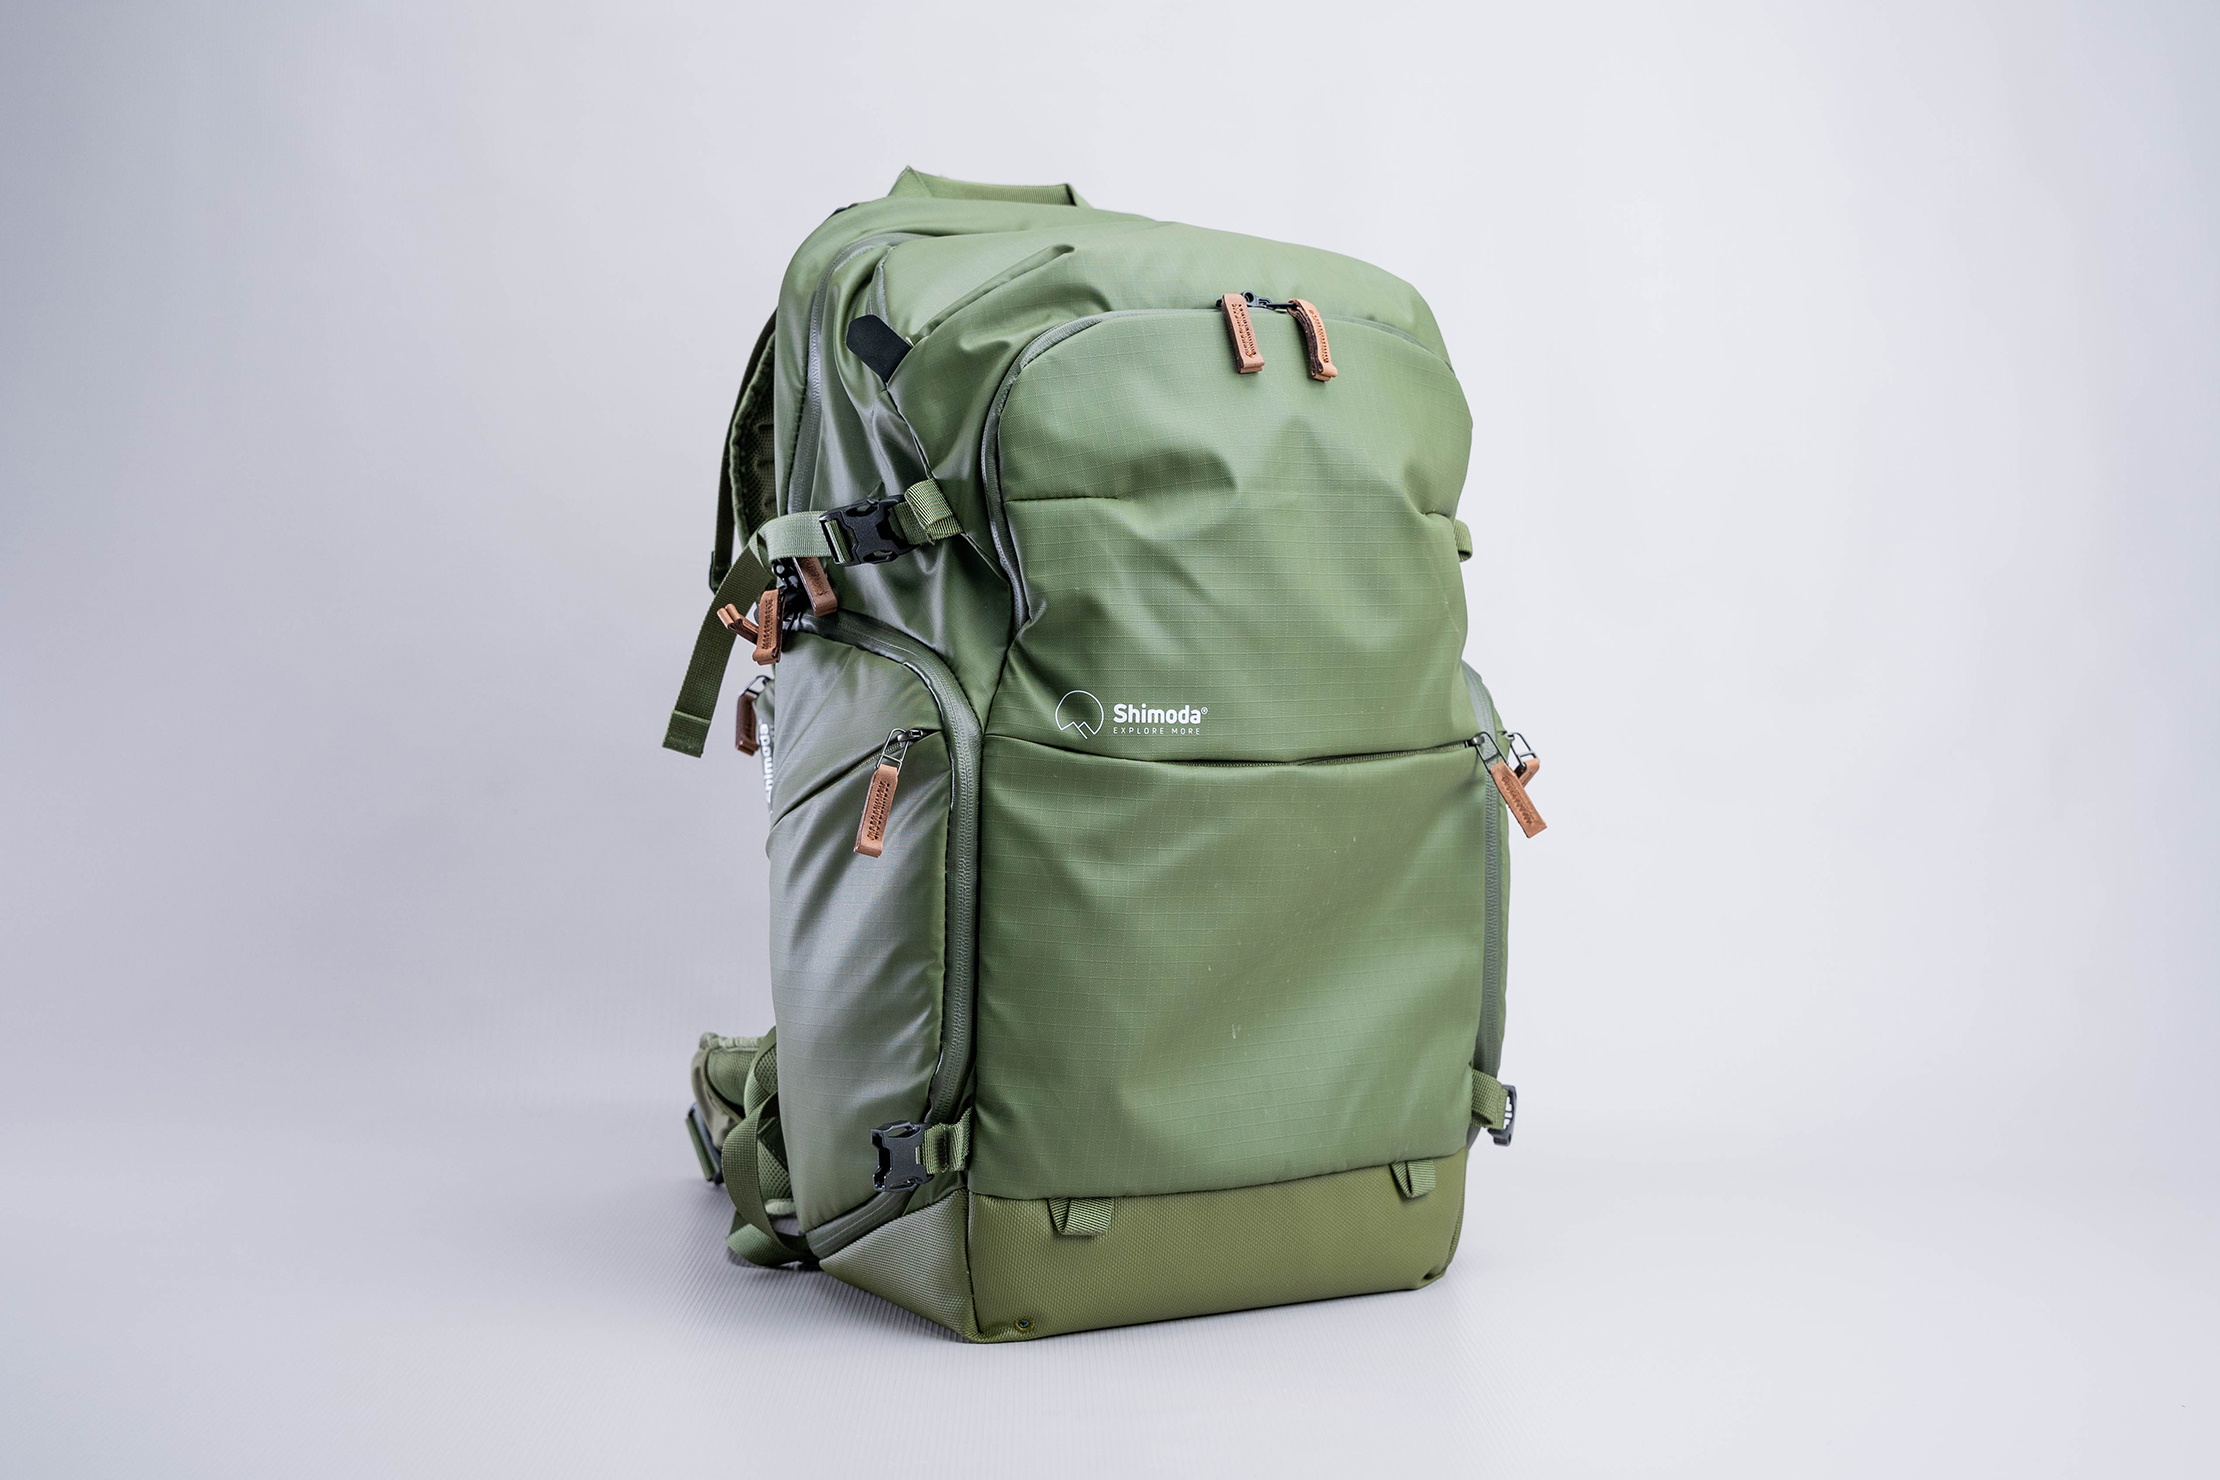
When we first got the Explore V2, we were curious about the material used for the exterior shell. All of our research pointed towards nylon, but we reached out to Shimoda to be sure. They told us they used a “combination of 210 Denier and 420 Denier Carbonate-coated nylon ripstop.” They used the higher denier material “in high-abrasion areas to increase durability” and opted for something lighter in “low-abrasion areas to reduce weight.” Thanks for the information, Shimoda!
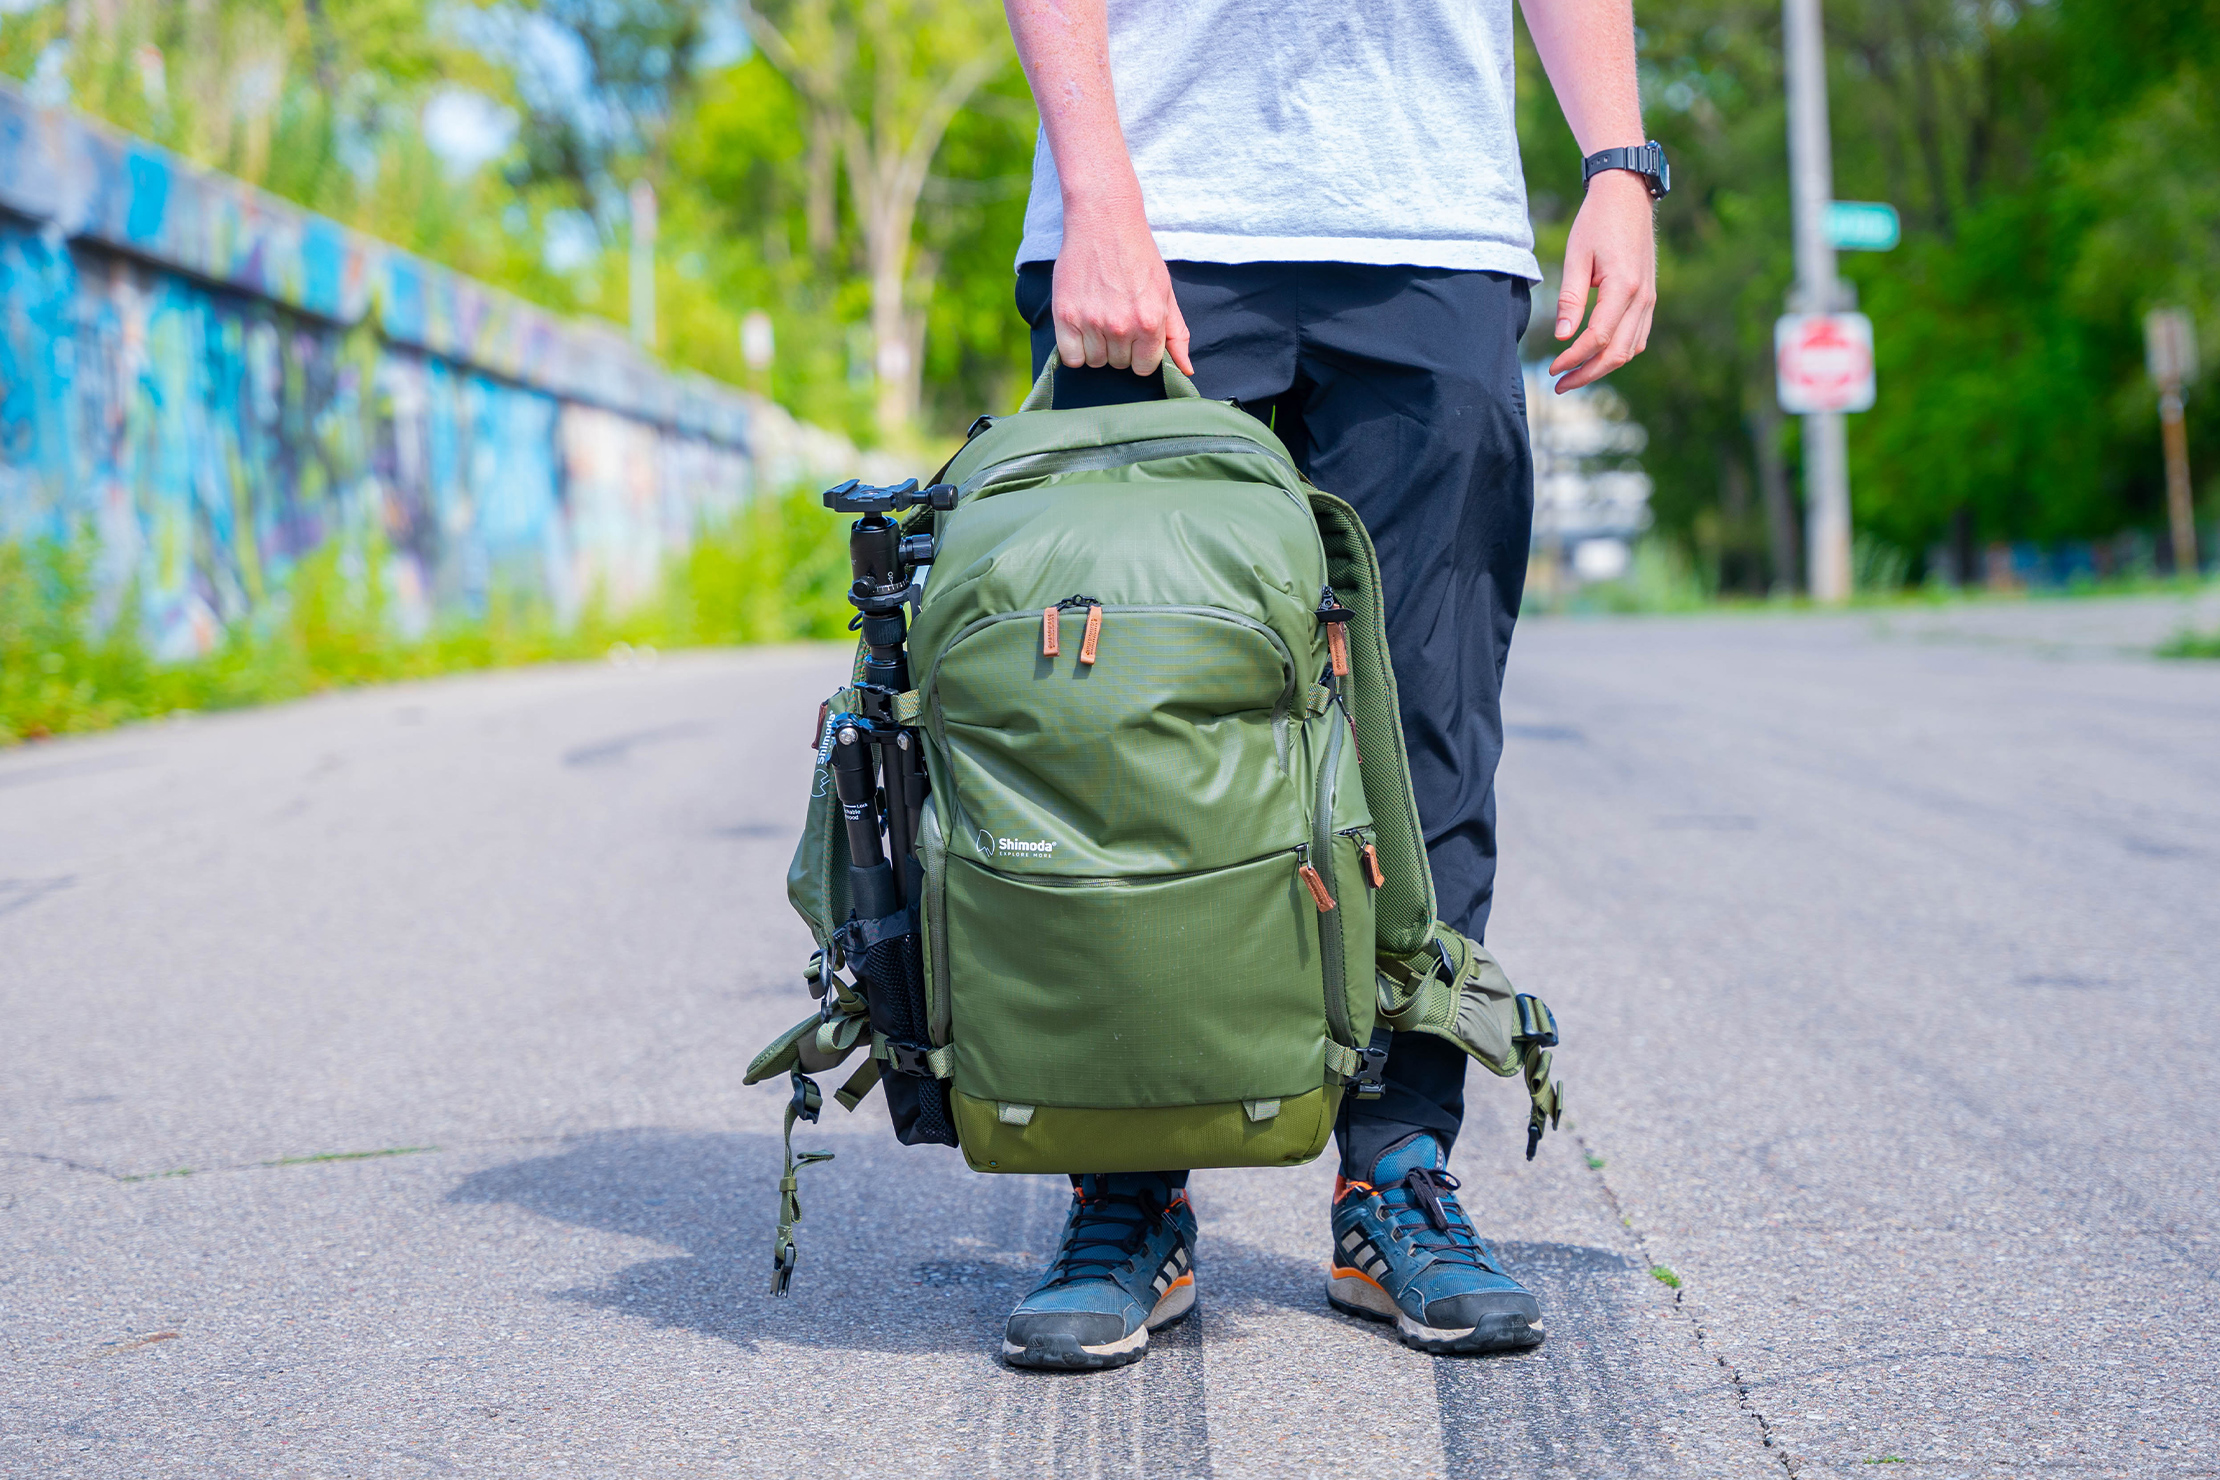
The exterior looks and feels extremely durable, and our testing has shown that to be the case. In cycling around Detroit, this bag continues to take a beating, yet it looks like the day we bought it. In addition to the shell being extremely water resistant, the bag comes with a rainfly that adds even more protection. Shimoda includes the rainfly whether you just get the bag or opt for the starter kit with extras—which is a good shout.
The pack features YKK zippers in varying sizes, shapes, and designs. The hardware is a mixture of YKK and Duraflex, but they both work so well that we didn’t notice a difference between the selections. So far, so good as far as usability is concerned.
The back panel has a metal frame encompassing the entire back to help displace weight and add structure. It’s also nice if you accidentally drop or bump the bag, as the back side has a rigid ring around it to protect your important, expensive gear.
The back panel has ample padding and mesh, allowing airflow while wearing the pack. There are additional air channels to promote the movement of air, which work nicely on hot days. You’ll still sweat while wearing this thing, especially when fully packed with gear, but it’s cooler than you might think.
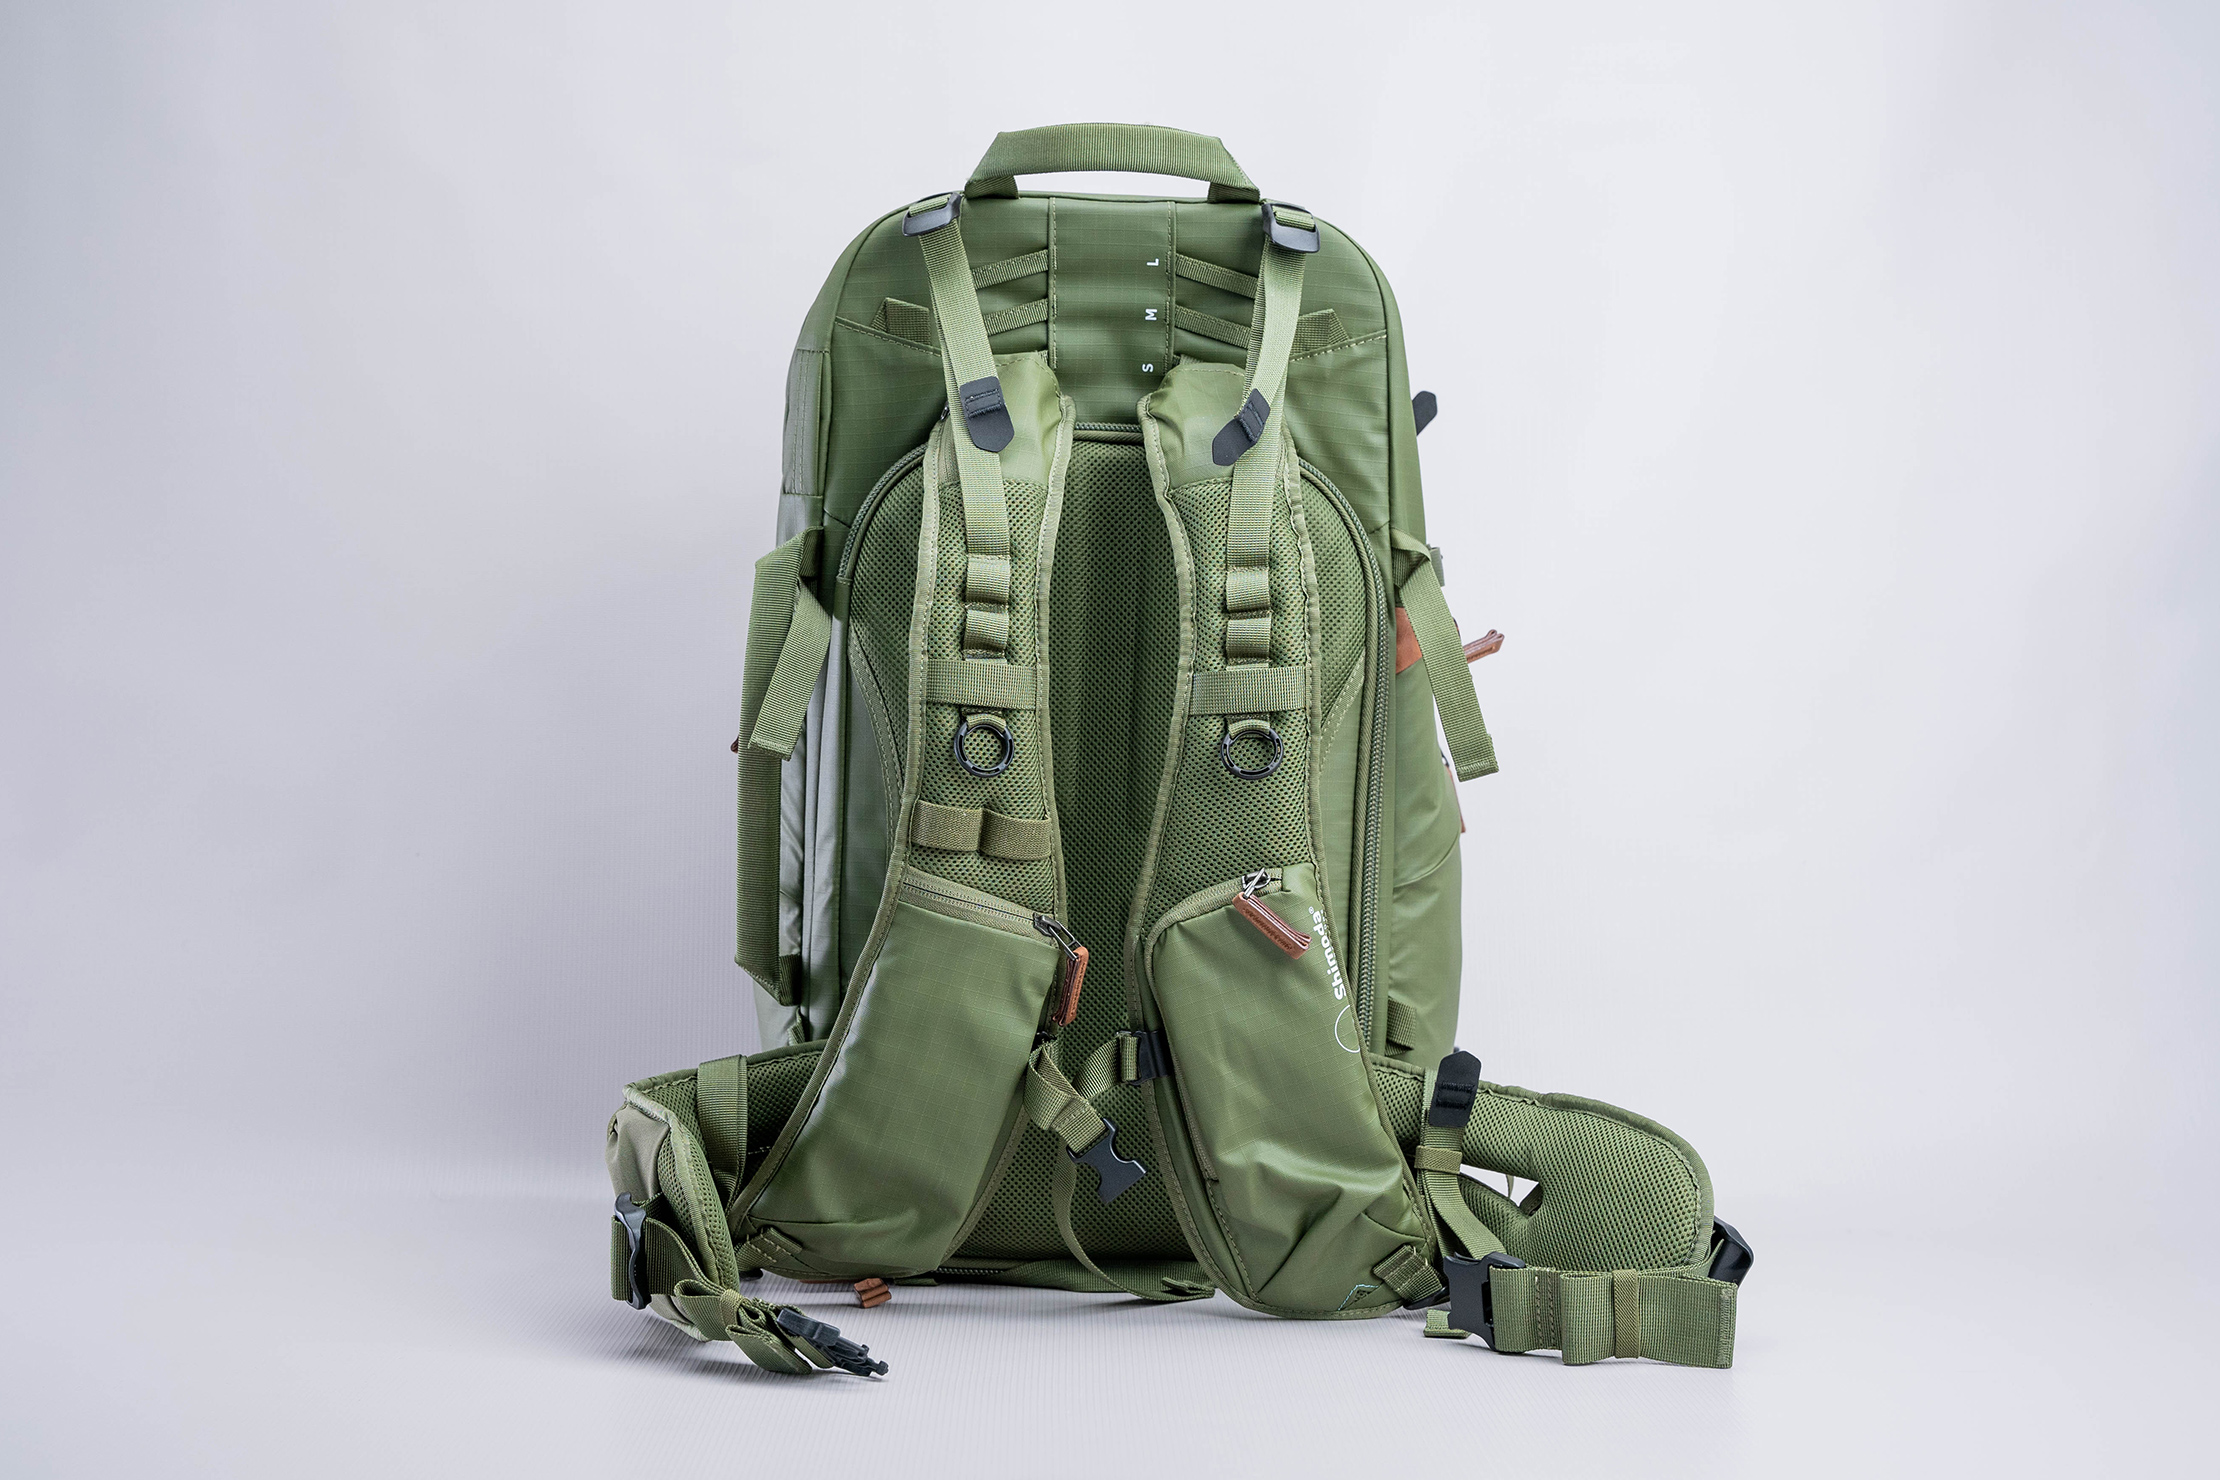
The shoulder straps have three adjustment settings: Small, Medium, and Large. These are ideal for tall, short, and, uhh…medium people, or when you want to switch things up during a long hike or jaunt across a new city. There are load lifters, too, which keep the weight where you want it and stop the backpack from swaying.
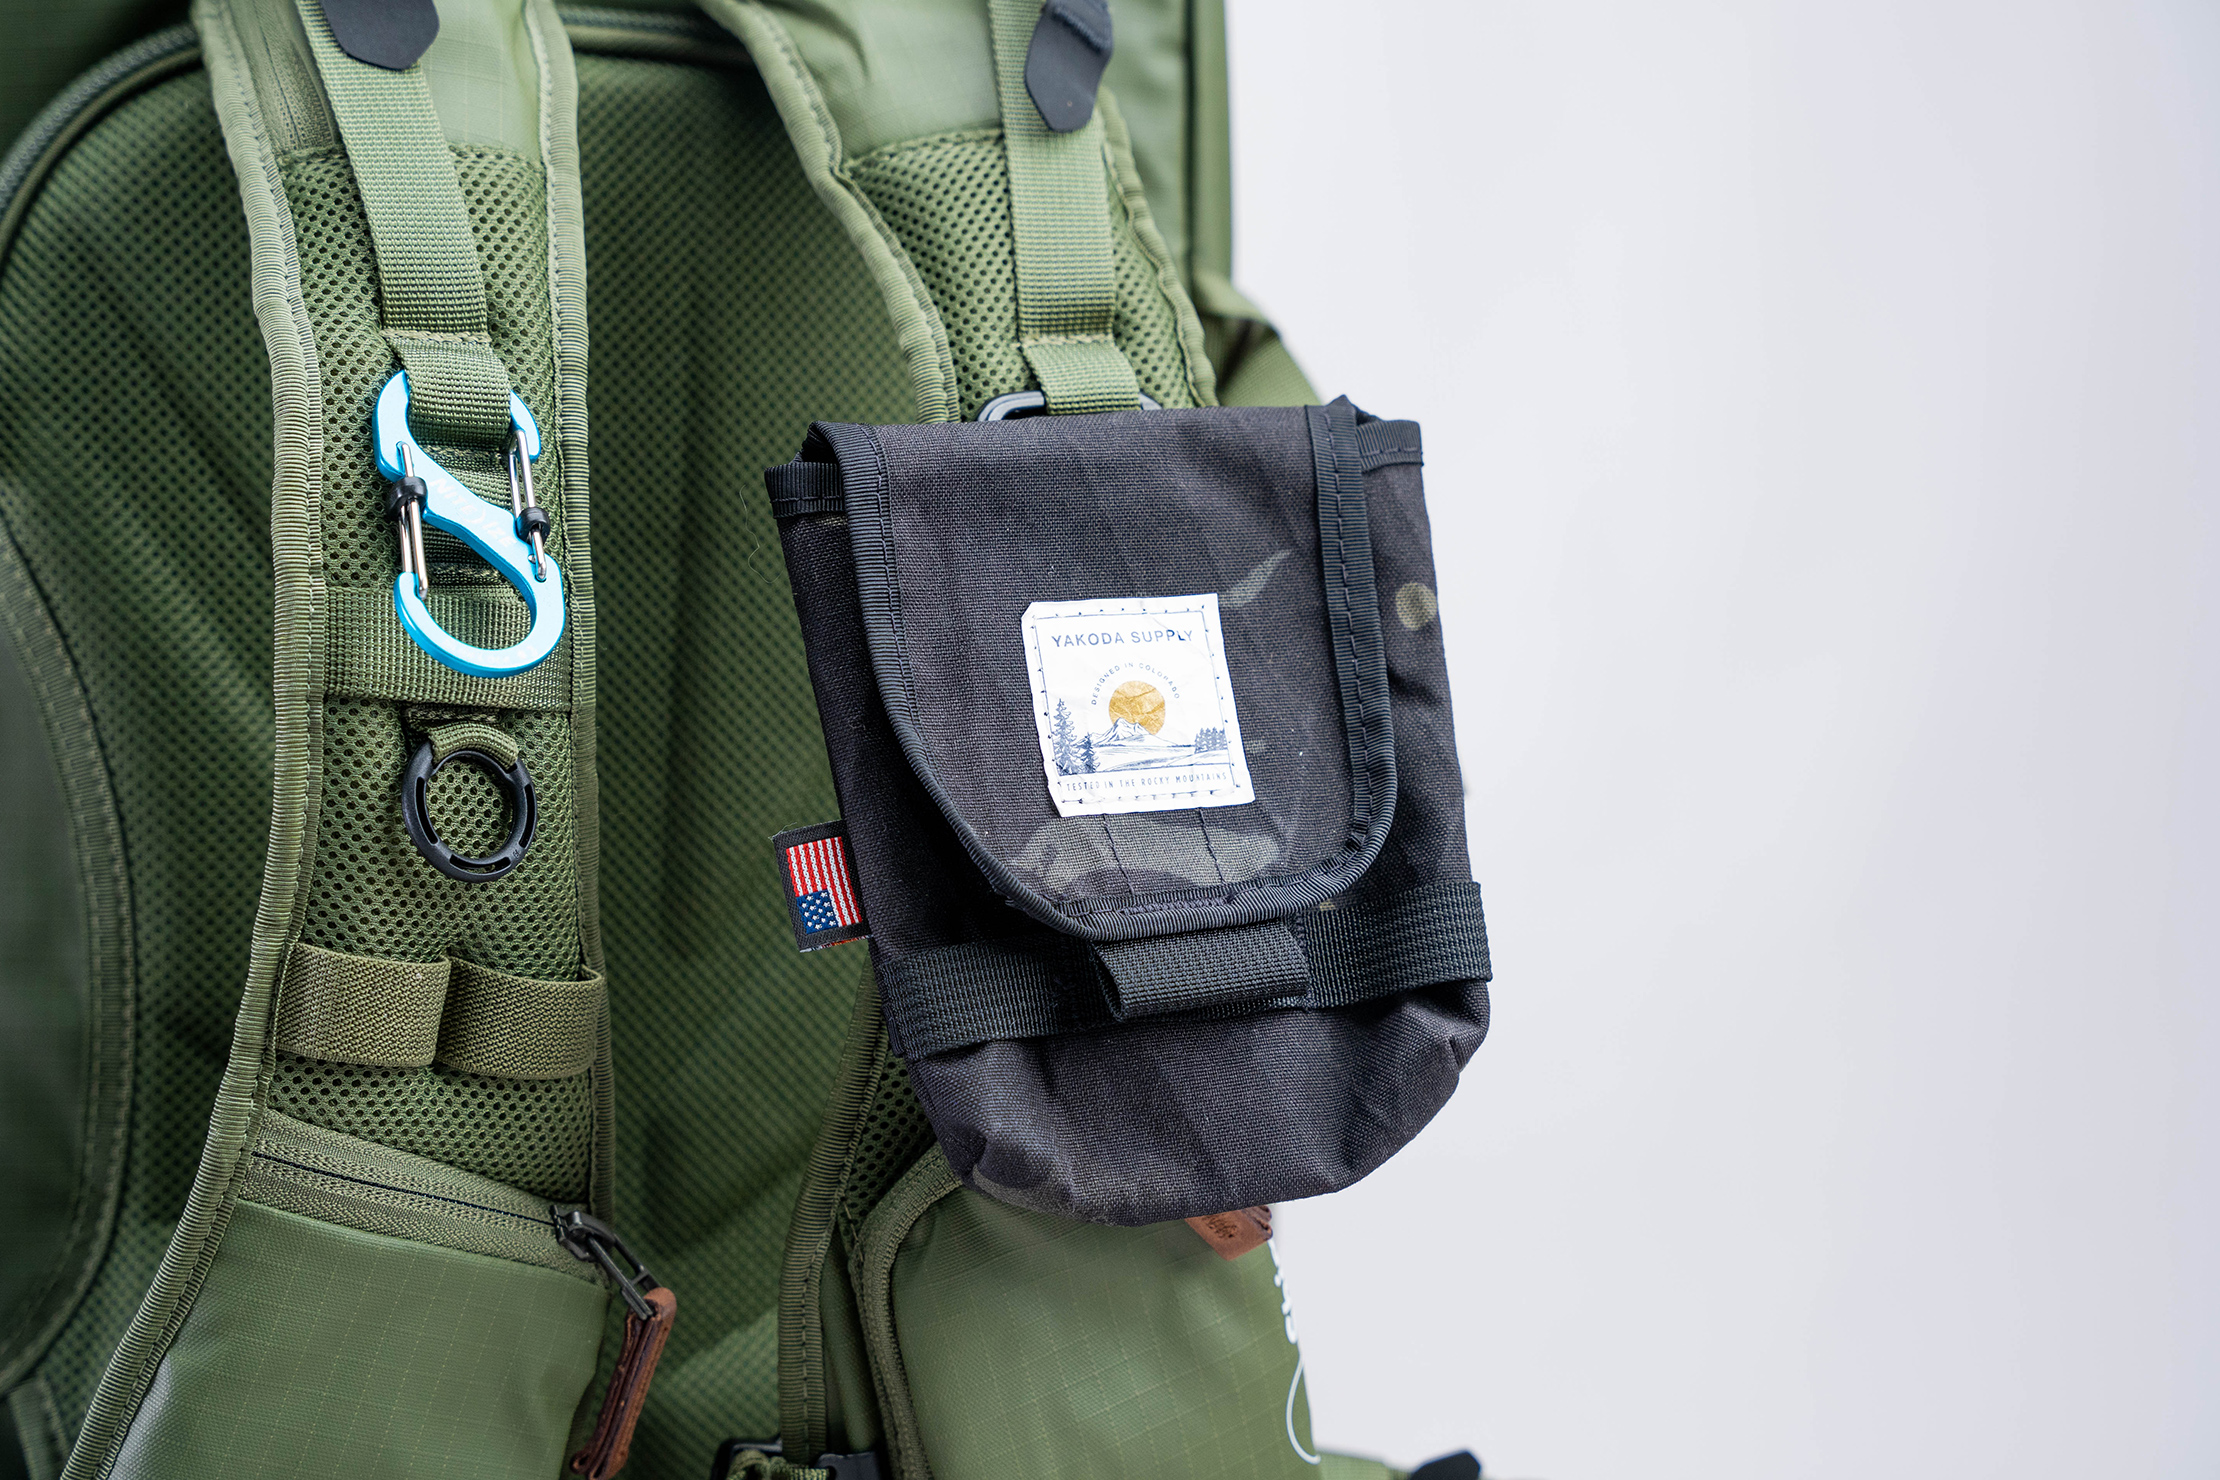
Down the front of the shoulder straps are different loops, rings, and attachment points to fix gear to your front side. These are welcomed additions because they don’t get in the way when they’re not in use but offer a lot of unique mounting points for small pieces of gear like a Nite Ize S-Biner SlideLock or a Yakoda Utility Pouch.
Both straps have a pocket on them—the one on the right opens on the tip with a zipper and folds out for more oversized items, and the one on the left zips roughly halfway open for quick-use items like a phone or GPS unit. At first, these felt like unnecessary add-ons, but we continue to use them nearly every time we use the pack. Fast access to your essential gear without reaching into your pocket saves energy on a long walk with a ton of weight on your back.
The shoulder straps have ample padding and are aerated with mesh to keep things cool, like the back panel. They are relatively malleable and aren’t super heavy or restricting, which enables them to form and get to know your body better, adding comfort for long-haul treks, no matter where you’re going.
We have a sternum strap on a rail system, making micro-adjustments possible. It is small, so it doesn’t offer a ton of support, but it makes it so that you can pull the shoulder straps together if you want to and makes the bag feel more at home on your person.
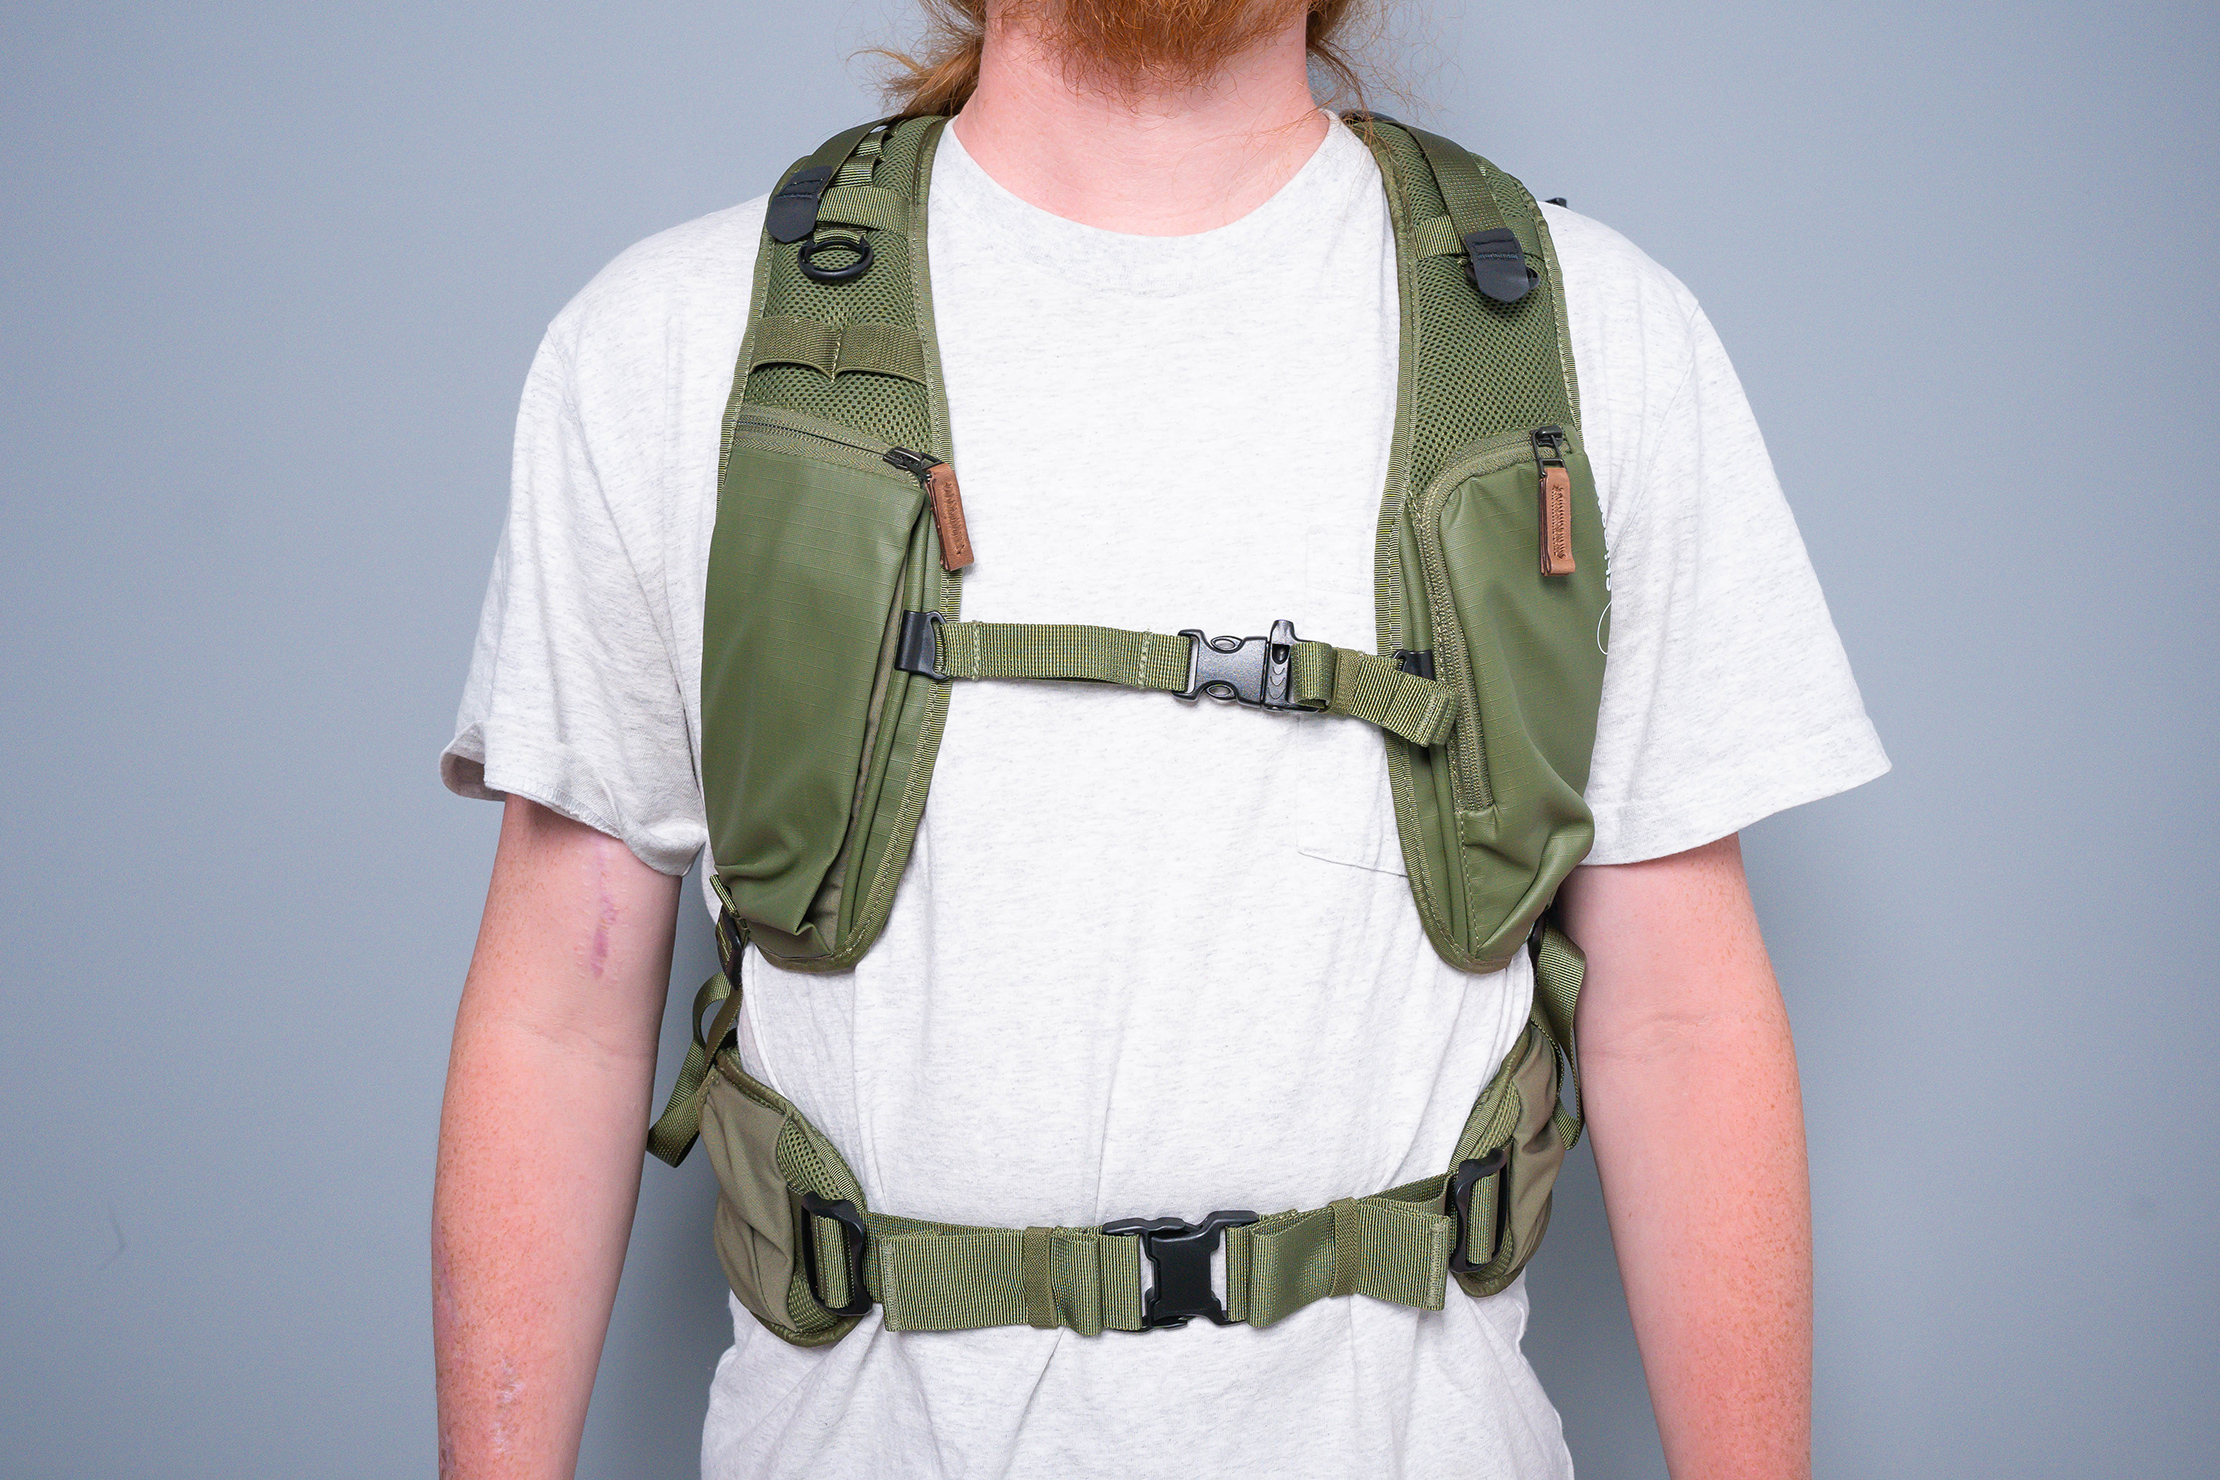
Shimoda went in the opposite direction with the hip belt; this thing is beefy. It has the same padding and mesh as the shoulder straps and is quite broad. The mesh makes it cool, and large holes on either side enable airflow when the temperature rises. Two mesh pockets on each side are ideal for small items you want to access quickly. They aren’t the most secure pockets, especially if your hike turns into a scramble, so we wouldn’t recommend putting easy-to-lose items here.
You can remove the hip belt by undoing the hook-and-loop fastener underneath the center section. it is a nice feature, but as we mentioned earlier, this thing has a lot of surface area. If you take it off mid-hike, it will eat up a ton of room inside your pack until you get back to your hotel, Airbnb, or camp. It’s best to leave it on until you can stow it somewhere safe or remove it before you head out for the day.
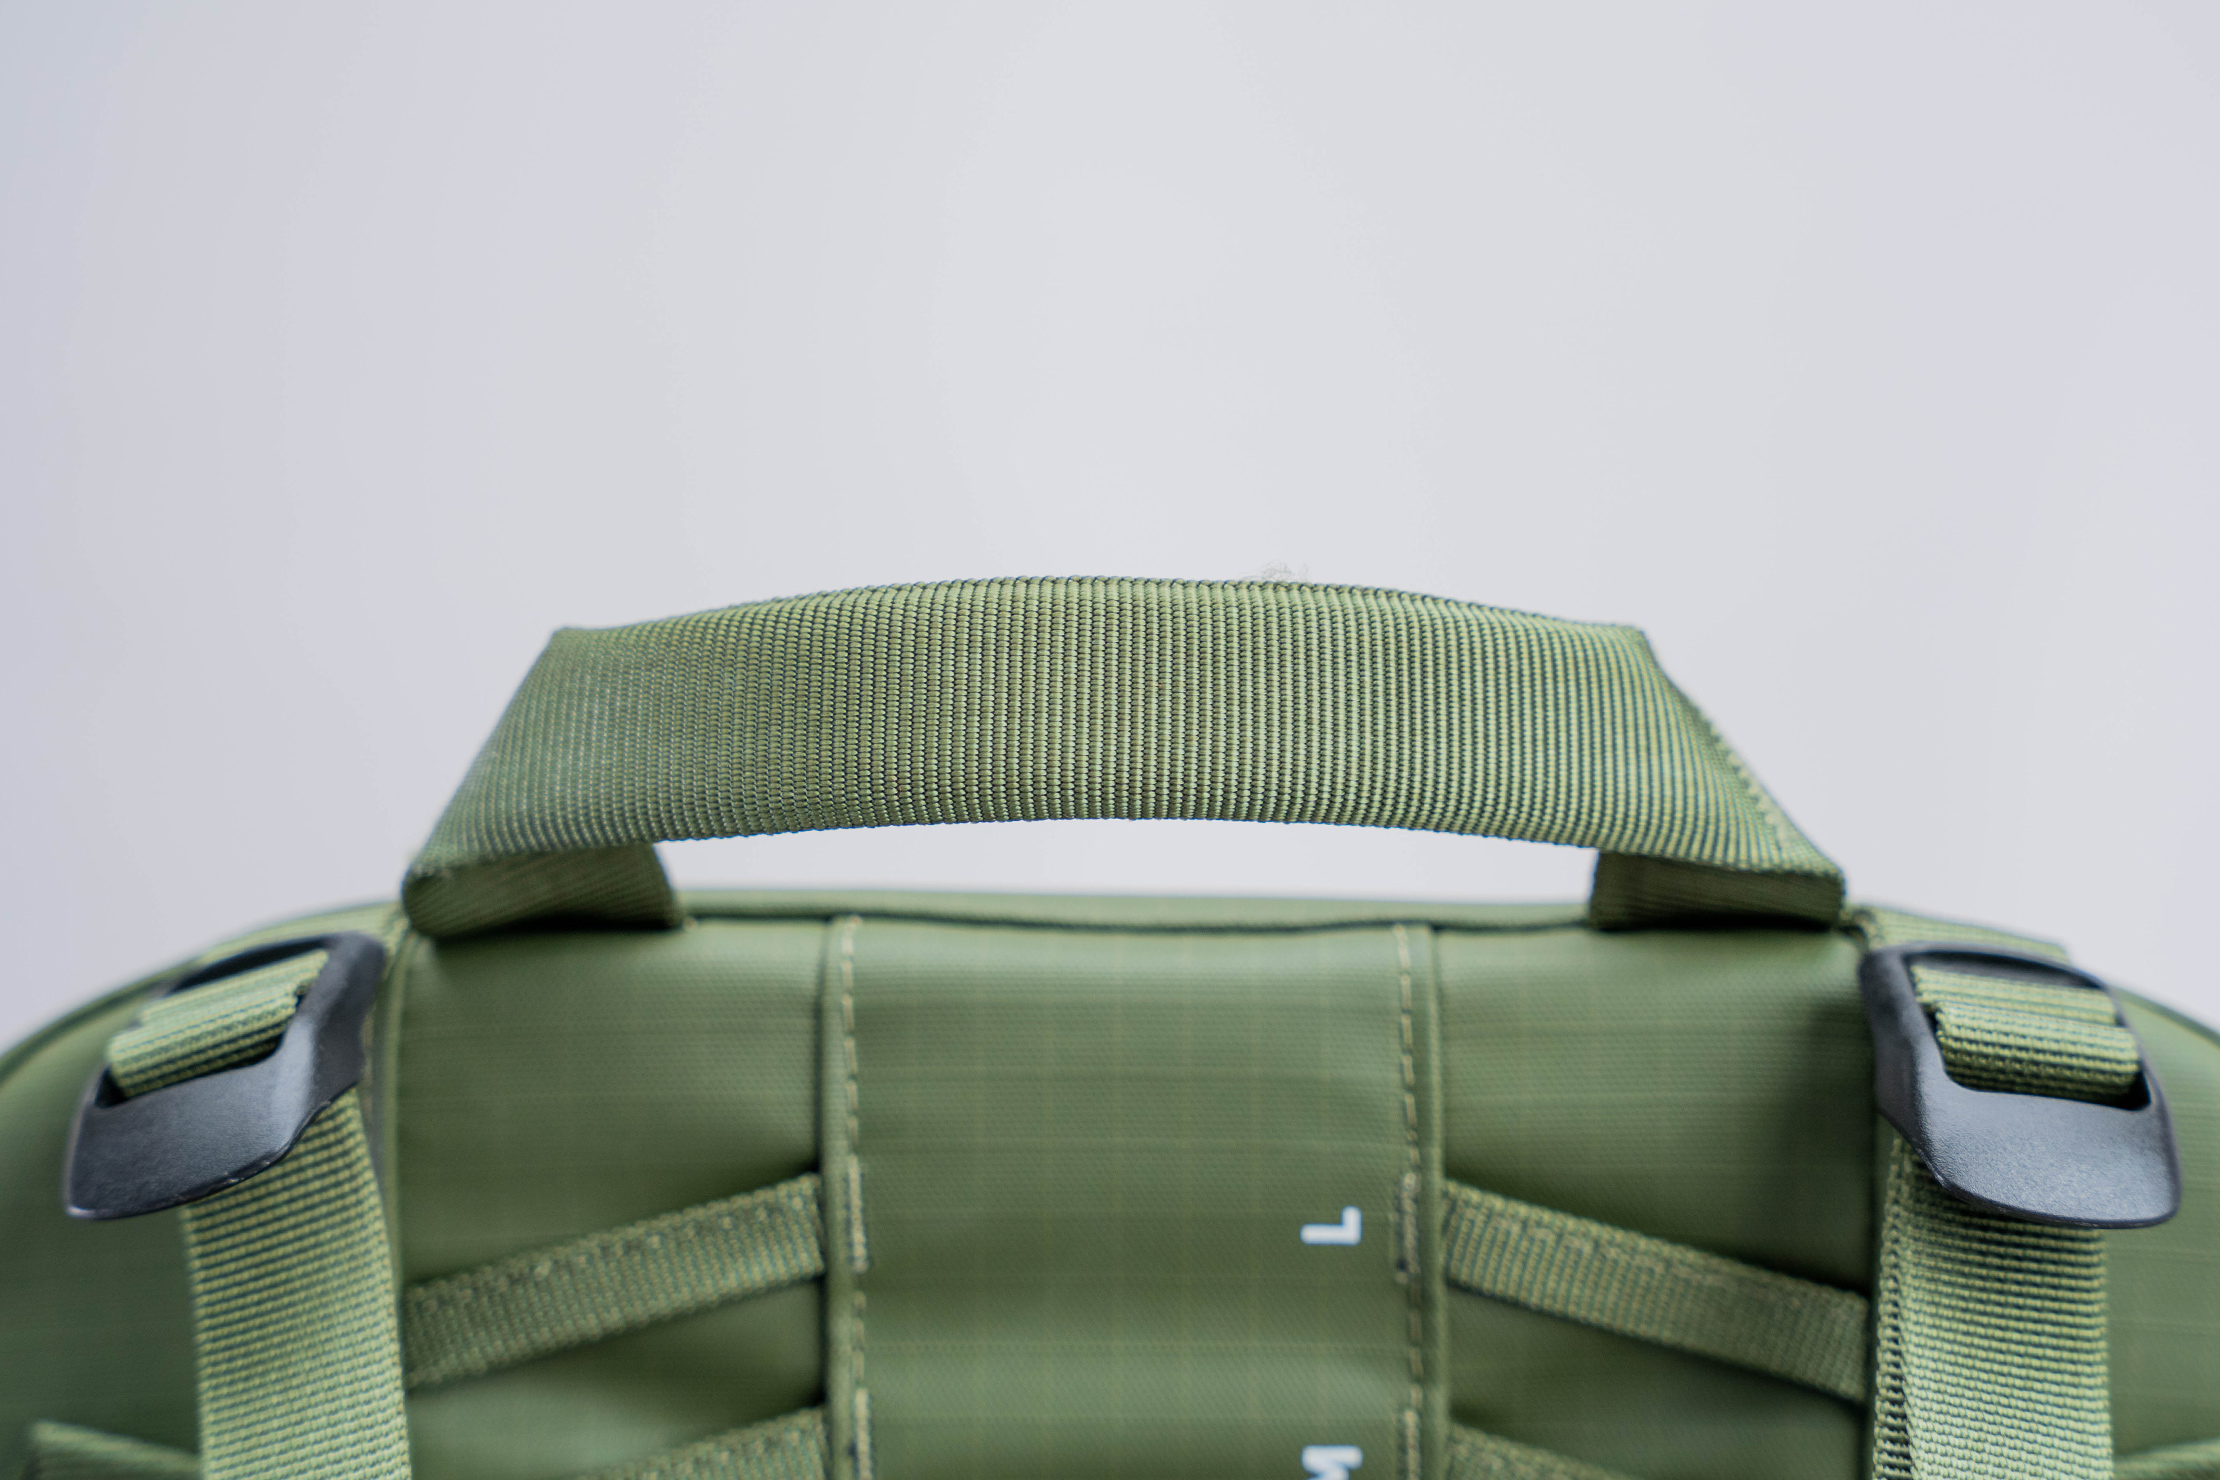
There are three different handles on the Explore V2, and we dig each for various reasons. The first is the top handle, which feels durable but has a fair amount of padding to add comfort. This bag gets heavy quickly, and without the padding, our hands would hurt instantly. It isn’t a comfortable carry when fully packed, but it has enough padding for our liking.
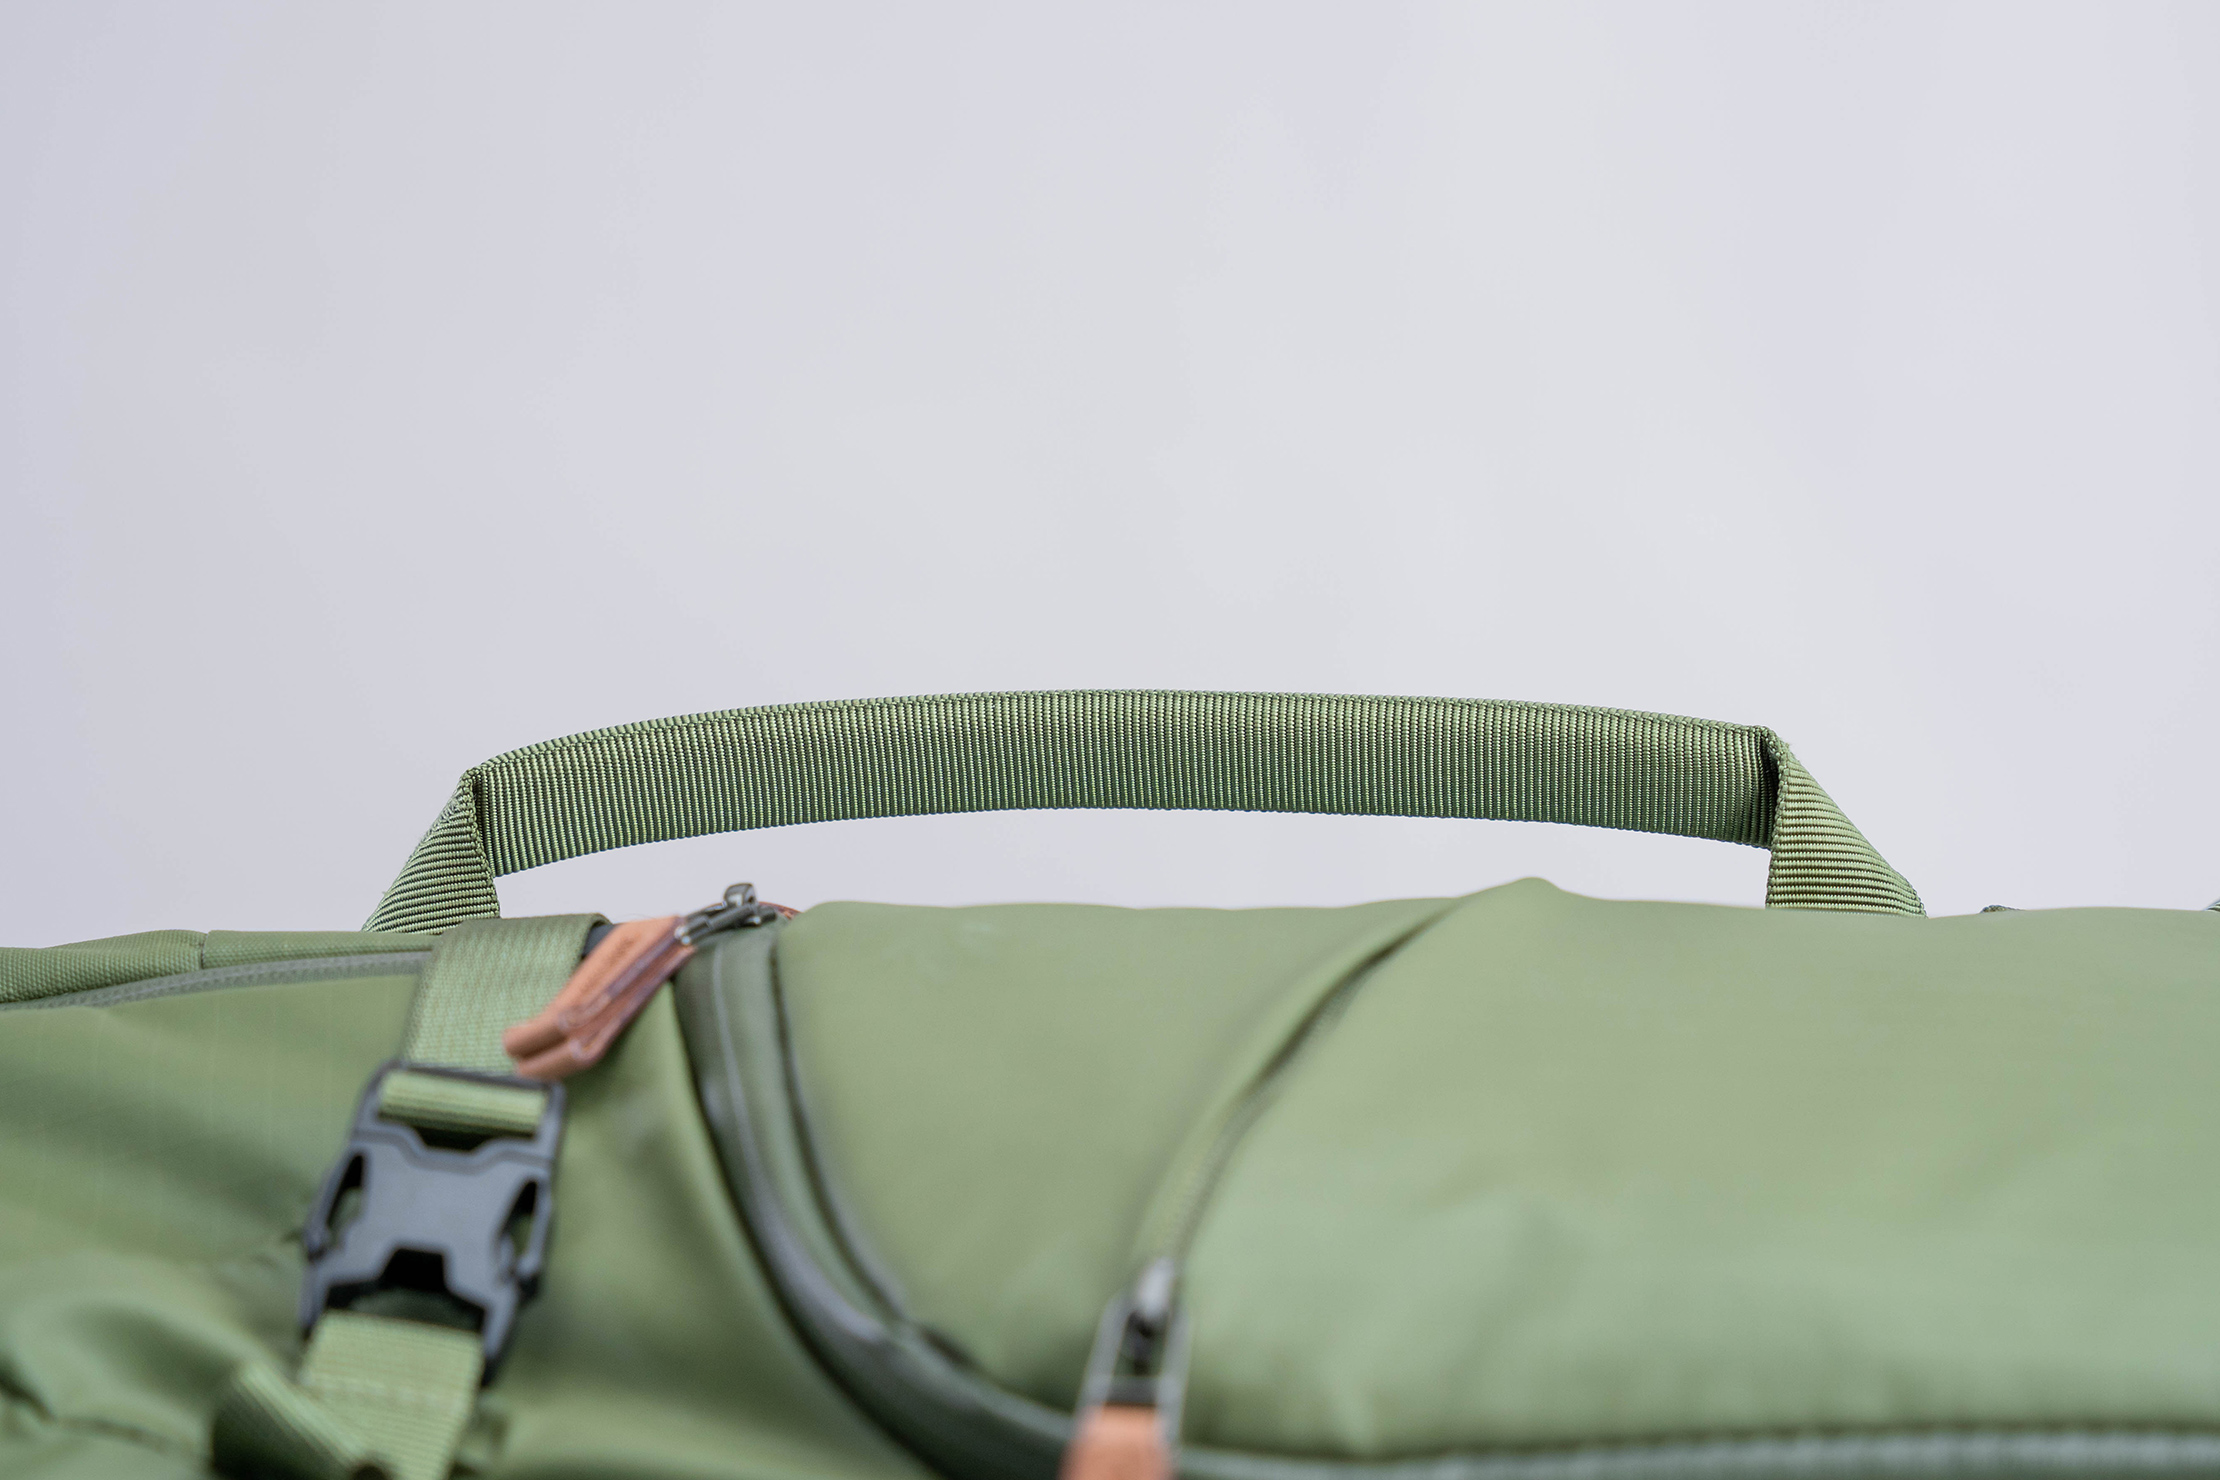
A similarly designed handle on the right side of the back panel can be used as a luggage pass-through or as a quick grab handle. The bag is a little large to be placed on rolling luggage, but it’s nice to have the option. In use as a carry-on, we dig this handle because it makes it easy to stow and remove the bag from the overhead compartment. It’s a larger handle, so it’s easy to grab, and you can even two-hand it if you need to. It has similar padding and is a great inclusion, we think.
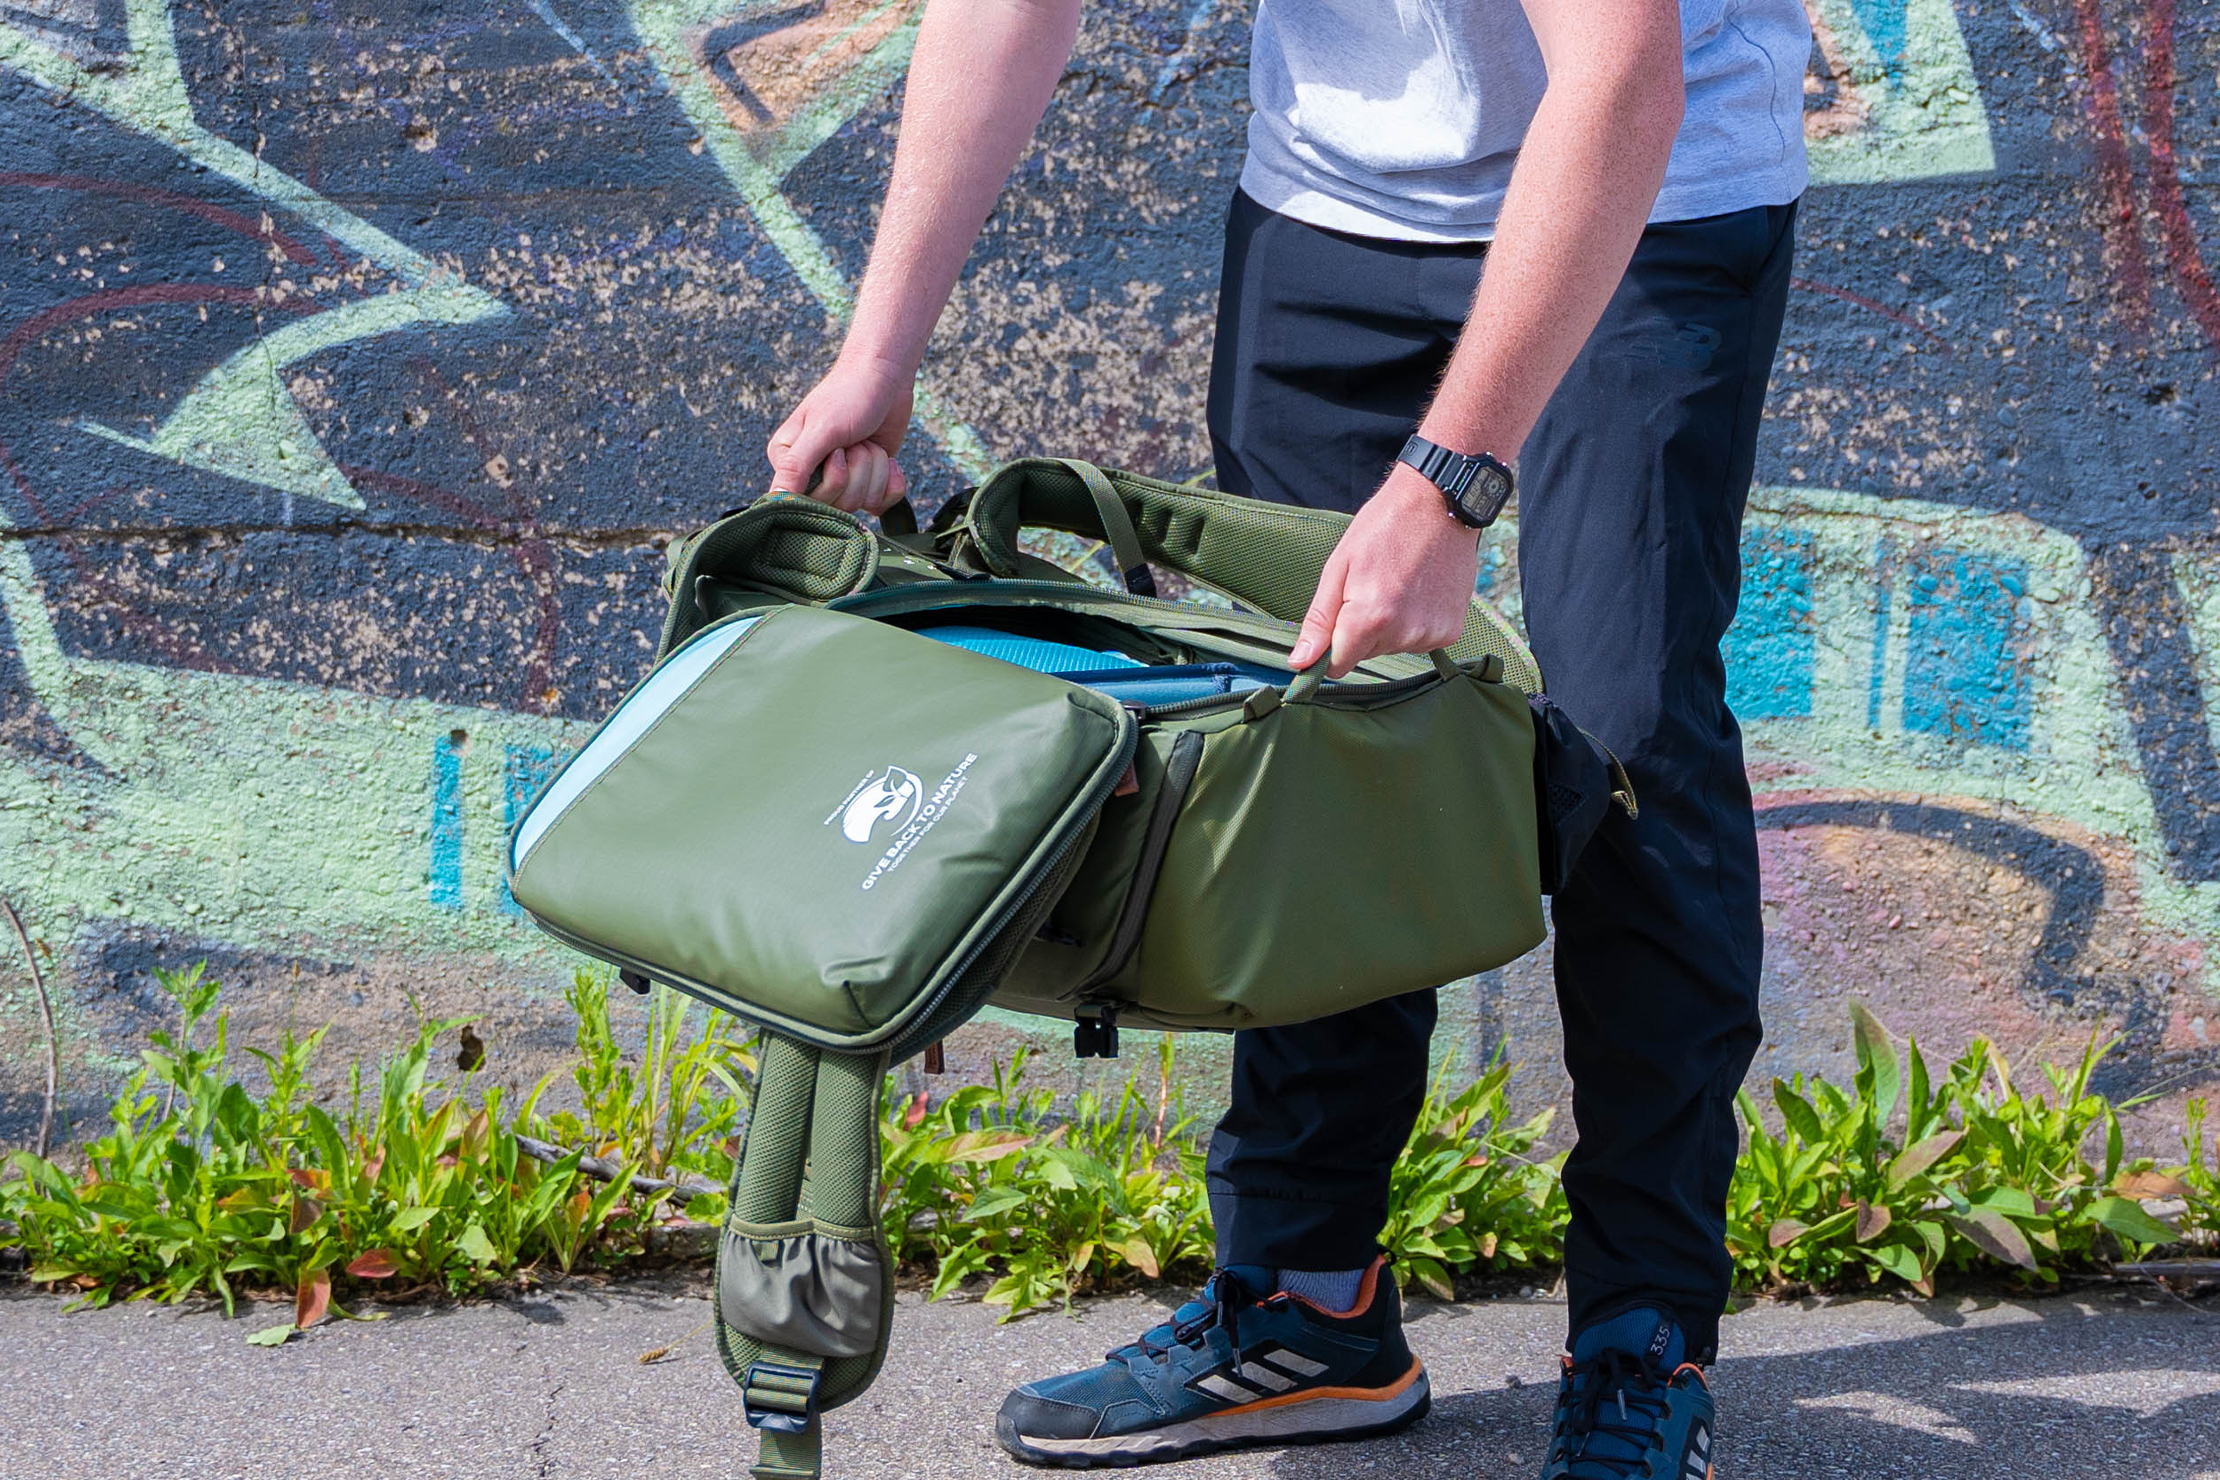
The last handle is the simplest but might be the most useful. It’s on the bottom of the back panel and lacks padding, making it a less comfortable carry. You’re not supposed to carry the bag by just this handle, though. It’s there so you can grab the bag when you have it open while are actively shooting a location. You can grab the top handle along with this handle and carry the bag like you would a giant tub of water. If you grabbed just one handle, the water—or camera gear in this weird analogy—would tumble onto the ground. If you hold two handles, the gear stays inside. We think this is a great inclusion and something you won’t miss until you know it exists.
There are two compression straps with clips on each side of the bag. These can be used to make the bag smaller when it isn’t as full but are most helpful in securing a tripod or other items on the side of the back. We don’t want to get ahead of ourselves, though—we’ll get to that later.
The last thing to mention in this section is the Shimoda logo on the pack’s exterior. It’s white and pops nicely but isn’t too in your face. It says “Explore More” and has a vector image of a mountain with the sun behind it. It’s an indicator of where you can take the bag if you choose to, and we’re here for it.
Fit Notes
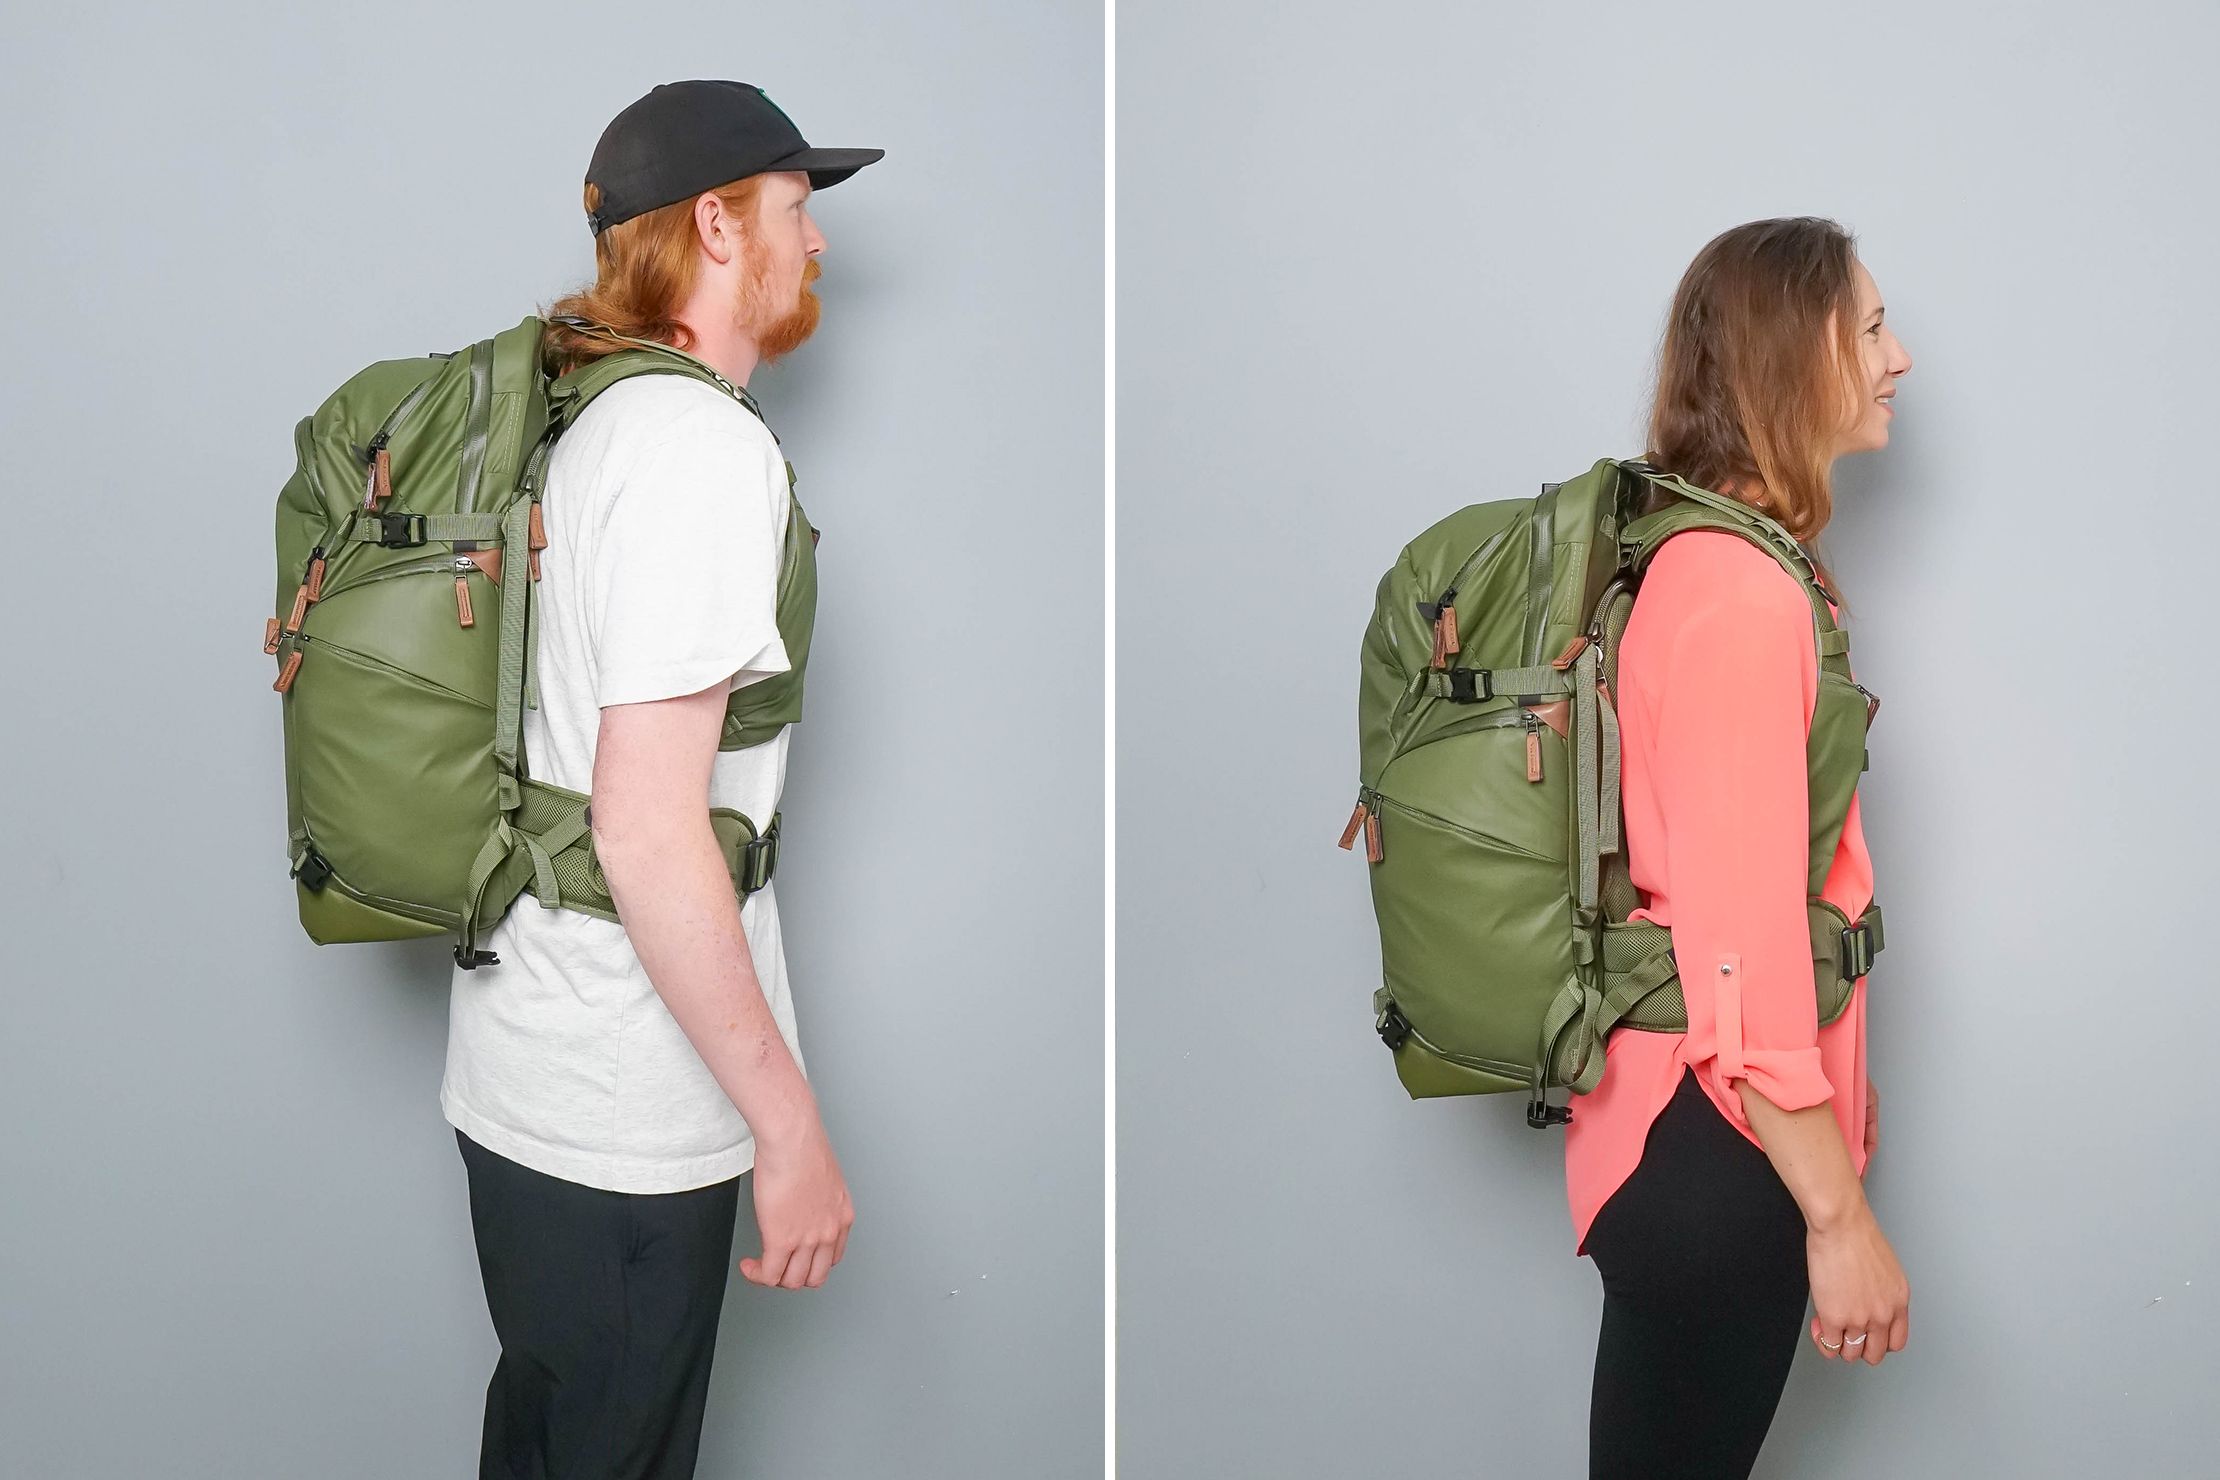
One of the first things we noticed about the Explore V2 is that it doesn’t look like many of the camera bags we have come across. At first glance, most people wouldn’t know it was a bag meant to house photography equipment. Some people might not like that—but it has a function while traveling.
Sometimes we don’t want the entire world to know that we have thousands of dollars of equipment on our back, especially while exploring a new city. By getting a camera backpack that looks like a regular travel backpack or even just a large daypack, we may deter unfriendly people from having a go at our bag. The bag looks at home on the trail, in the city, or at the airport, and we dig that.
Inside The Pack
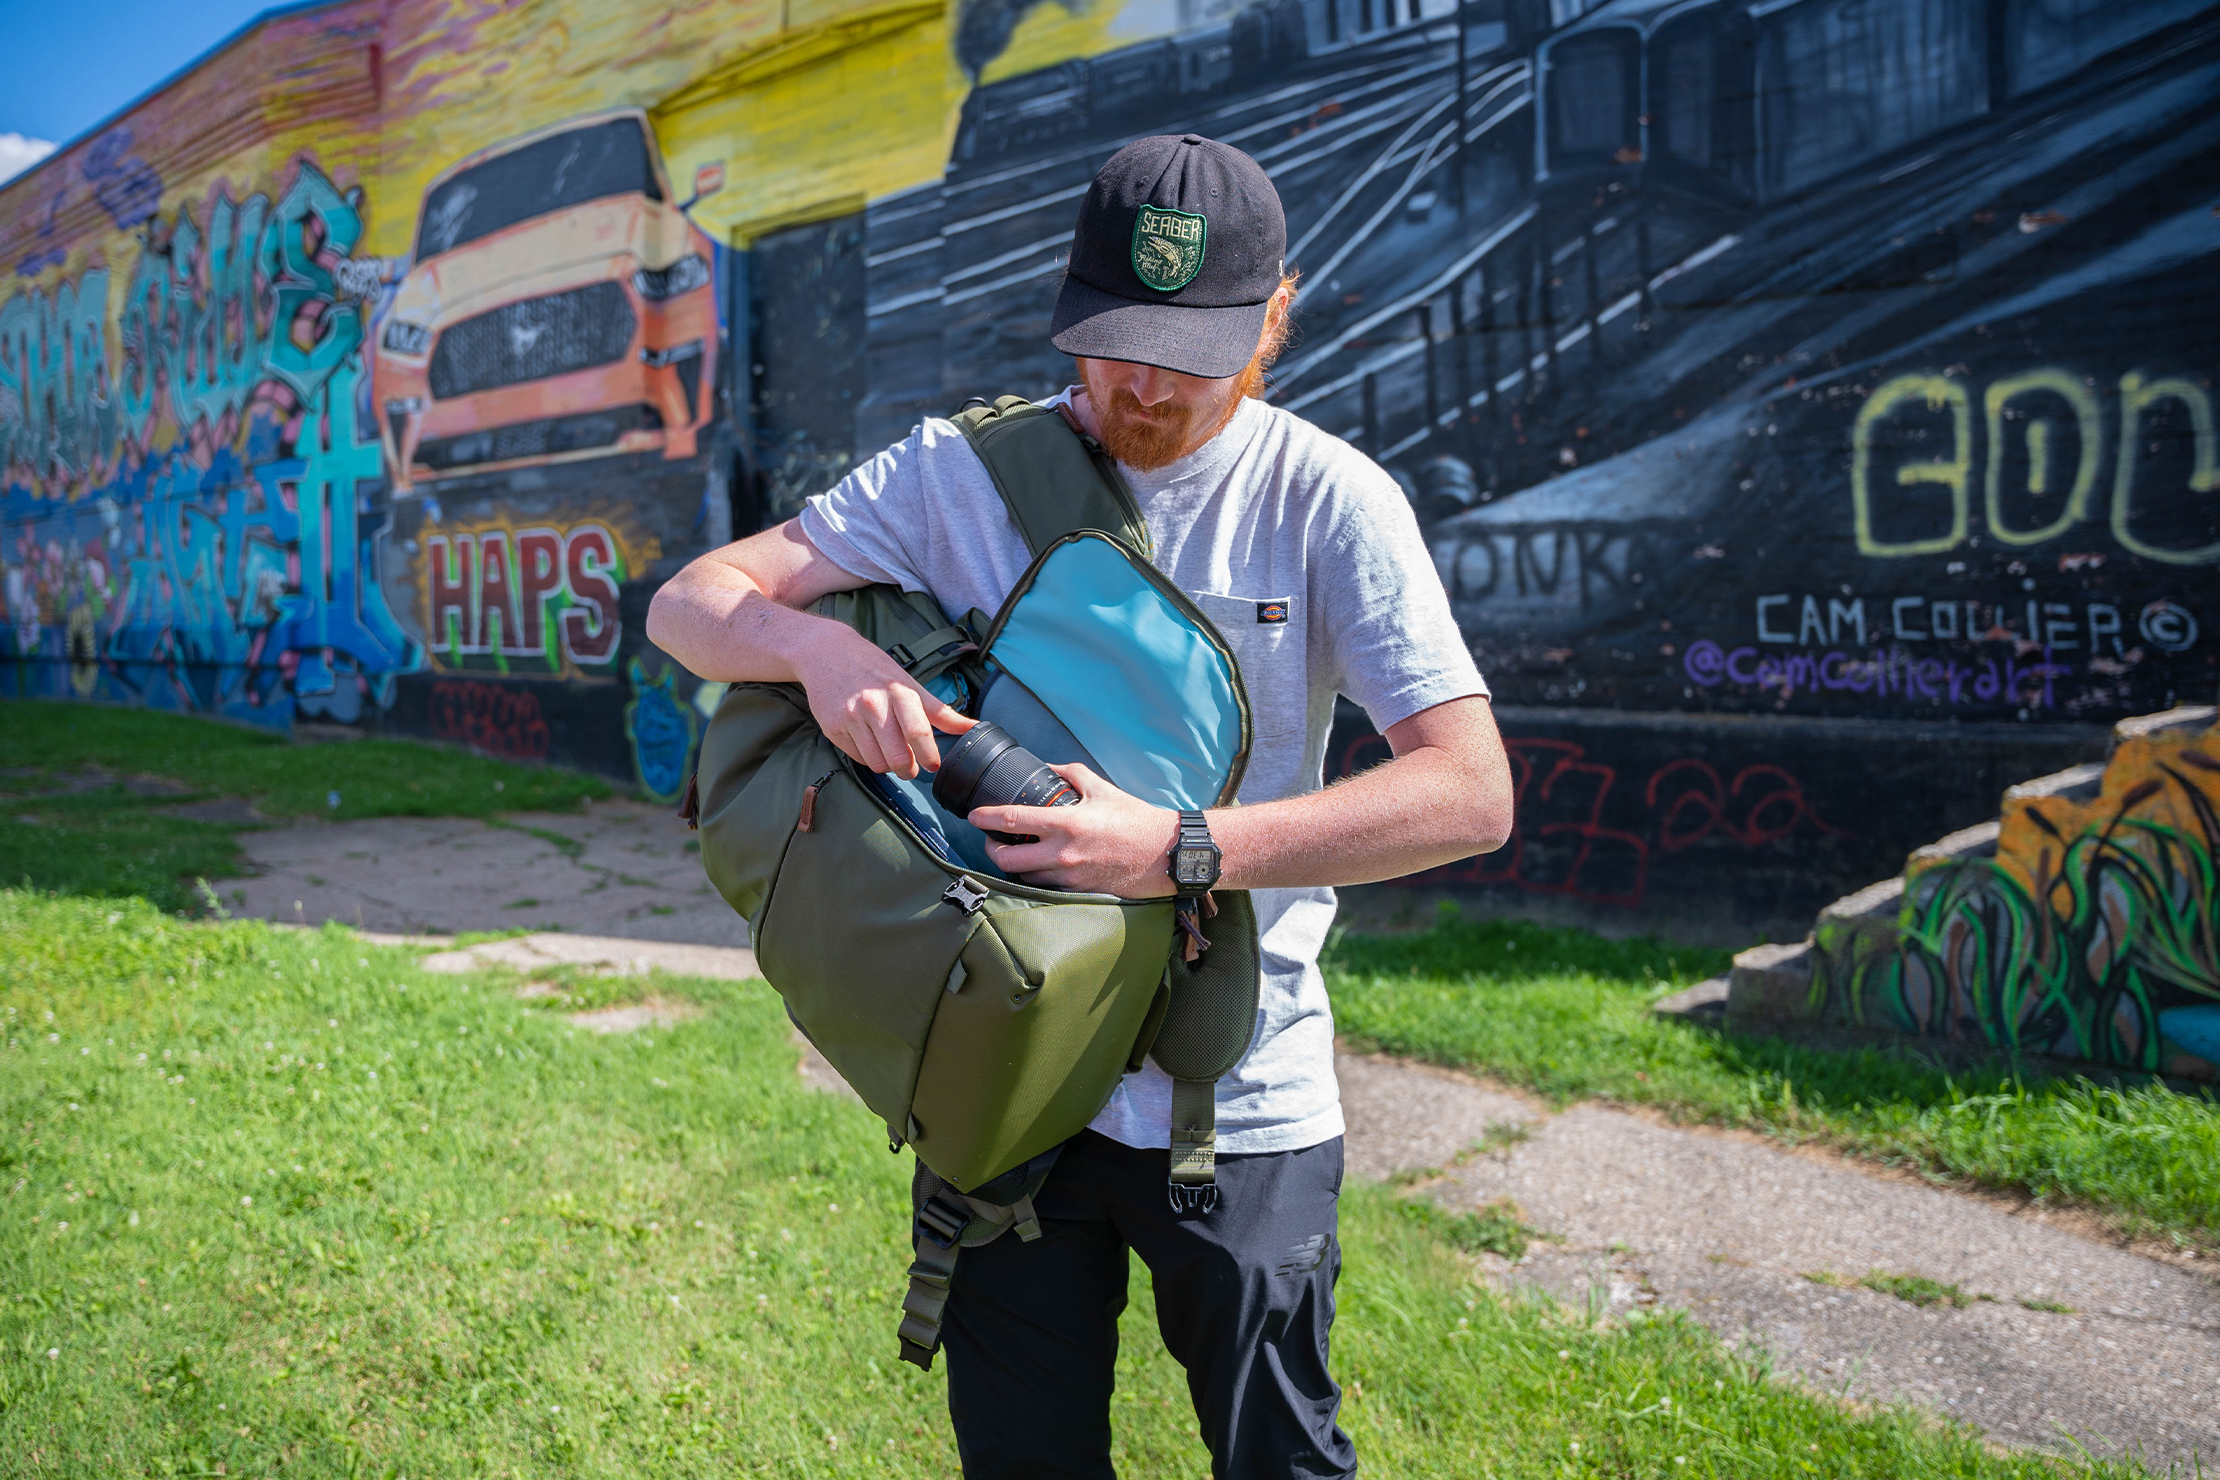
The Explore V2 has two side pockets. One offers access to the main compartment to get your camera, drone, or handy recorder. On the flap where it opens, there’s a liner with a hook-and-loop fastener that works well for stowing flat items. There isn’t a ton of padding, so whatever’s in there could be banged around a bit as we open and close the flap.
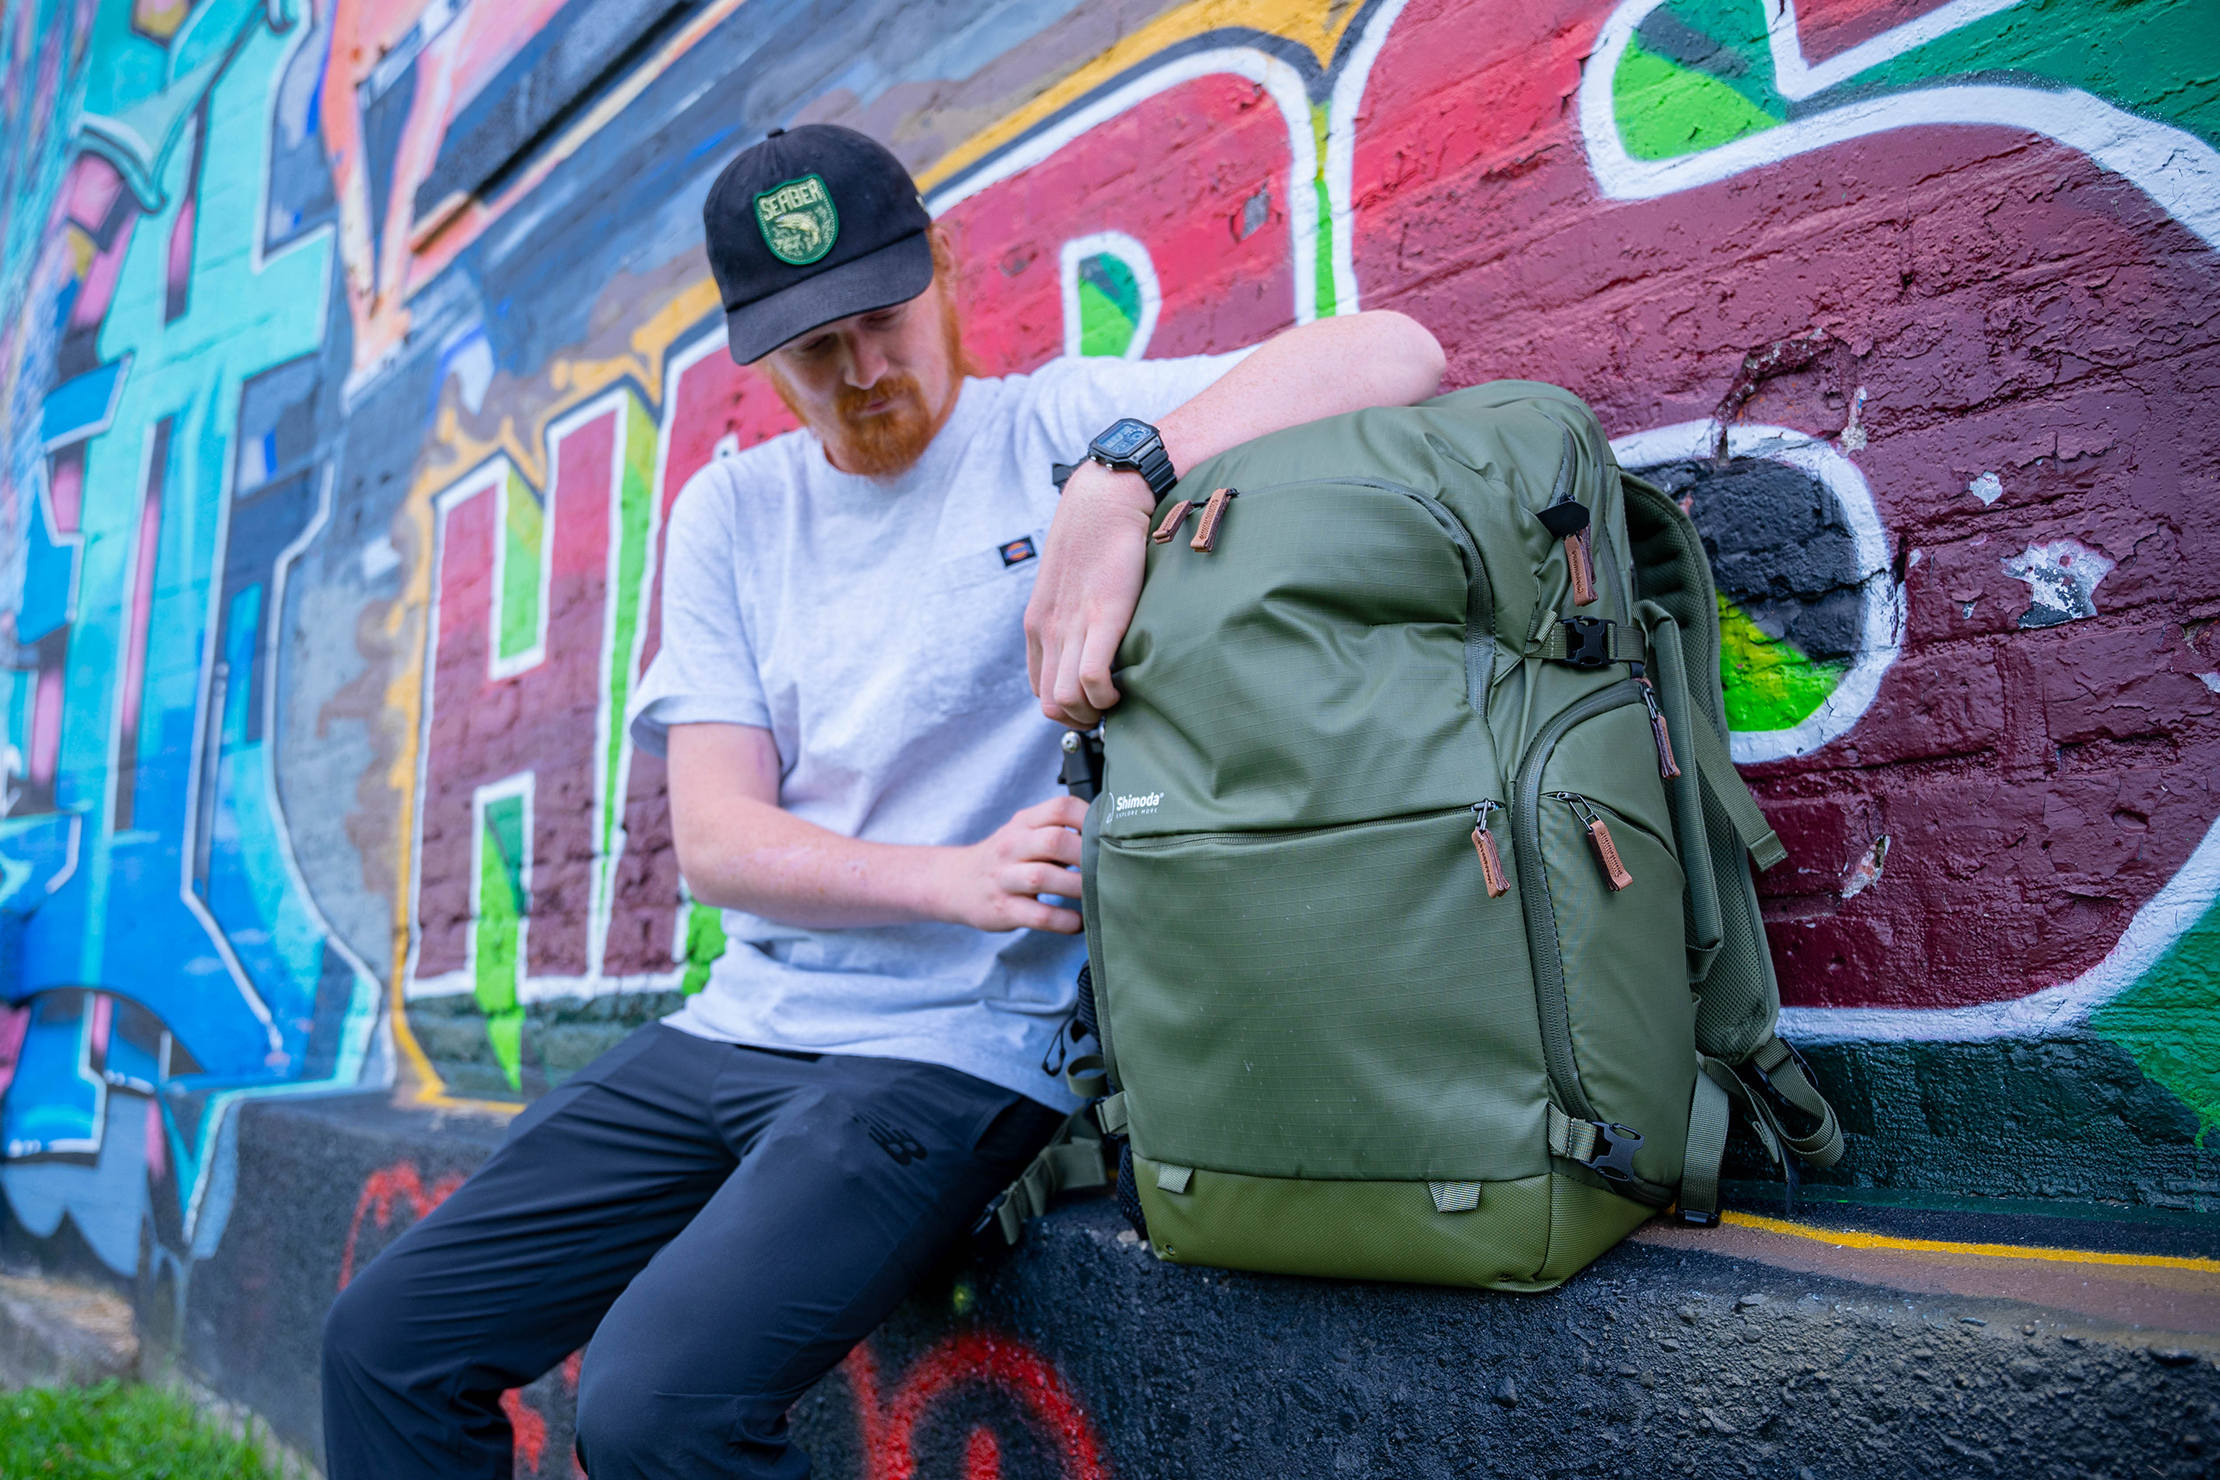
The other side area has two zippered pockets crafted from a highly water-resistant material that resembles thermoplastic polyurethane, or TPU. These are on the inside, not the flap, so they have more security and protection for items like lens filters.
Both side pockets have pop-out hybrid water bottle/tripod holders. You can unleash this dynamic piece of fabric by using a diagonal zipper on the pack’s exterior. The material is black and has non-stretchy mesh on the sides. It doesn’t have any give to it, but it’s large enough to fit a 32-oz Nalgene bottle, which is pretty wide. The top has an elastic drawstring closure, which locks onto whatever you stow in the pocket.
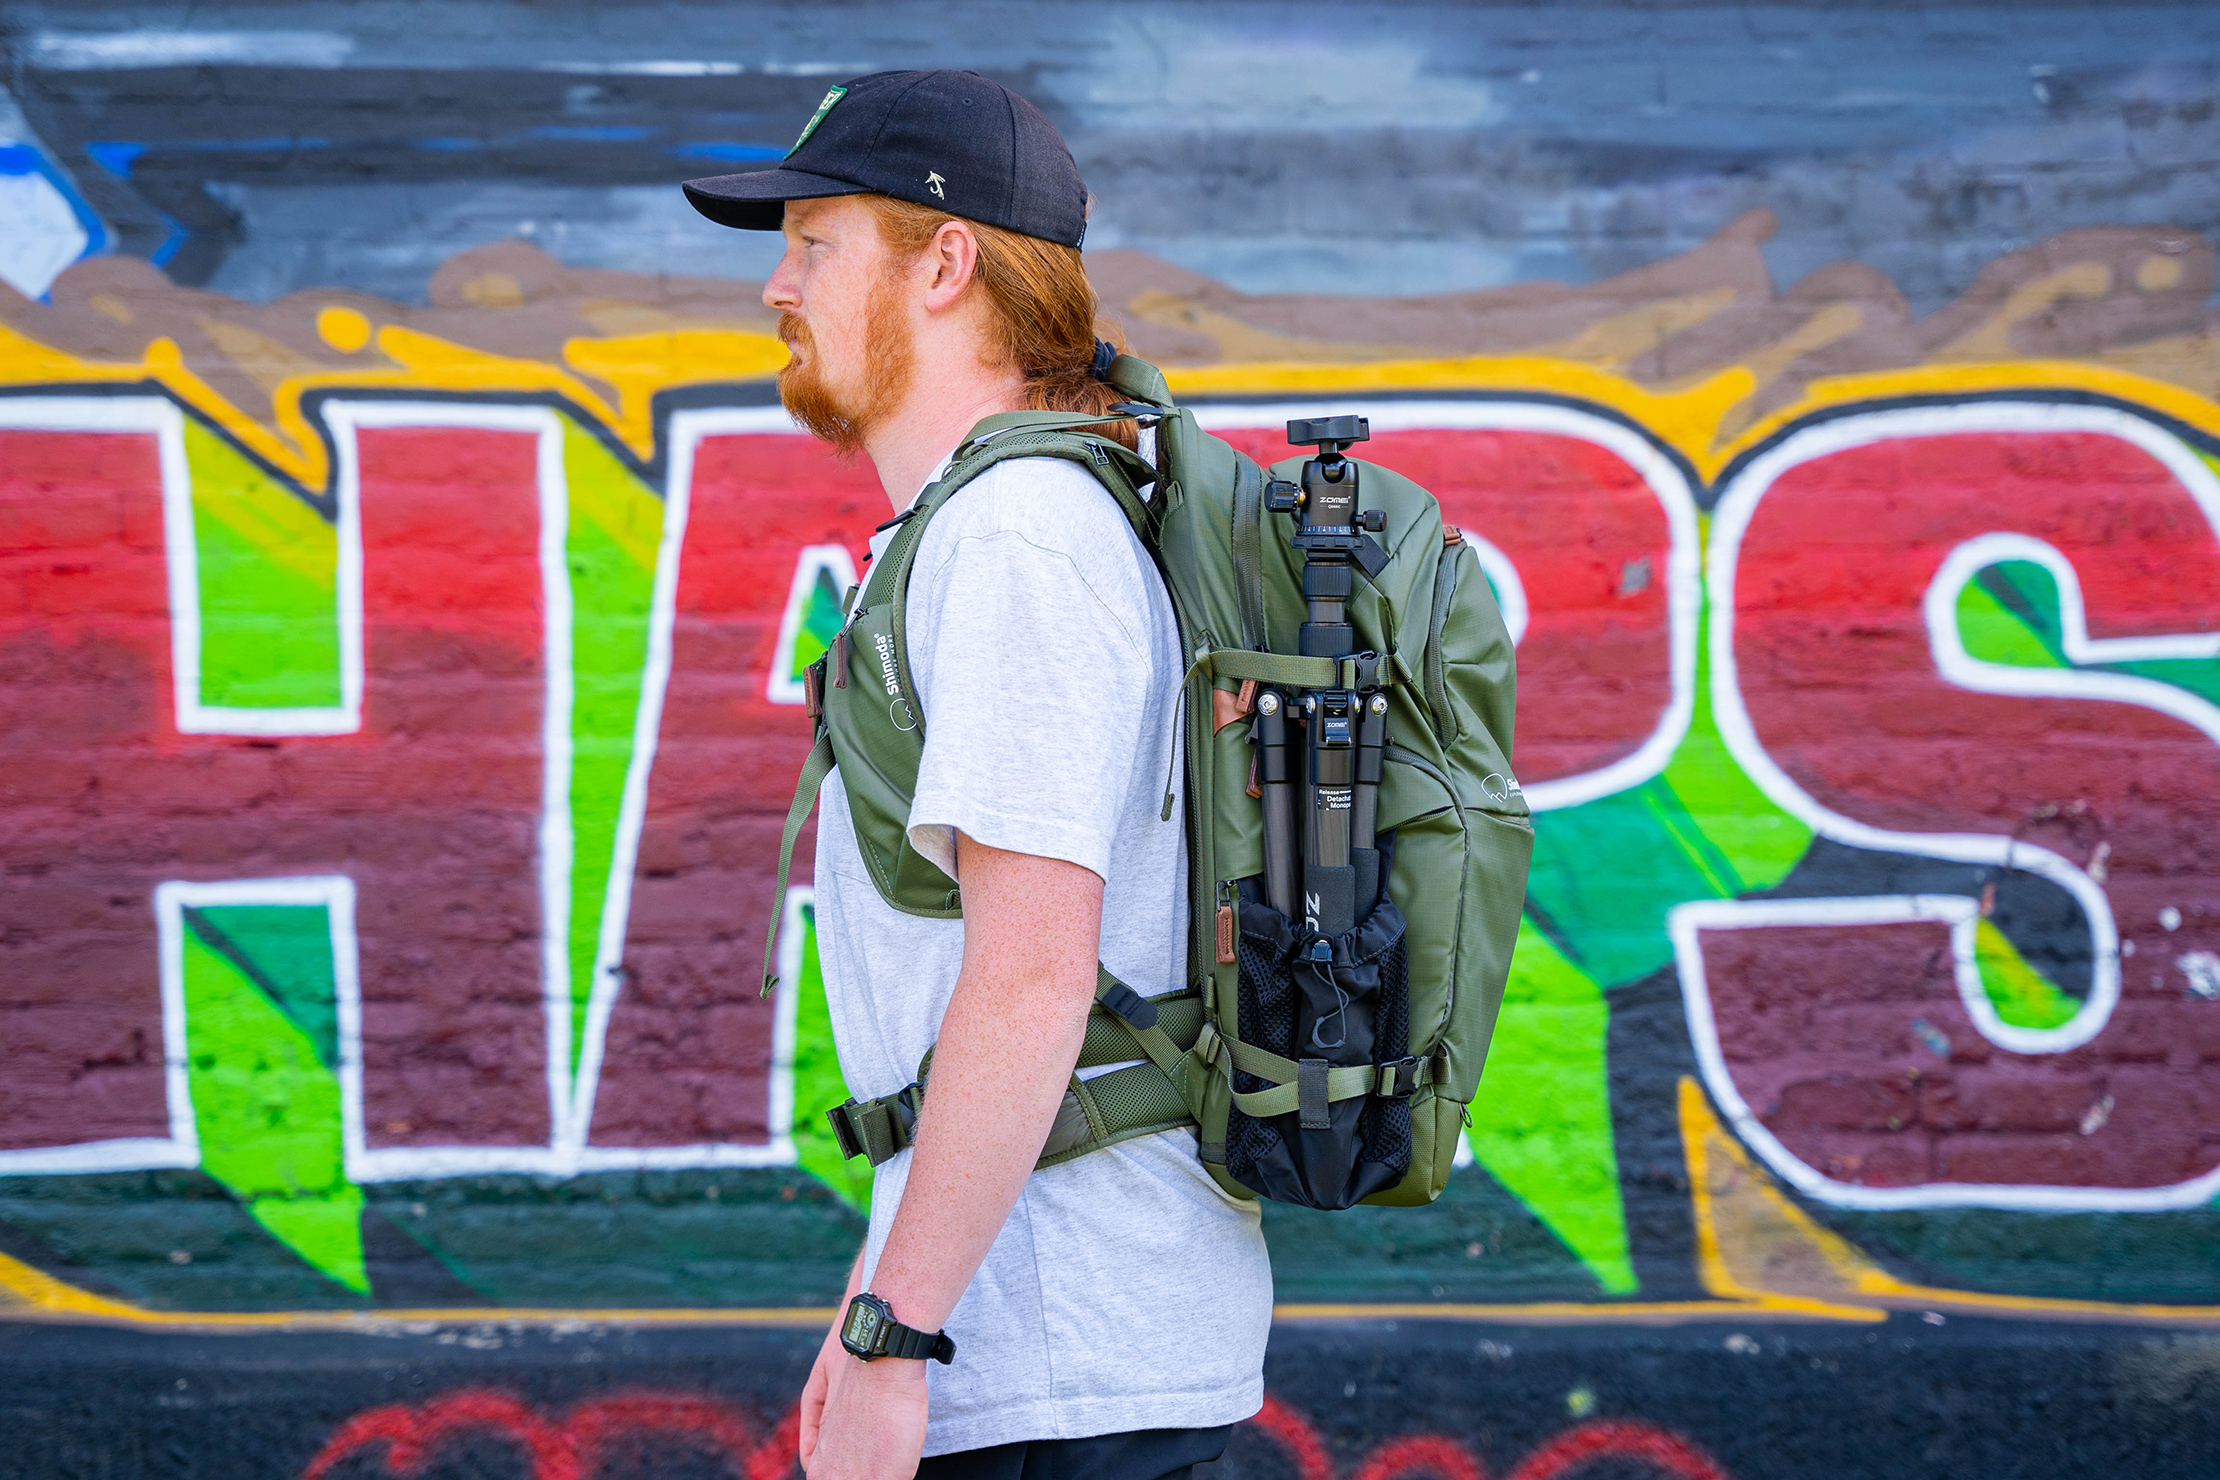
In addition to a water bottle, these work great for transporting your tripod from location to location. Place the feet into the black extension and tighten the elastic to complete the first of three security points. The compression straps we mentioned earlier come into play at this point: the upper strap secures the tripod’s top and the lower one loops through a small hole on the pocket. When tightened, even large tripods feel very secure. The heavier your tripod, the more lopsided your bag will feel, but it’s a small price to pay to be able to bring a large tripod with you on any trip.
If all three of your tripod’s feet won’t fit into the pocket, you can just put one or two in and secure it the same way. It makes sense to put your tripod on the side that doesn’t open into the main compartment so that you aren’t constantly fiddling with your tripod to access the quick-grab camera pocket.
It’s important to remember that if you plan to use this bag as your carry-on, the tripod counts towards your size and weight. But that’s enough about tripods. Let’s move on!
There are five other pockets to cover, so we’ll start on the front side and move from bottom to top.
The bottom center pocket is somewhat spacey but flat and has no internal organization. There’s a fair amount of padding, and it sits on the camera cube inside the pack. This is a good spot for a planner, notebook, or novel to read in between shooting bangers for Instagram.
Above that is another pocket with a curved zipper opening and some internal organization. Two zippered pockets are crafted from the same TPU-like material we discussed earlier. This is a good spot for a hard drive or SD cards as it’s water resistant and somewhat protected from the outside world. Hard drives without a protective case or loose memory cards will do better elsewhere, though.
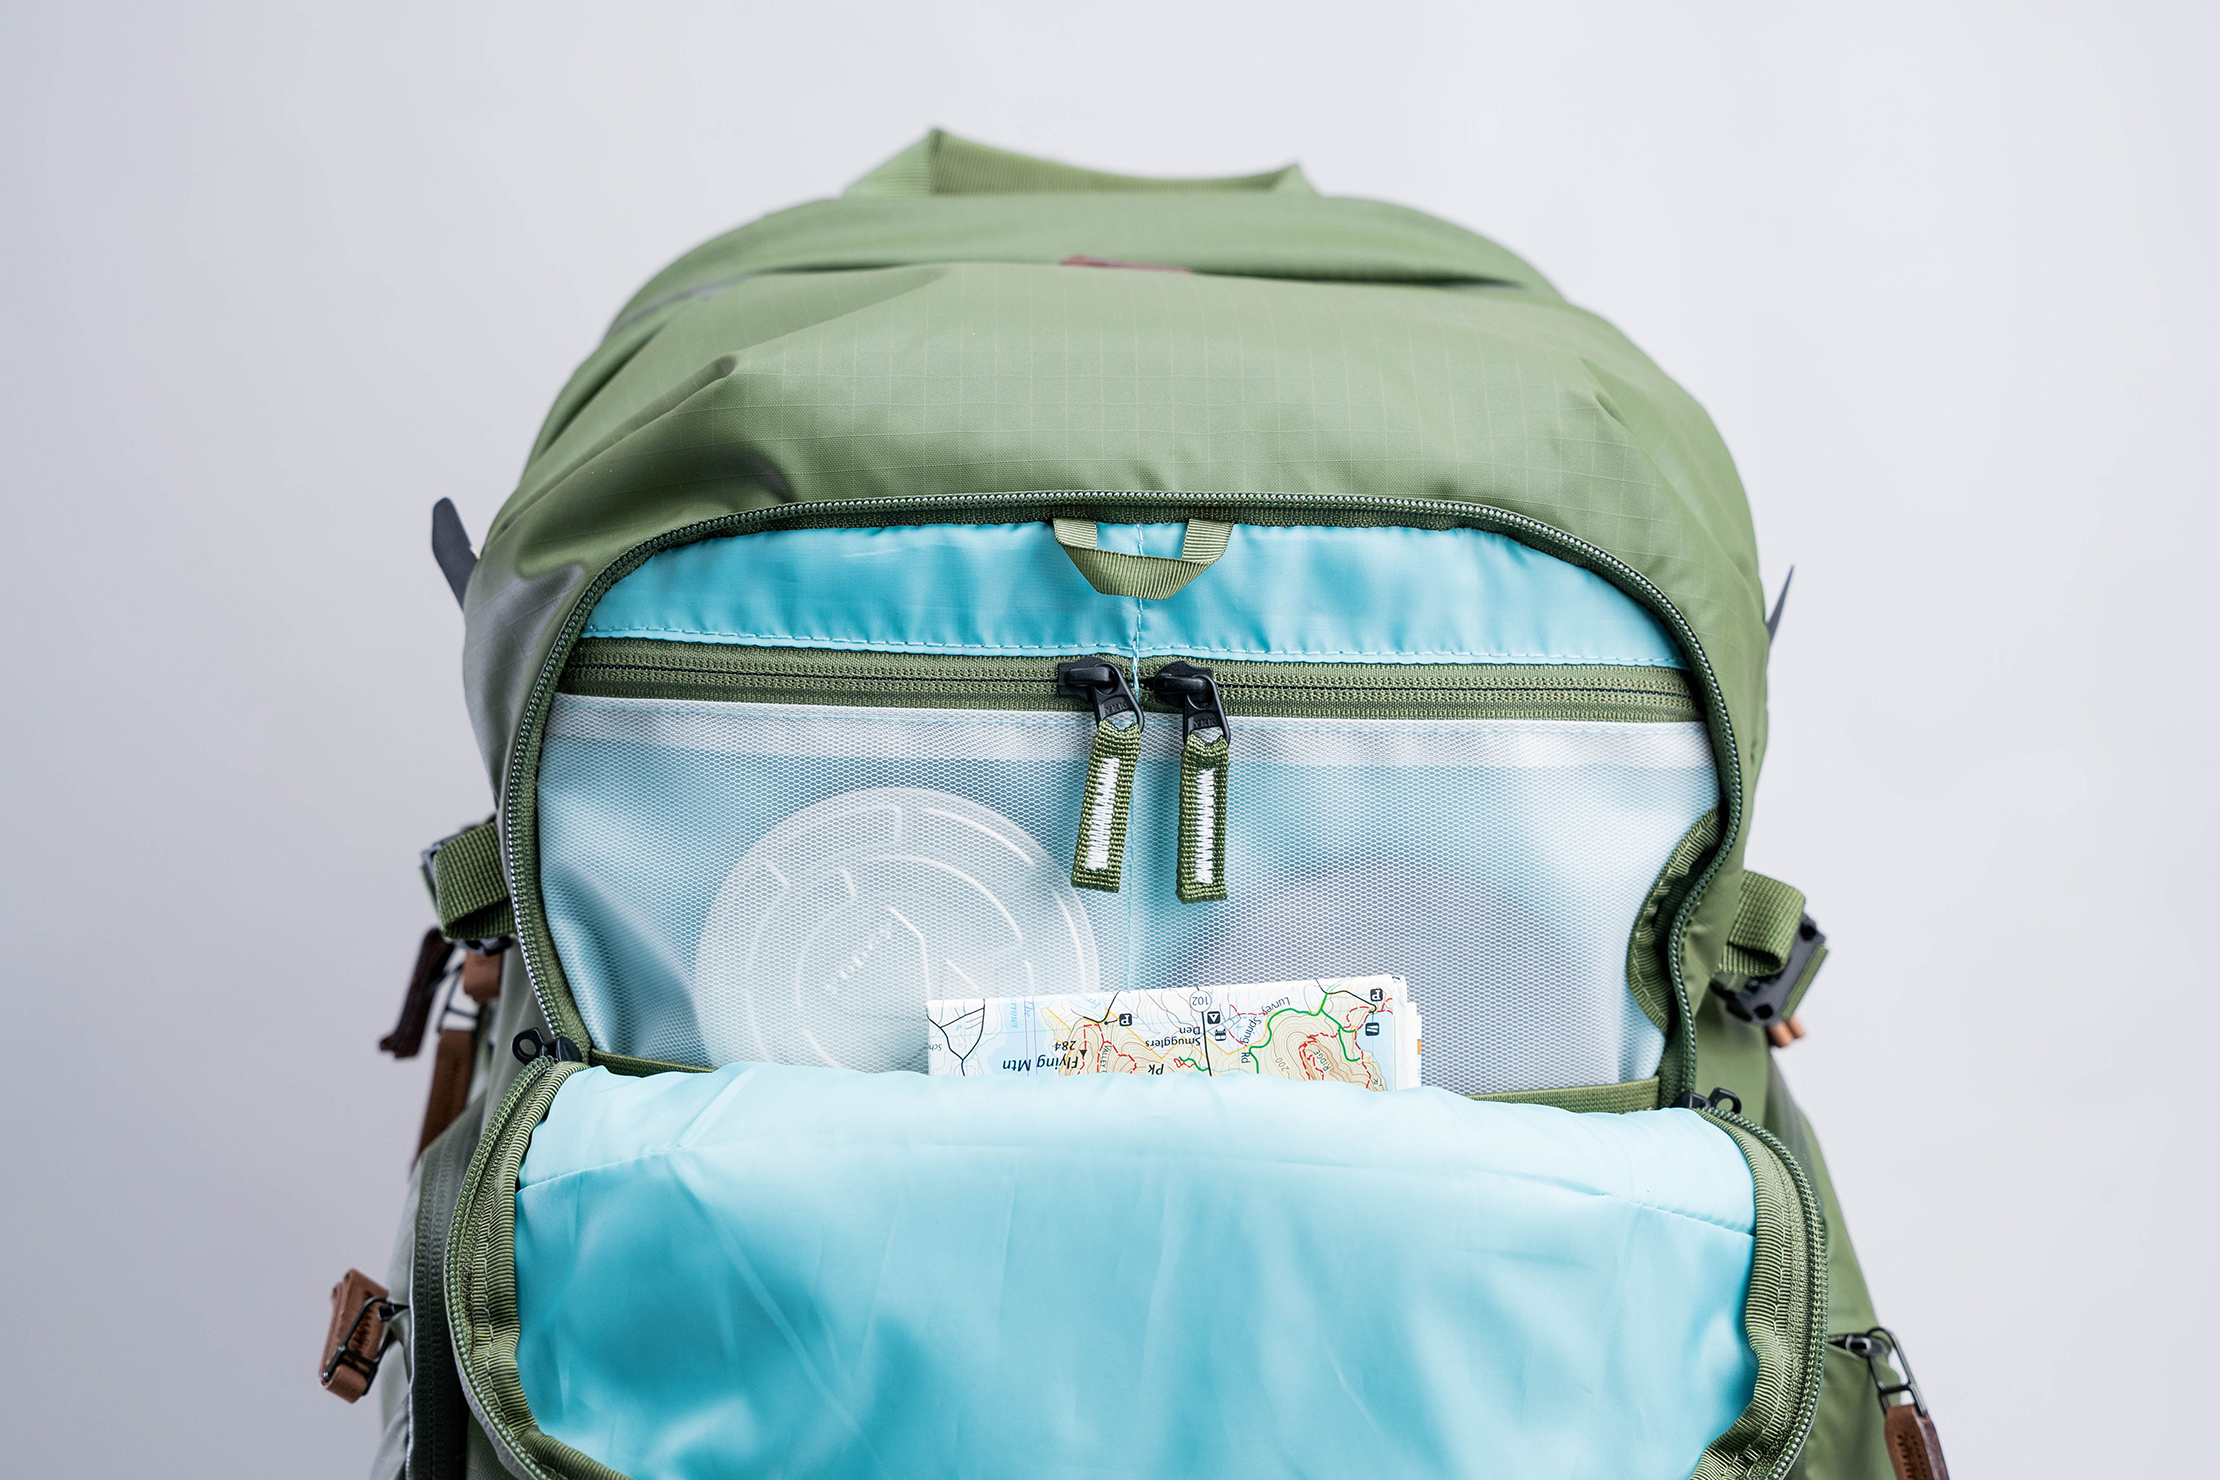
The pocket goes to the bottom of the front of the backpack, and there is a liner to break it up into two sections. Flat items do well here; you can use the liner to separate travel documents from accommodation or visa paperwork. It’s a large dump area for large items you aren’t sure what to do with, and we’re happy to have it.
Another curved zipper pocket offers access to the main storage compartment for non-photo gear. This pocket takes up all the space between the top of the camera insert and the backpack’s top, so there’s plenty of room for gear here.
There are zippered pockets on the front and back sides for the smaller gear you don’t want to lose. The backside pocket is mainly made from liner material and has some mesh on the top. Its counterpart on the opposite side is smaller and almost all mesh. The area between these two pockets is large enough to fit a few medium packing cubes or a large and small packing cube, depending on your brand. We use this pocket more than any other non-photo-related ones, as there’s much more space here than you might think.
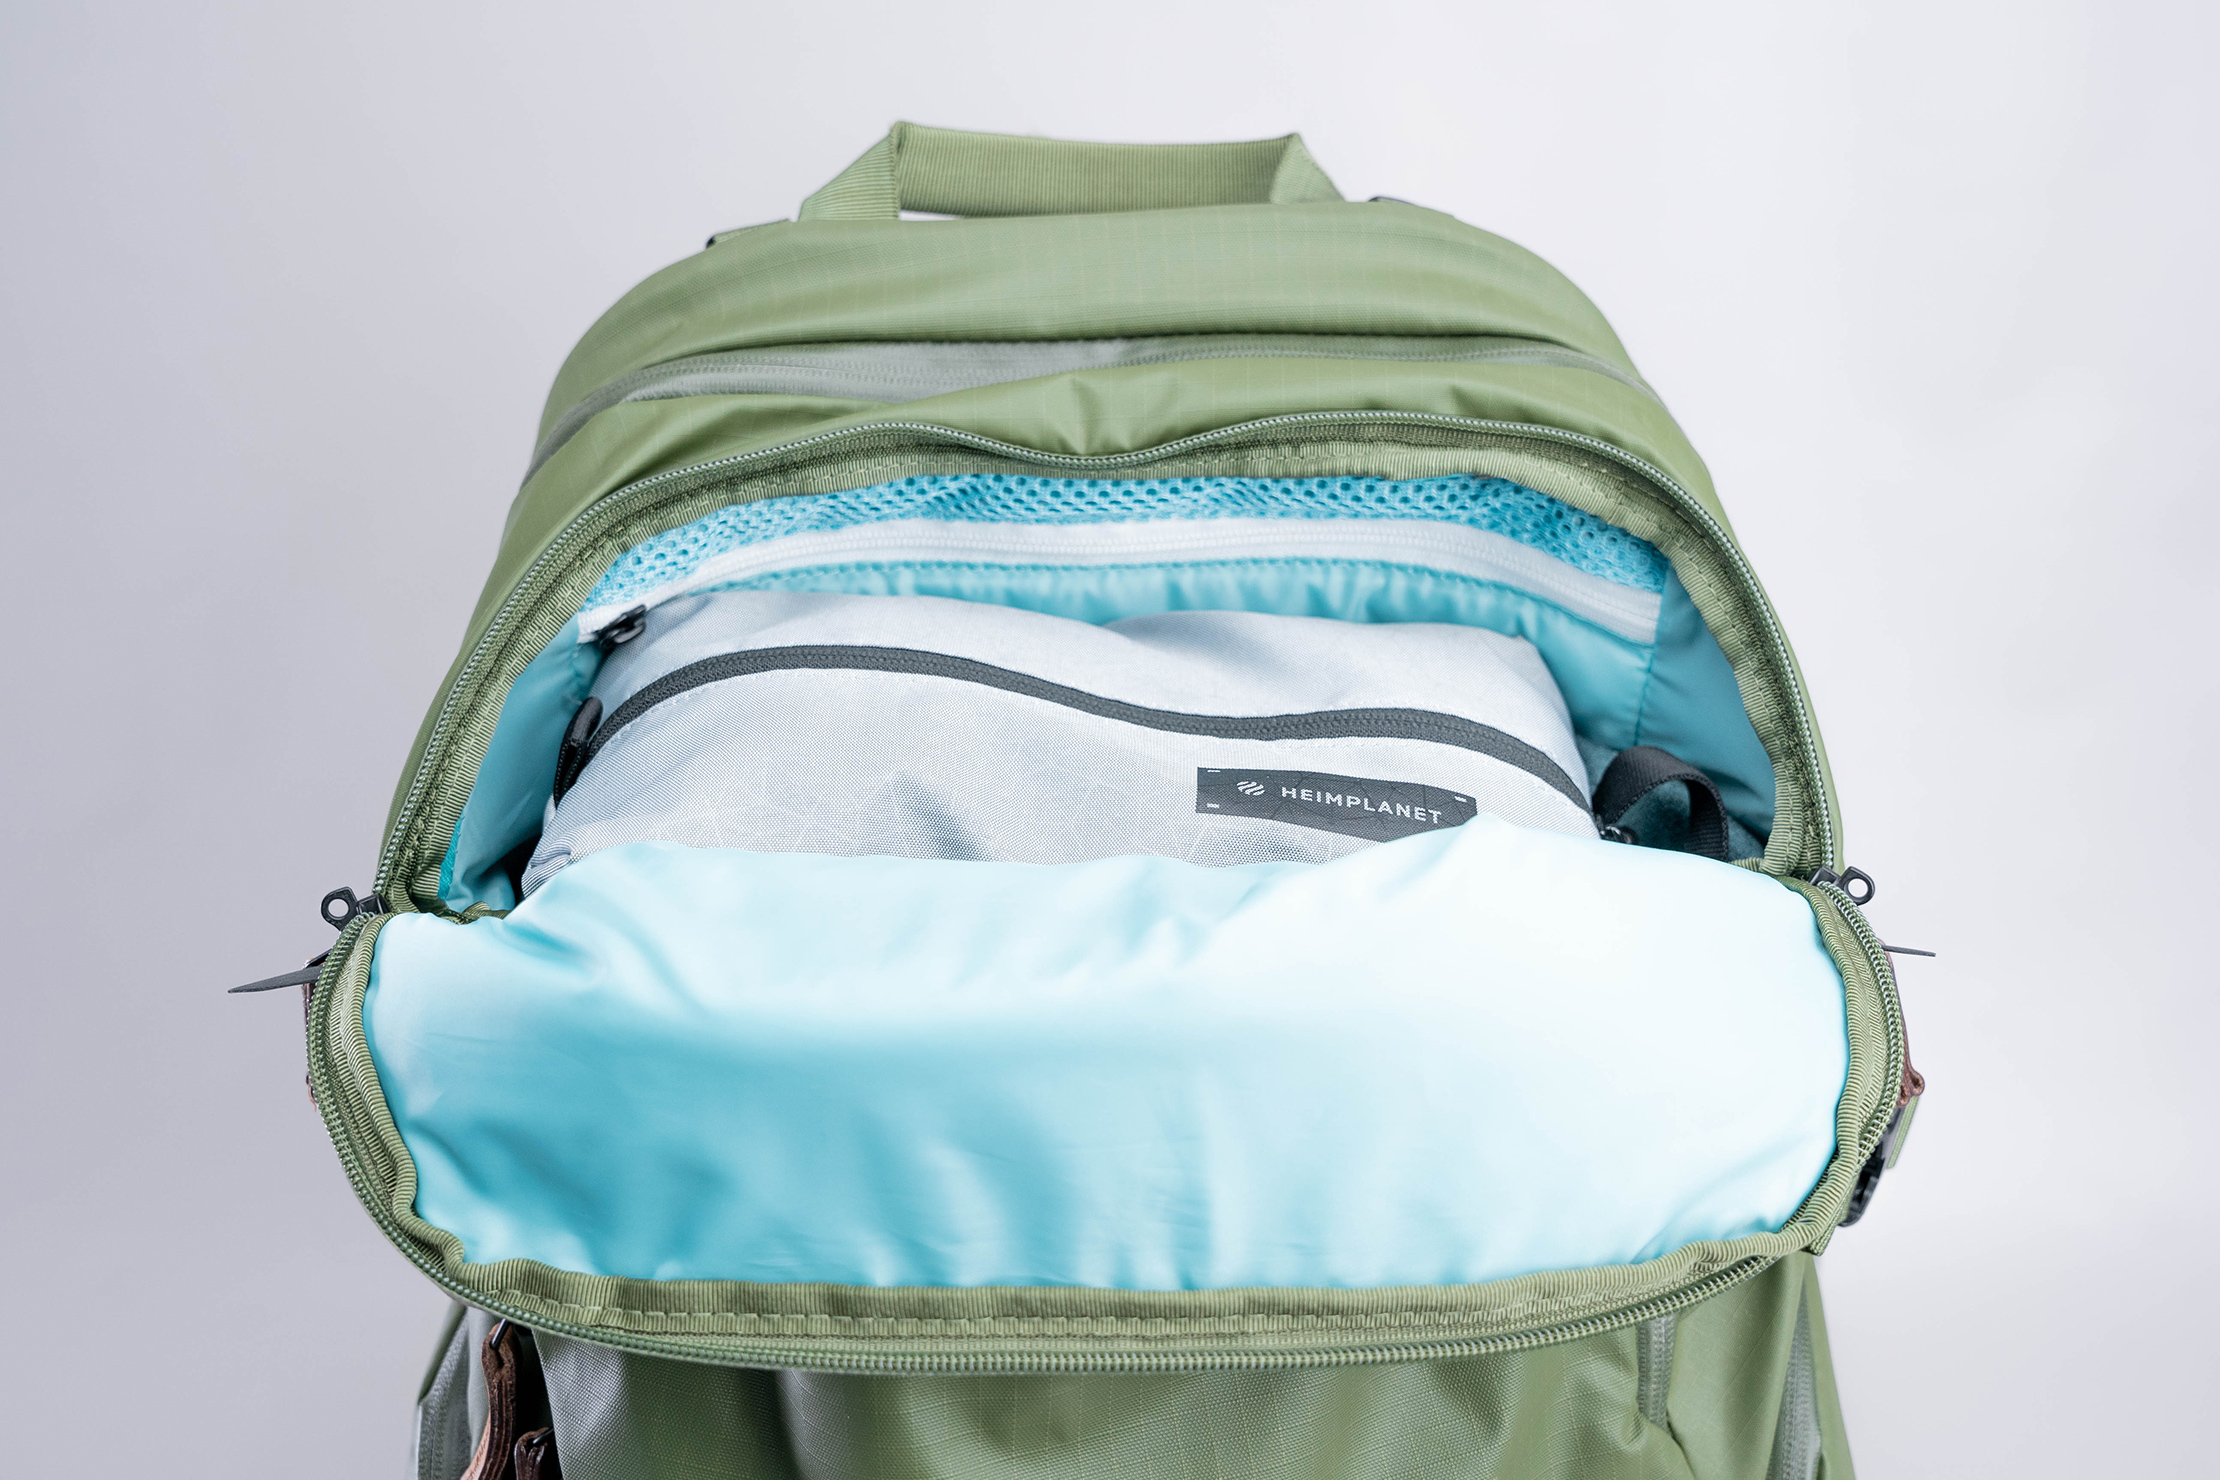
The final front-side offering is less of a pocket and more of an access zipper. It curves around the top of the pack, looking into the area between it and the camera cube area. There’s a little room to stow gear here, and we sometimes do, but it feels like more of an access window than a place for our stuff.
It reminds us of under the hood of a car. You can pop the hook to take a look at the engine, and there’s a little space in between the motor, battery, fuse box, air filter, etc. where you could potentially put things, but almost anything you did place here would fall through the cracks and easily get lost. This area is similar; there are nooks and crannies for gear to fall into and get lost. It’s a nice place to stow a packable rain jacket and the rainfly, as you don’t need those items very often, and they’re large enough to be found easily. You can also access your laptop from here, but it can be difficult to slide out depending on how much gear you have in the backpack.
Ah, finally, we’re into the good stuff.
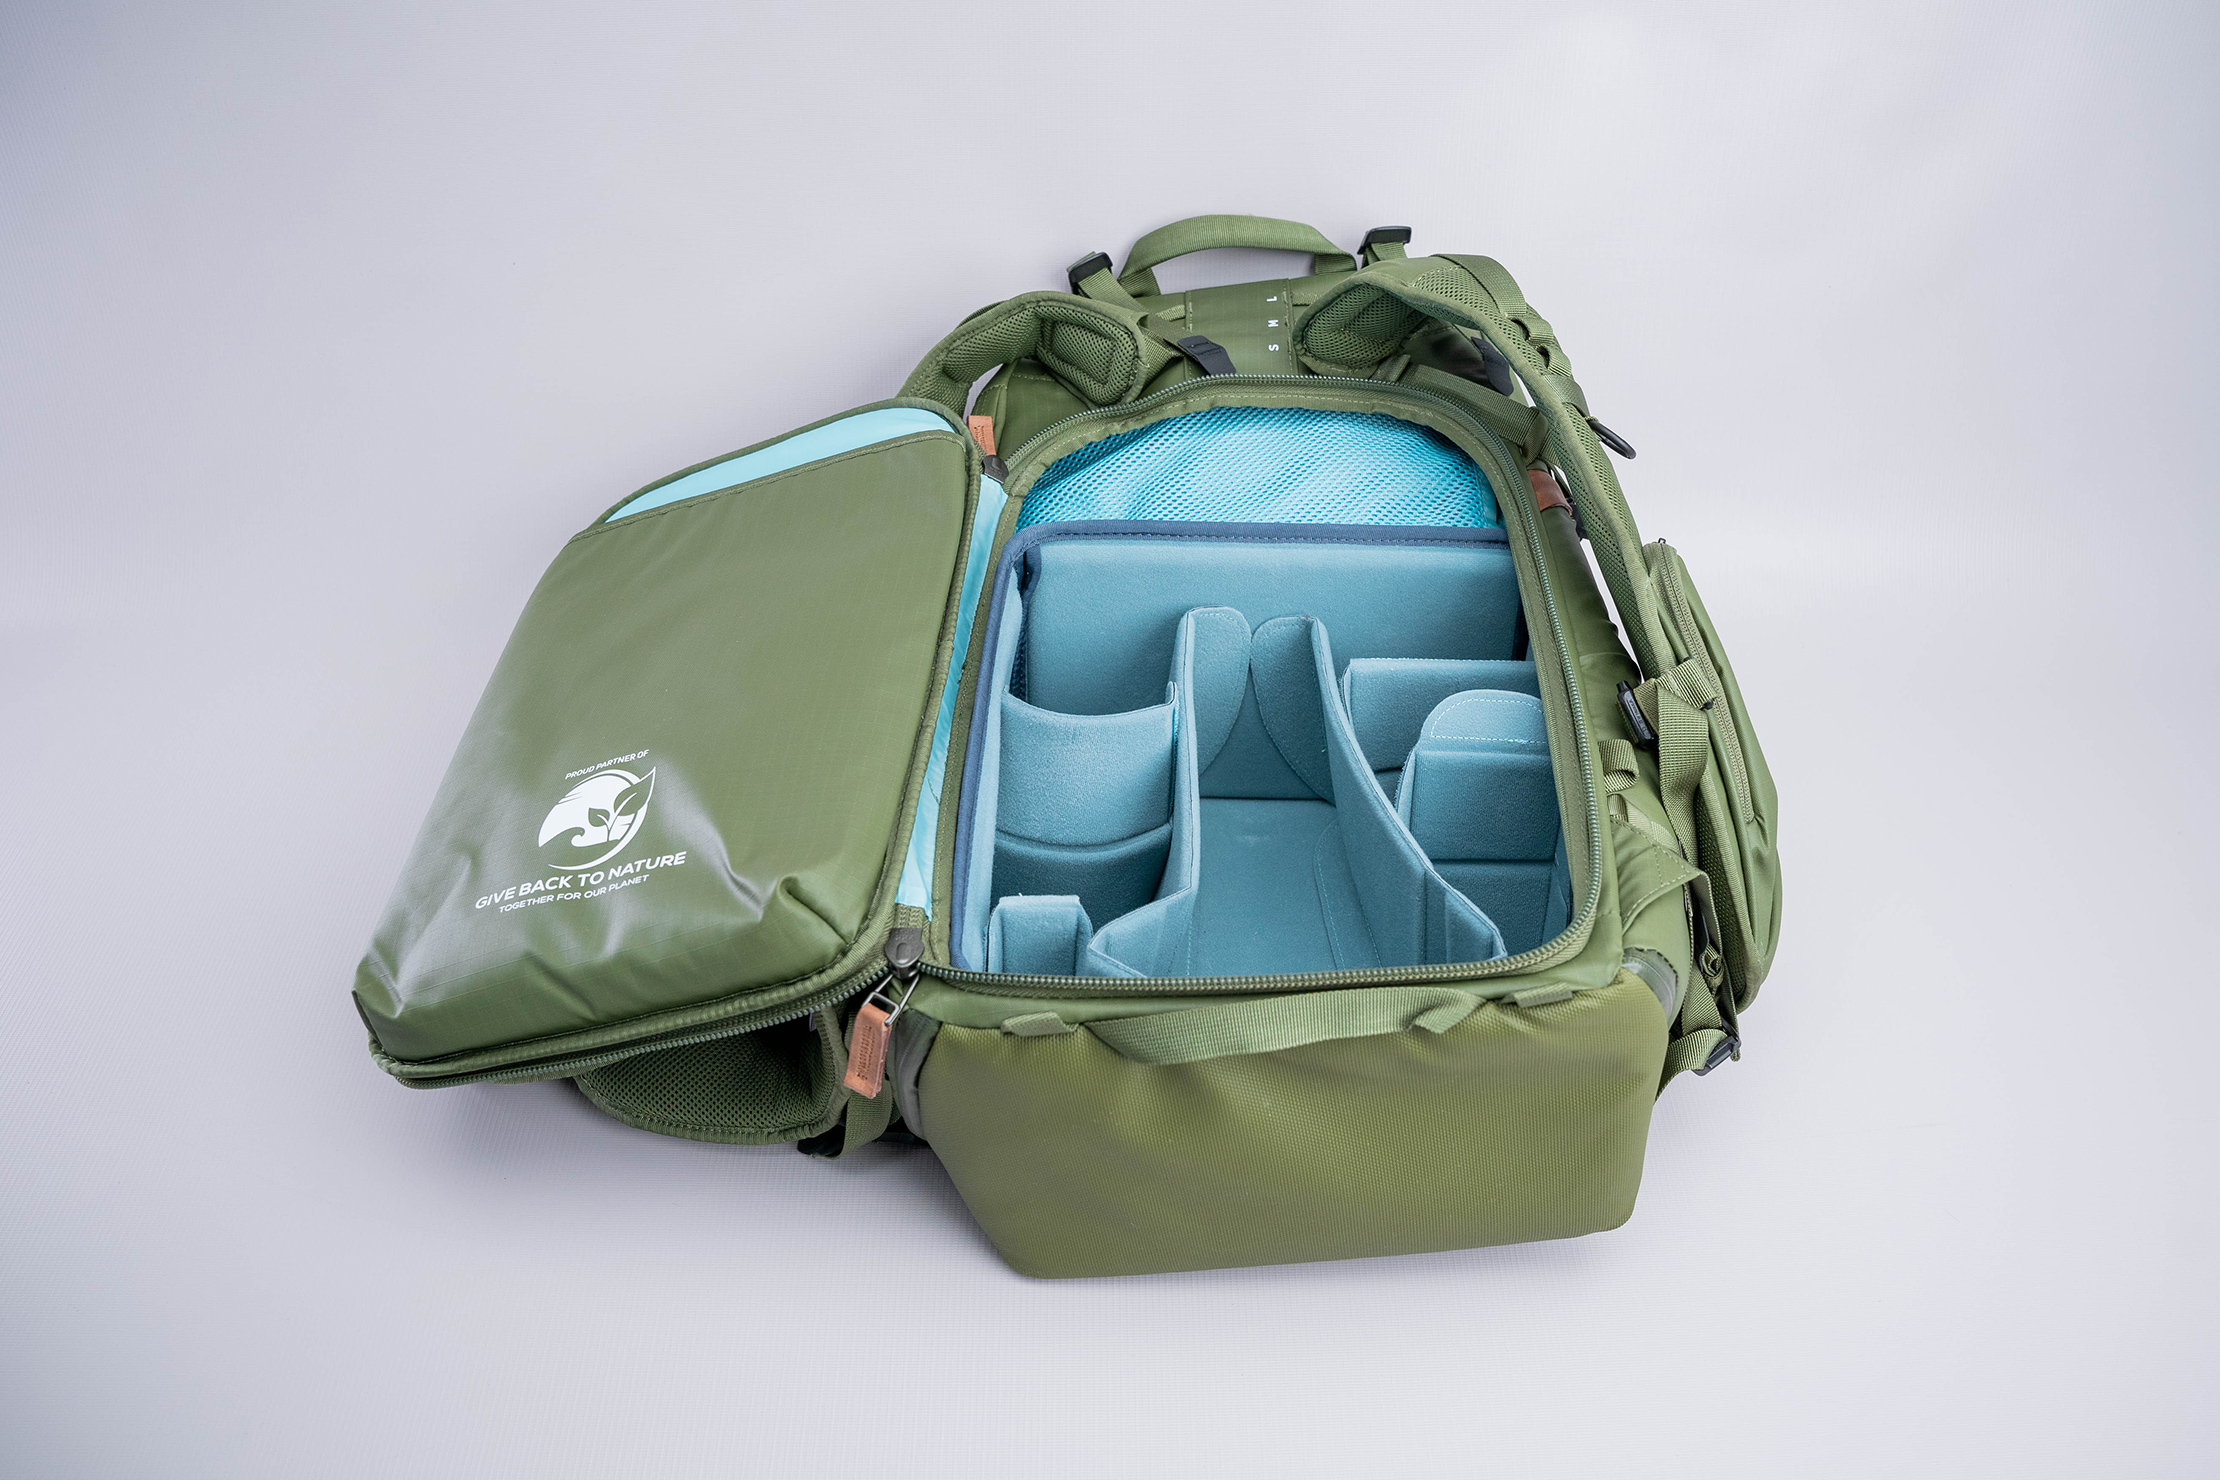
The back panel zips almost all the way around and flips open like a clamshell. Shimoda calls their camera cube the Core Unit, and there are a few different sizes you can opt for here. It’s worth noting that the backpack doesn’t come with one. You can purchase a starter kit with it, which is what we did. Our kit came with the Medium DSLR Core Unit, which measures 11.5 inches by 11 inches (29.2 cm by 27.9 cm) and stands roughly 6.25 inches (15.9 cm) tall. It’s easily removable, which is excellent for organizing your gear on a desk or table the night before an adventure.
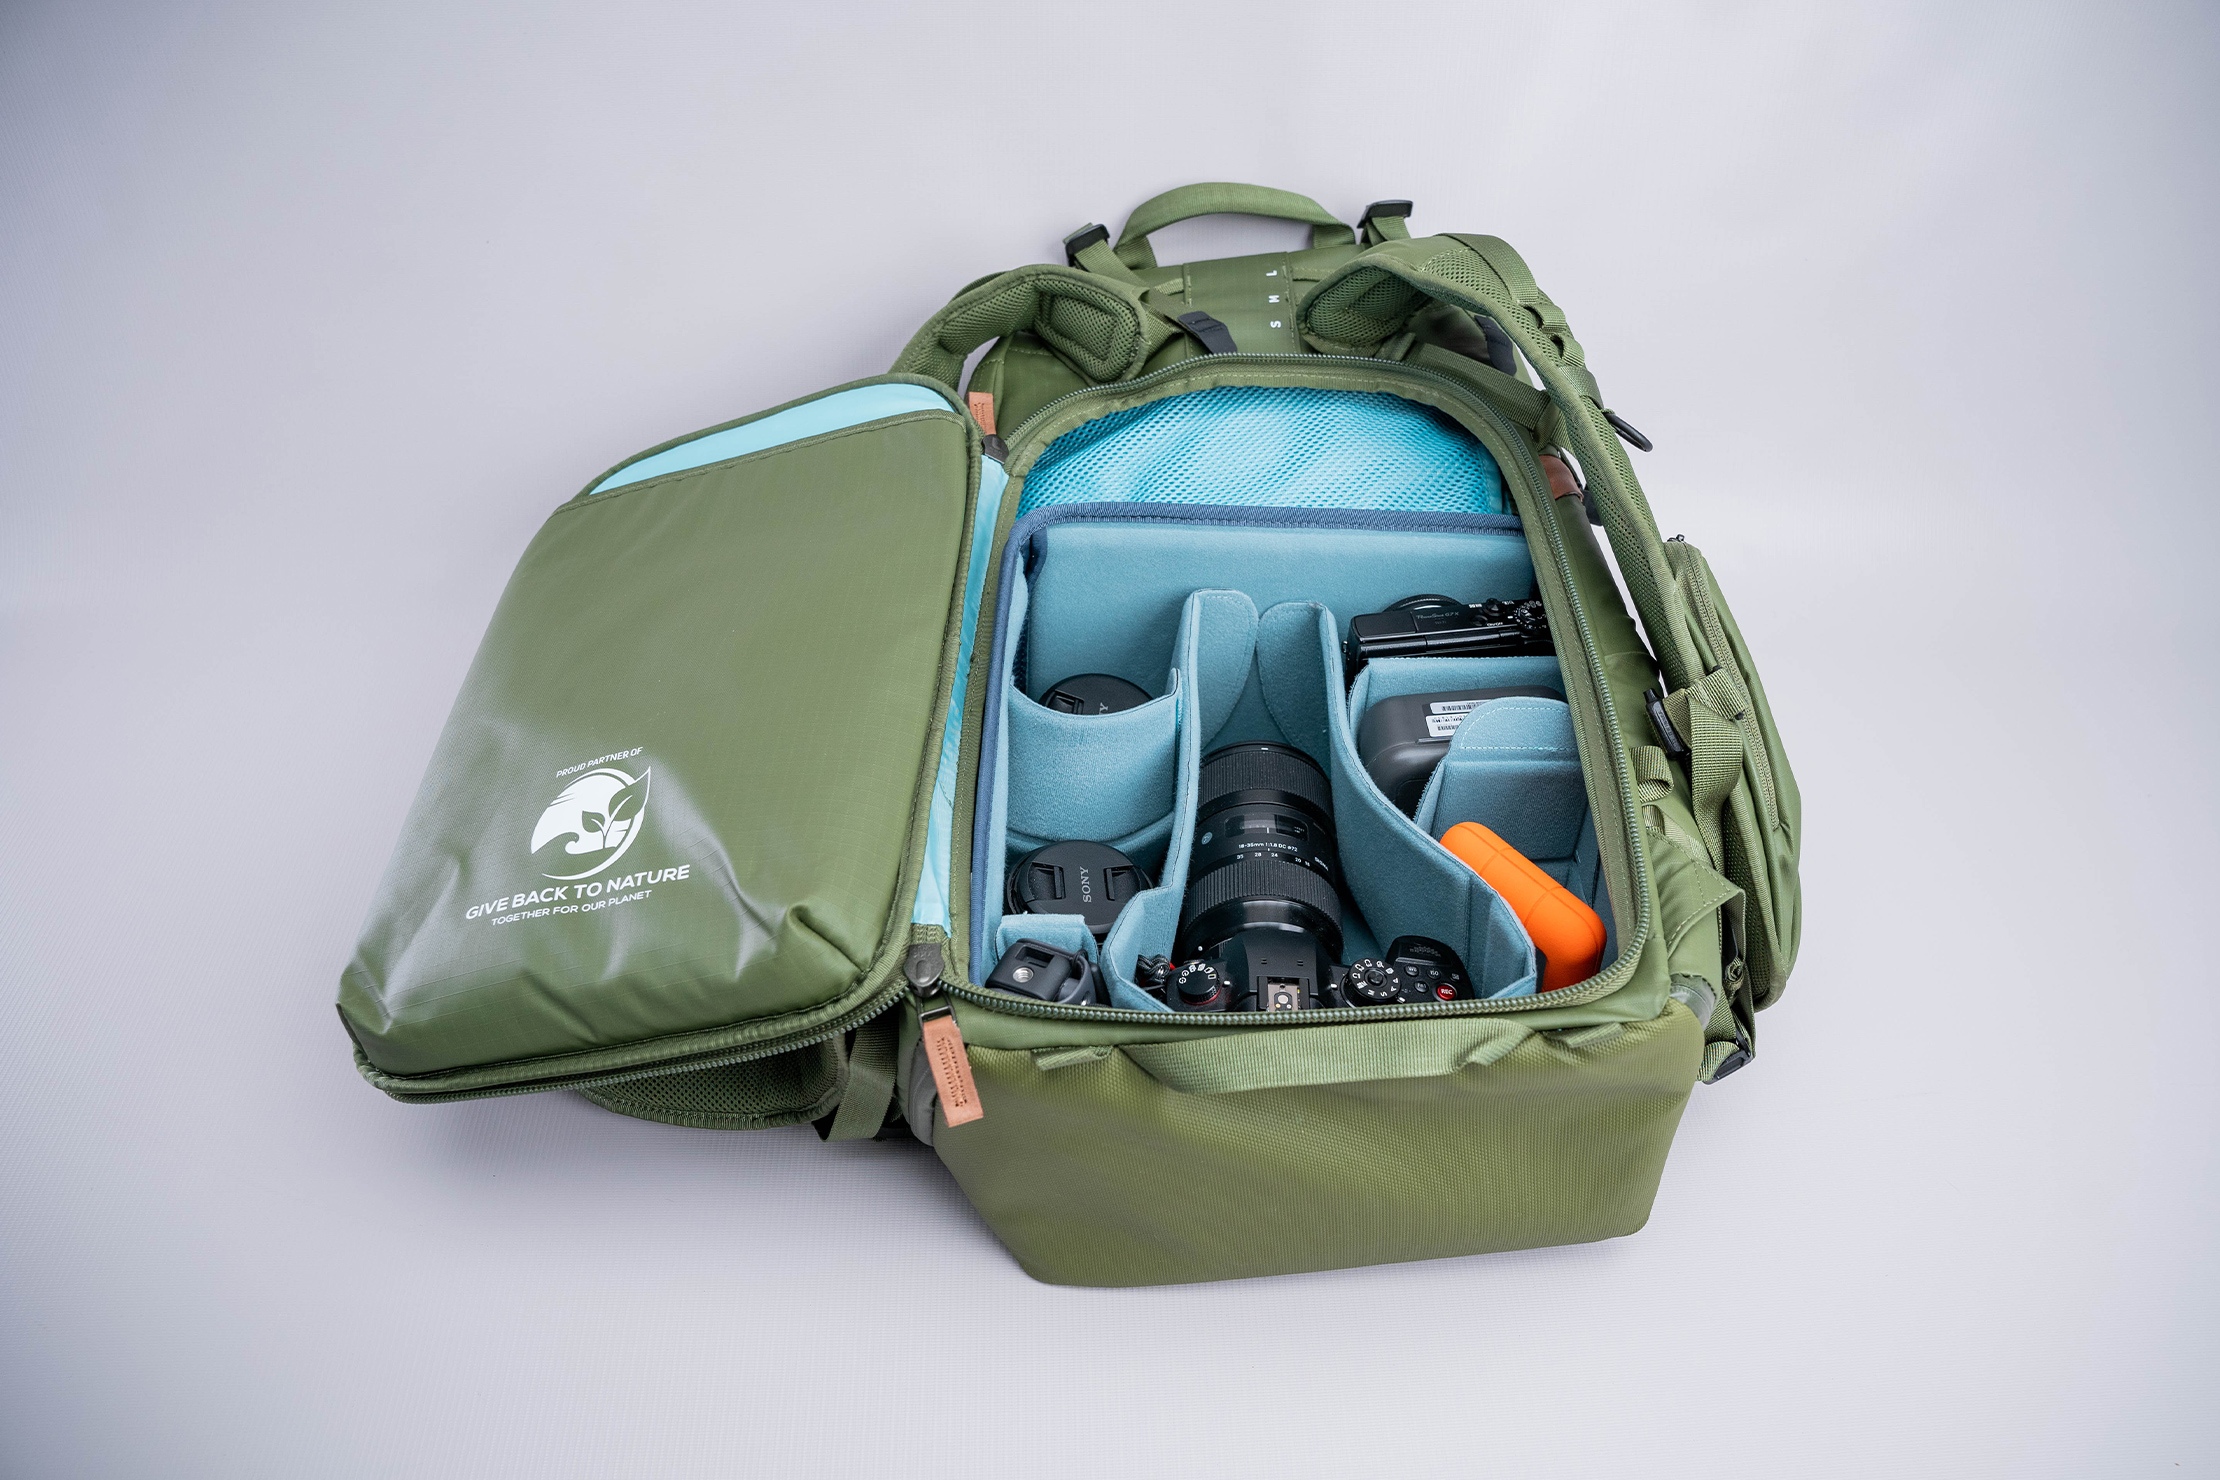
The core unit comes with a dust cover crafted from the same material as the liner, so it blends nicely with the pack’s interior. We dig the liner because it seals the unit until you’re ready to open it up, whether on an airplane, hiking to a remote waterfall, or sitting on your desk at home.
In addition to using it as a cover for the core unit, Ian from Shimoda went into detail about how you can use it as a packing cube. This is ideal because it’s the perfect dimensions to fit inside the pack’s main compartment. If you want to use the Explore V2 as a travel backpack for an excursion and leave your camera at home, you can do that, and the packing cube will fit most of your clothes for the trip. It will also fit in the area above the core unit when it’s in place, but you won’t be able to stuff it full of gear due to its size and a lack of extra space.
Shimoda offers several different-sized Core Units, so in theory, you could purchase a few and have different sizes for different trips. The smaller the insert, the more room you have to stow gear on top of it.
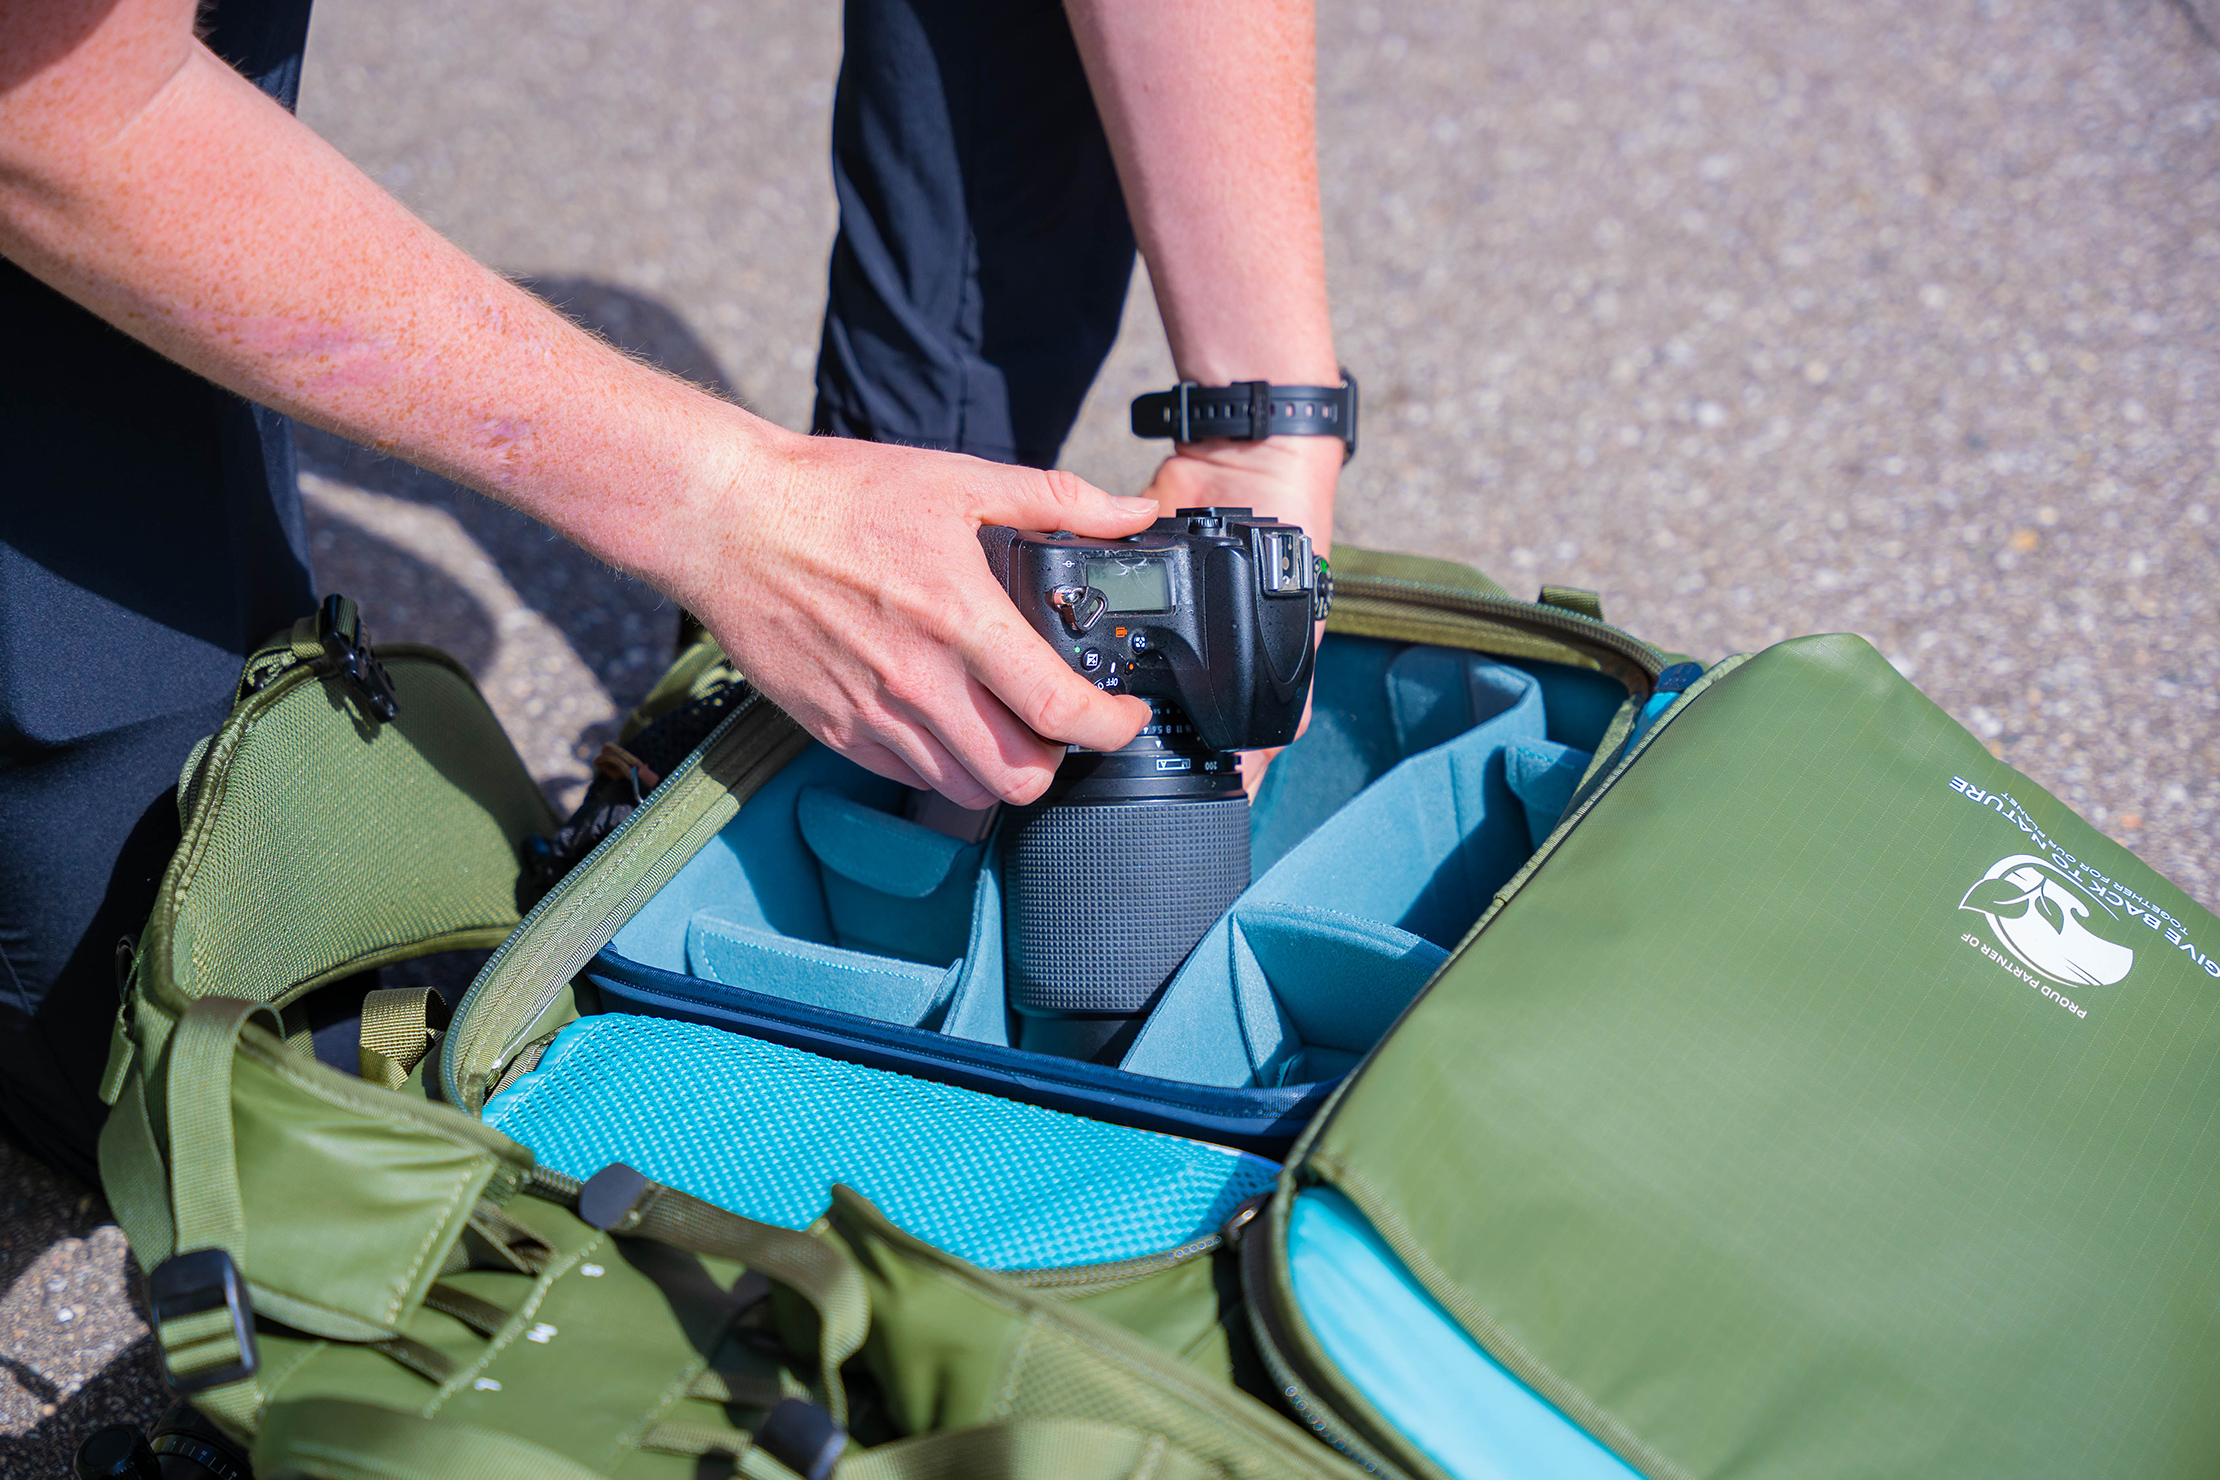
The unit has many dividers to secure your gear, and you can purchase additional ones, too. There are a few different dividers, ranging from those that can extend across the unit to extremely short ones that only span roughly an inch. You can use them to make the space fit how you want it to, and they’re intuitive enough to work around your oddly shaped camera gear. The main point of the Explore V2 is carrying your camera gear, which it does exceptionally well.
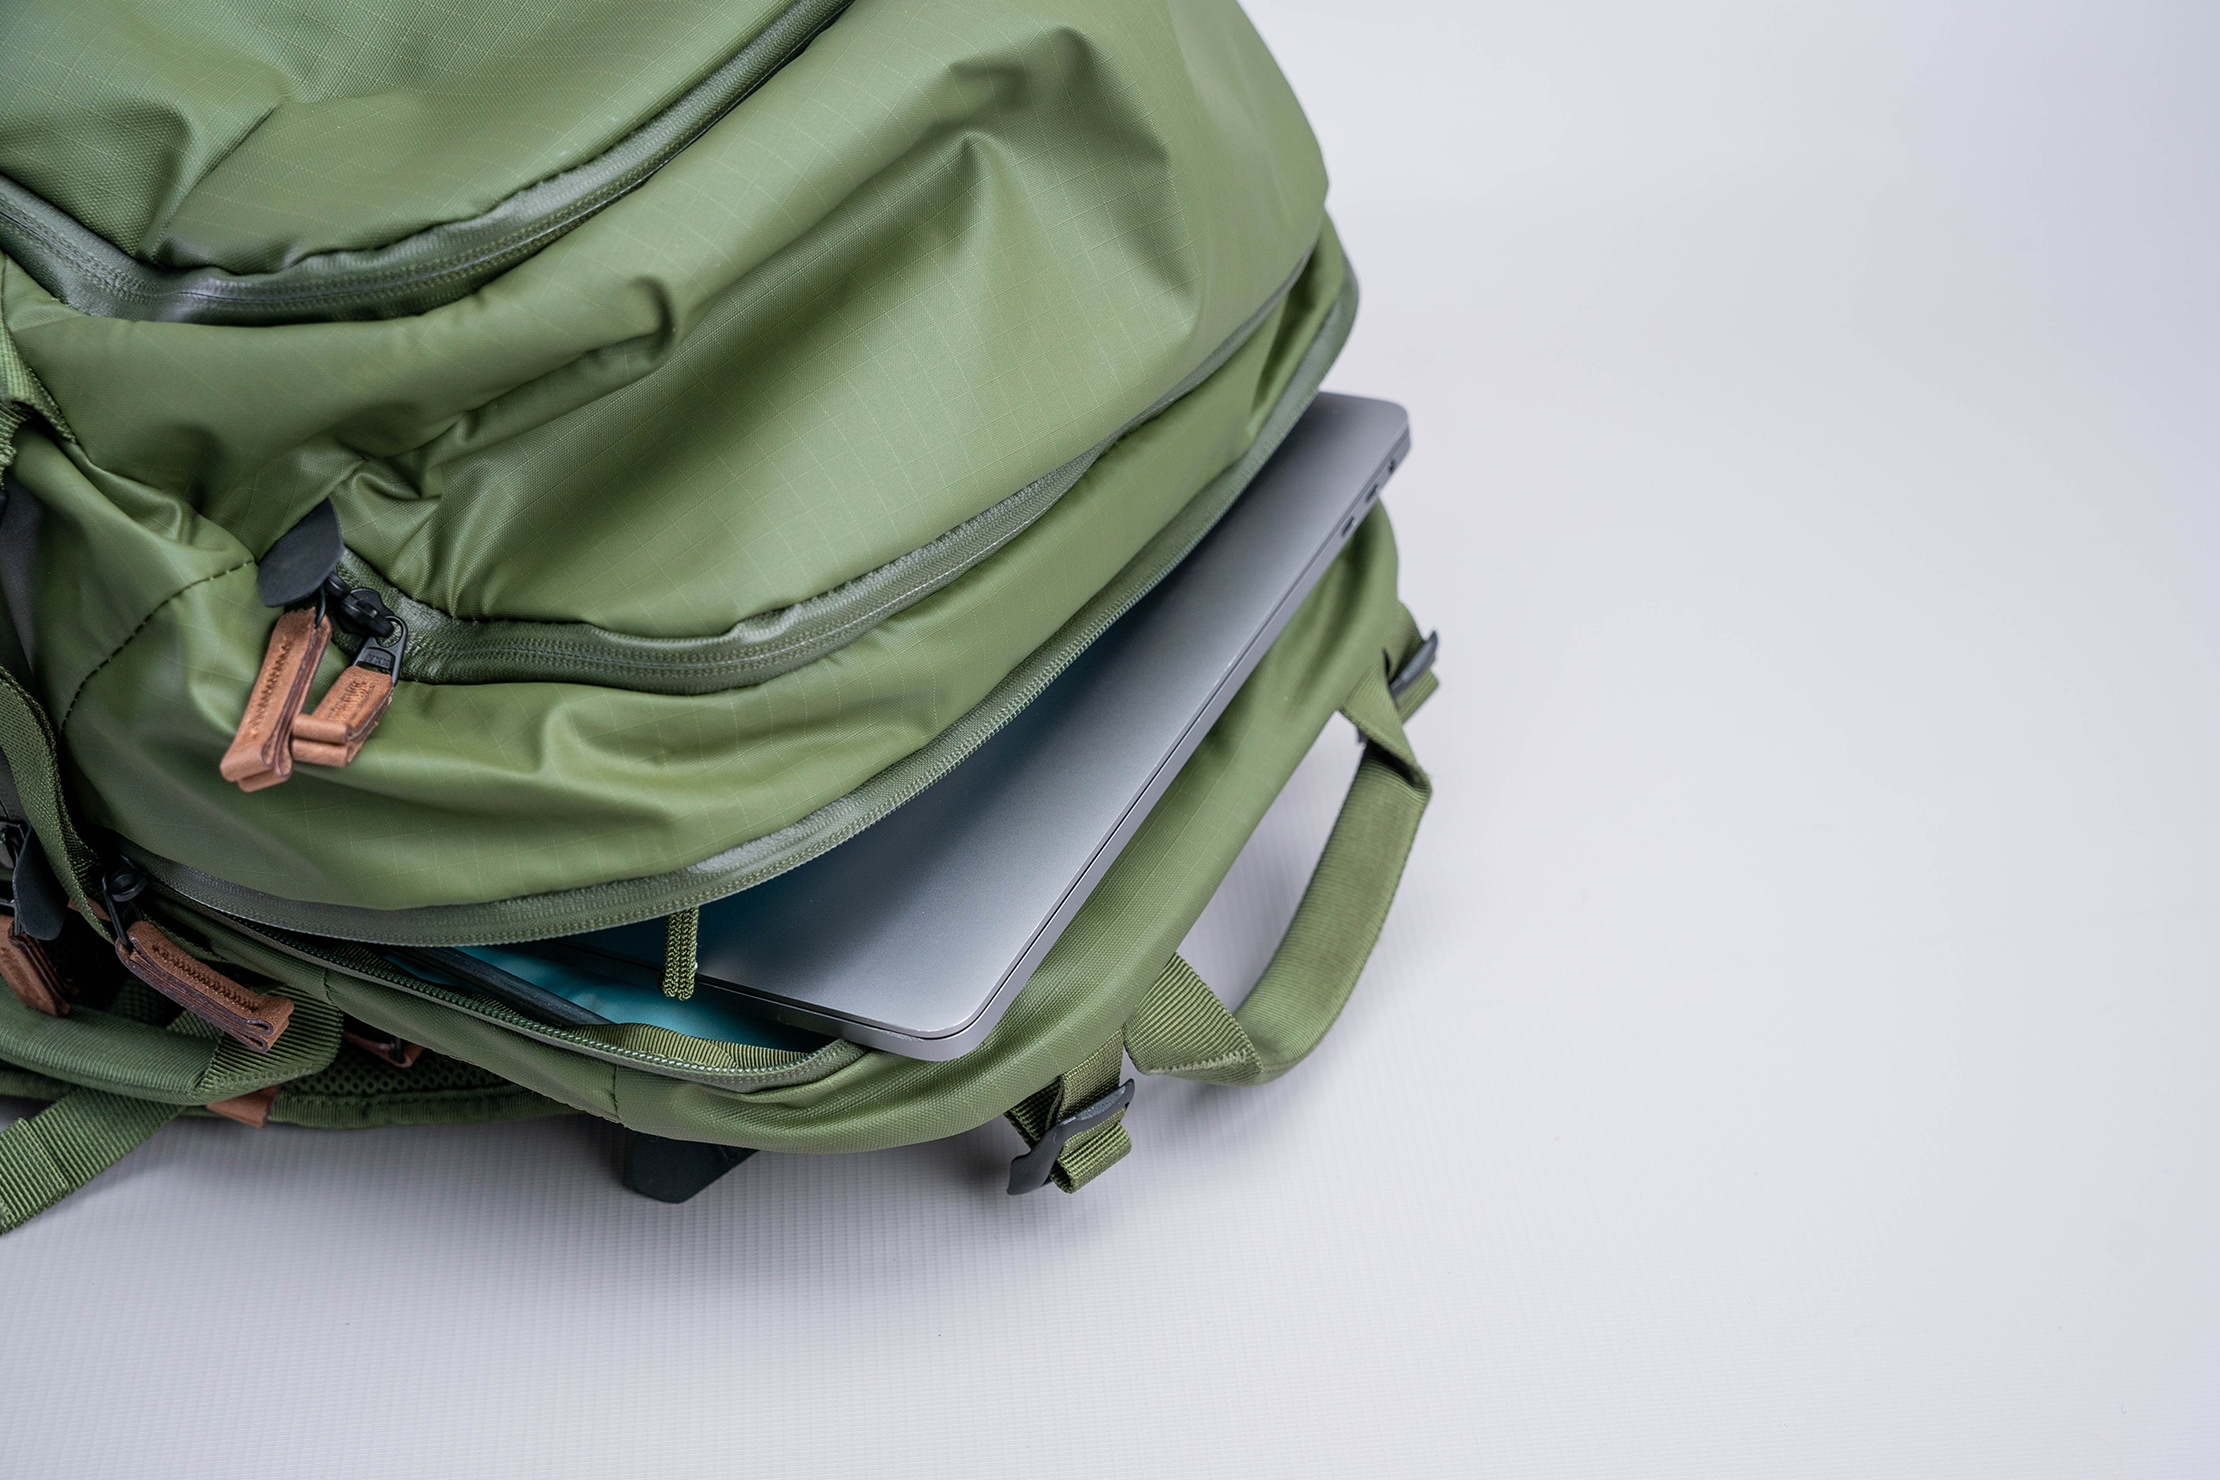
There’s an opening on the back panel to slide in your laptop. It has ample padding on both sides—the rear panel on the outside and a medium-layer of padding on the other. We wish there were some top closure to secure the laptop, but it operates fine without it.
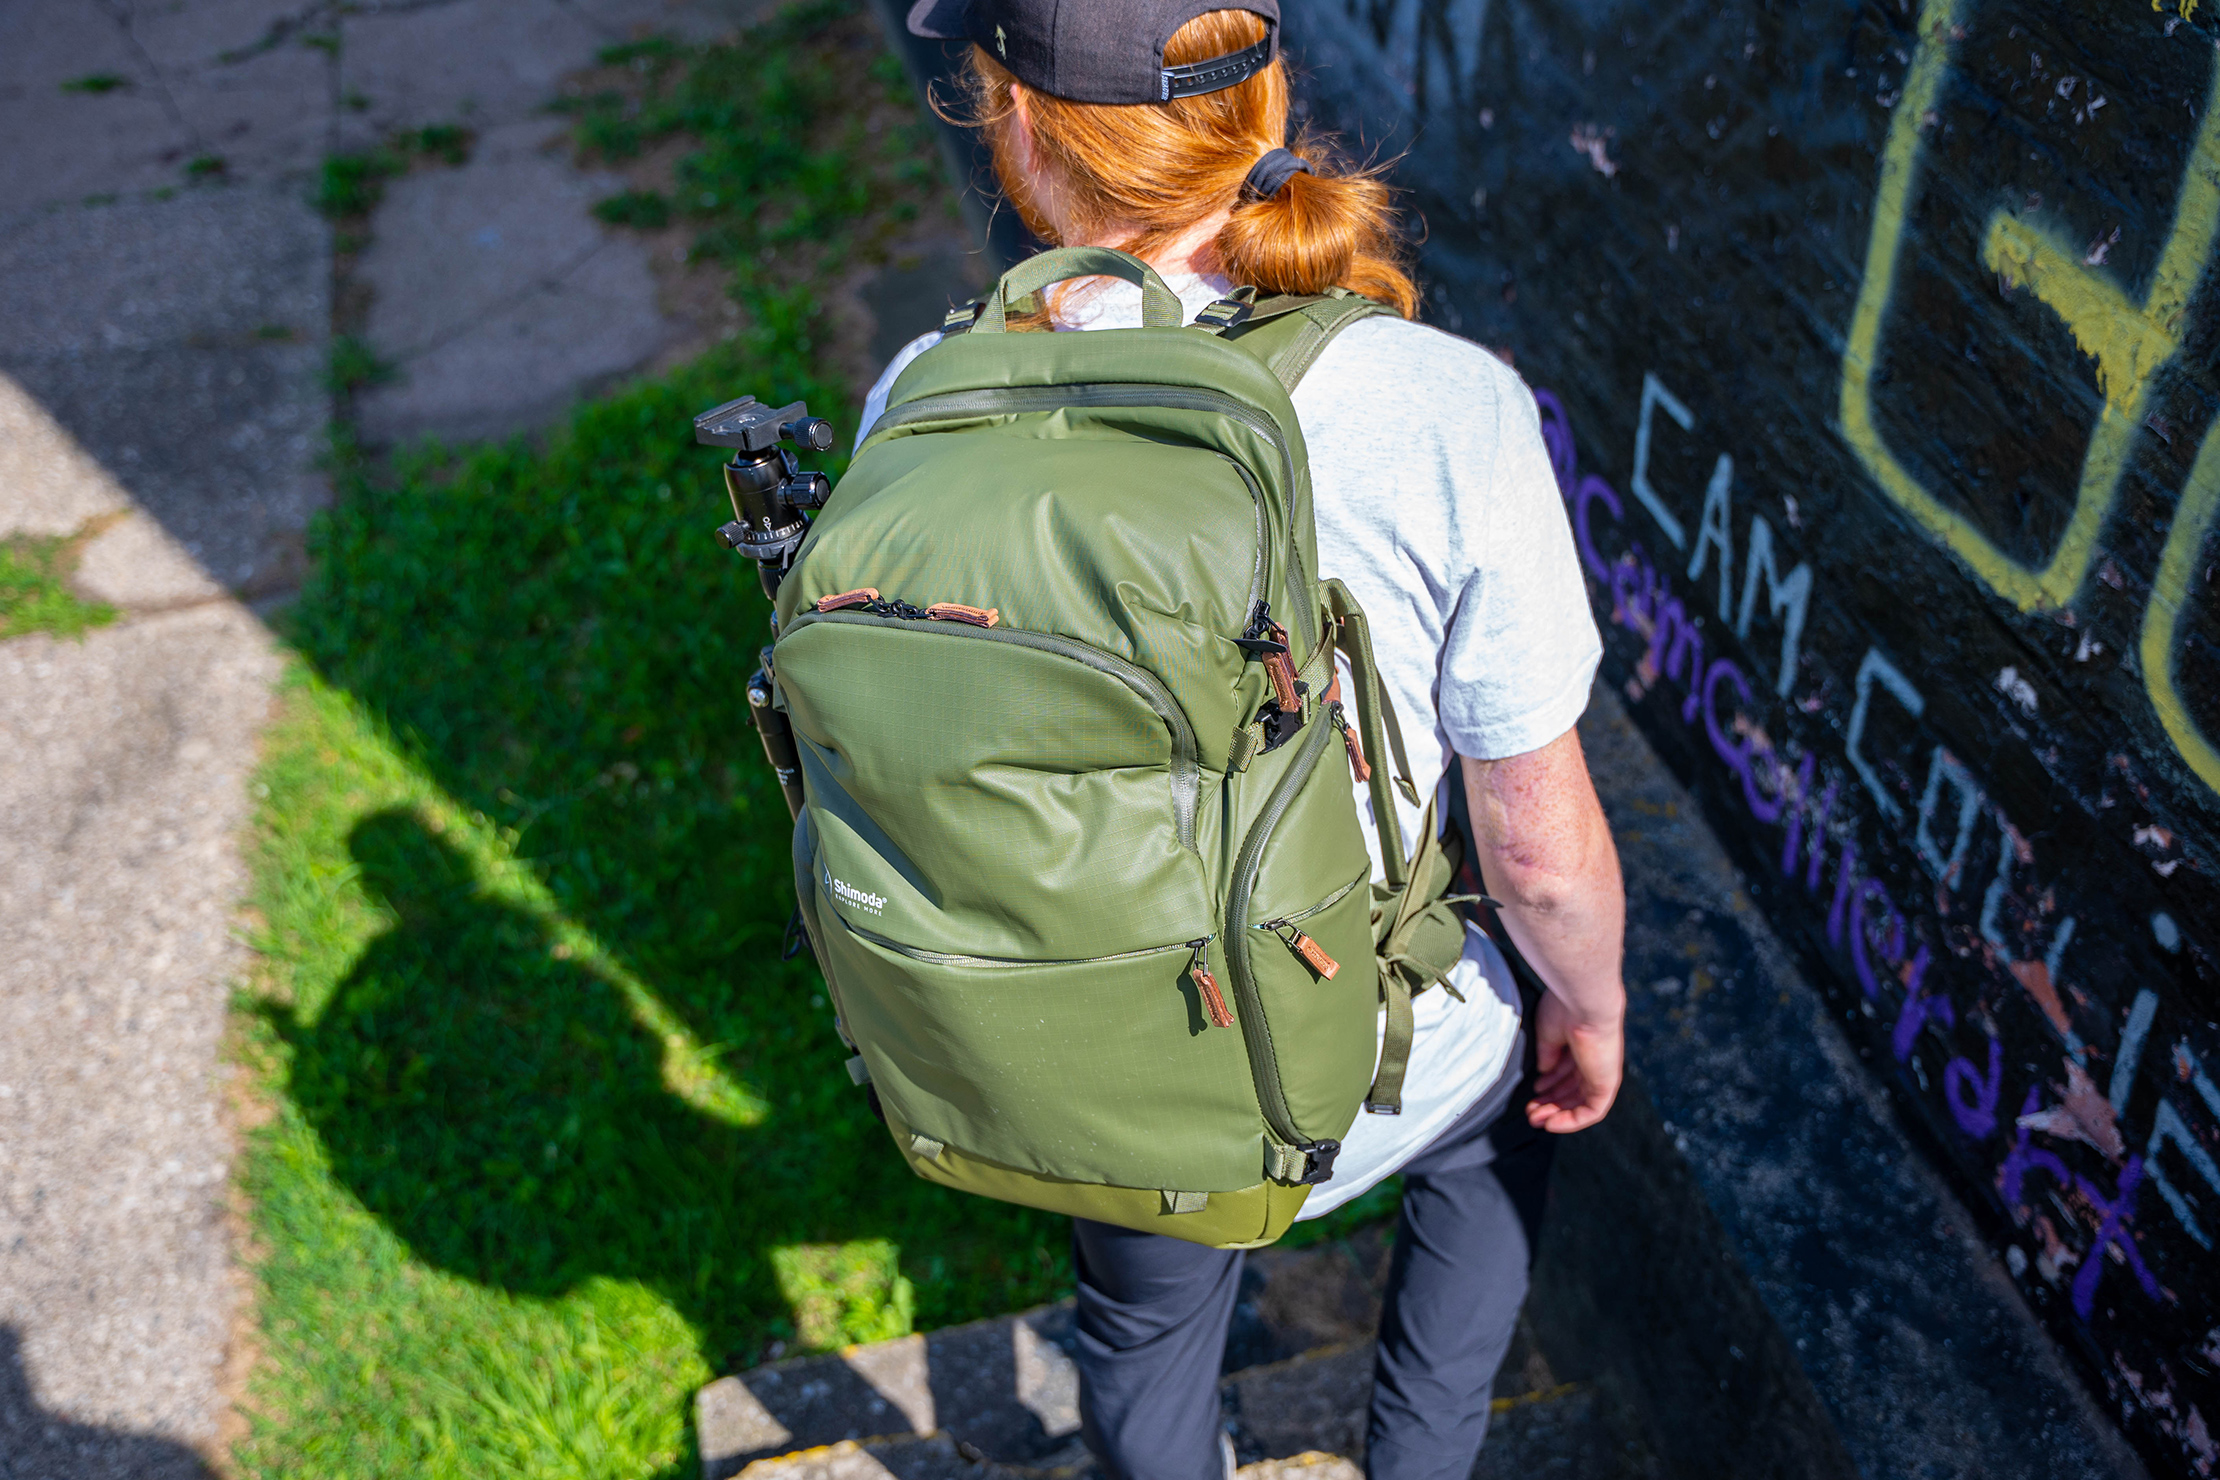
If there’s anything we’ve learned here at Pack Hacker, everyone uses their gear differently. This is especially true for photographers because there are so many unique things you can use your gear for, and everyone wants to transport their stuff differently. The Shimoda Explore V2 35 Backpack makes transporting your equipment safe and easy while not looking overtly like a photography bag. You can blend into your environment, no matter where that is.
Usage Timeline
Condition: Excellent
- Materials—both internal and external—feel extremely durable and water-resistant
- The back panel and shoulder straps are adjustable, have ample padding, and are aerated for airflow
- A ton of external features—from extra pockets to hybrid water bottle/tripod compartments
Condition: Excellent
- Exterior fabrics are water resistant, durable, and relatively lightweight.
- Back panel and shoulder straps still get sweaty but are breathable and don’t hold a smell
- Zippers are easy to grasp and use but can get caught on edges occasionally




Get your questions about the Shimoda Explore V2 35 Backpack answered from our team and the Pro Community right here on the page. Plus, join discussions with other members about gear, guides, and more.
Join Pack Hacker Pro or, Sign In