Aer Travel Pack 2 Review
The Aer Travel Pack 2 picks up right where it’s predecessor left off—a great one bag travel pack with a slick look and high attention to detail.
Video Review
Aer has updated the Travel Pack 2 by adding a false bottom in the laptop compartment—which was one of the few things lacking in this bag.
Our Verdict
Save time. Get access to brief summaries of our reviews so you can browse and make decisions more efficiently.
Pros
- Slick system with great attention to detail
- Durable and high quality materials used
- Great features
Cons
- No load lifter straps
- Laptop Compartment lacks a false bottom
- Compression straps can get in the way of the main compartment
Technical Details
-
Capacity
33l
-
Weight (lb)
3.7 lb (1.7 kg)
4lbs with hip belt (sold separately)
-
Dimensions
21.5 in x 13.5 in x 8.5 in (54.6 x 34.3 x 21.6 cm)
-
Notable Materials
EVA Foam, YKK Zippers, Duraflex Hardware, EPE Foam, Sponge Foam, CORDURA® Ballistic Nylon
-
Manufacturing Country
China
-
Laptop Compartment Size
15"
-
Warranty Information
Full Review
Get up to 10% off Aer • Join Pack Hacker Pro
The day has finally come! We are thoroughly excited to say that we’re taking a look at the Aer Travel Pack 2 in this review. Several of our team members at Pack Hacker have been using their original Aer Travel Pack for some time now (and to great success), so needless to say, we’ve been looking forward to getting our hands on the second iteration of an already great travel pack.
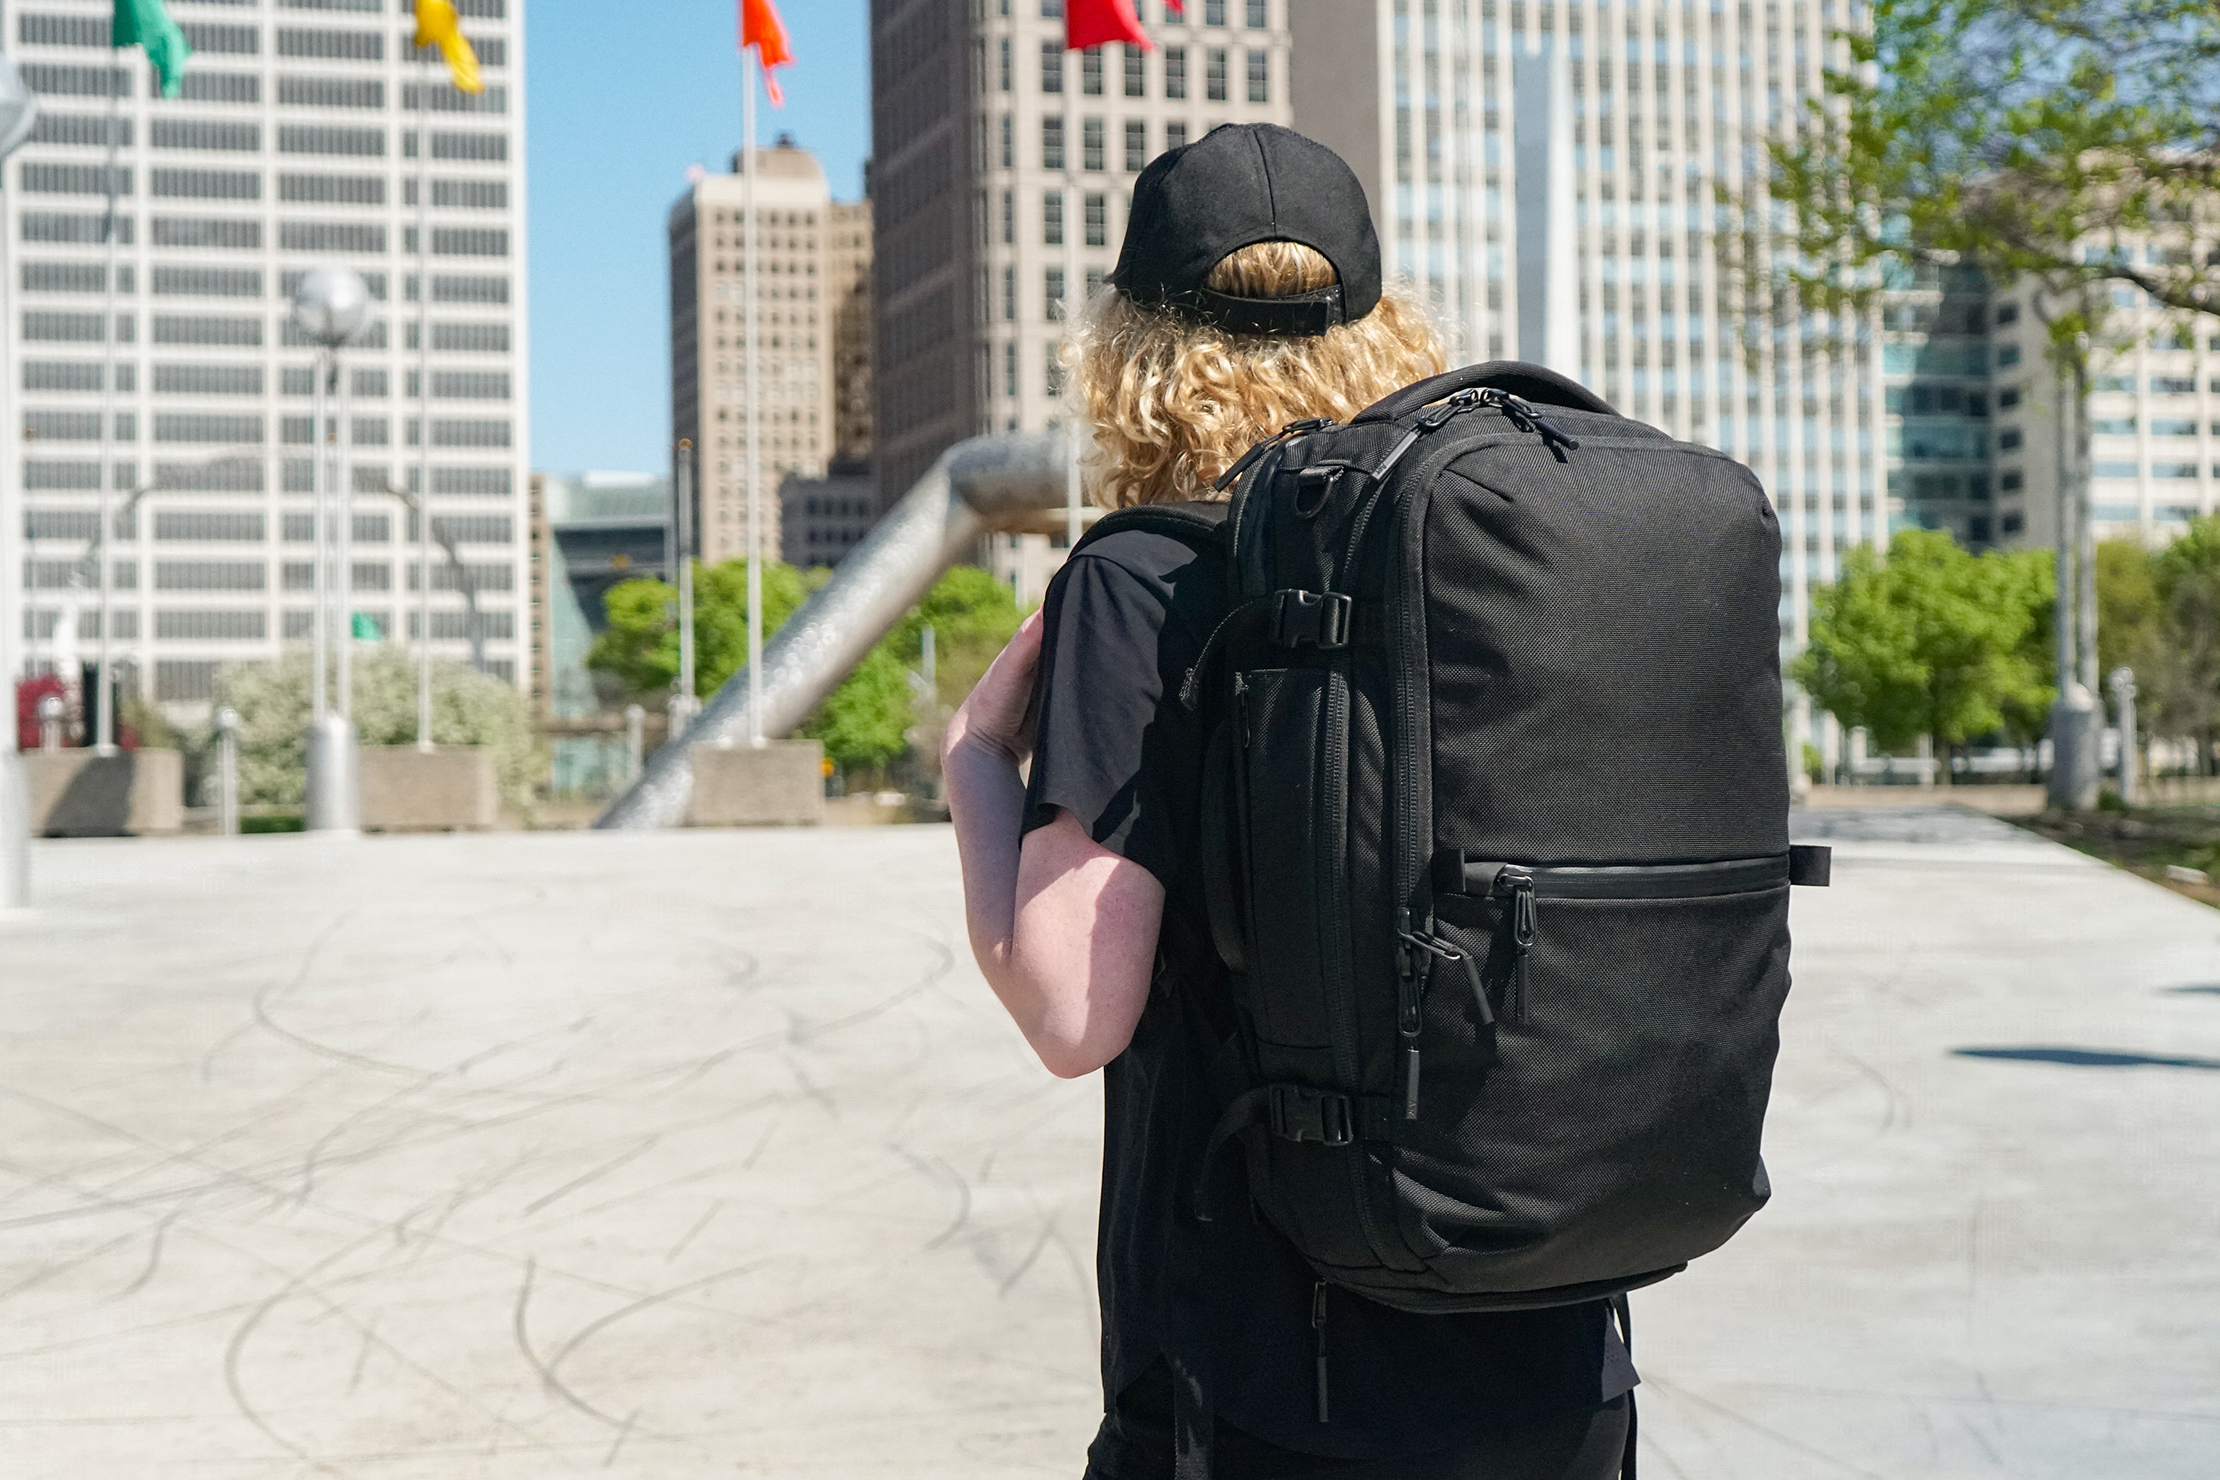
Aer has taken their first travel pack, made a bunch of really great improvements, and clearly thought through all of the details in the process for carrying a bunch of gear—so lets dive in.
Oh, and by the way—this is a long one. You’ve been warned…
Materials & Aesthetic
Starting with the exterior of this pack, there is a 1680D CORDURA® ballistic nylon weave—which is super durable stuff. How do we know it’s durable? Well, this is the same material as the Aer Travel Pack 1—a bag we’ve been testing for an accumulation of over six months, across various team members… and we’ve had virtually no problems with it whatsoever.
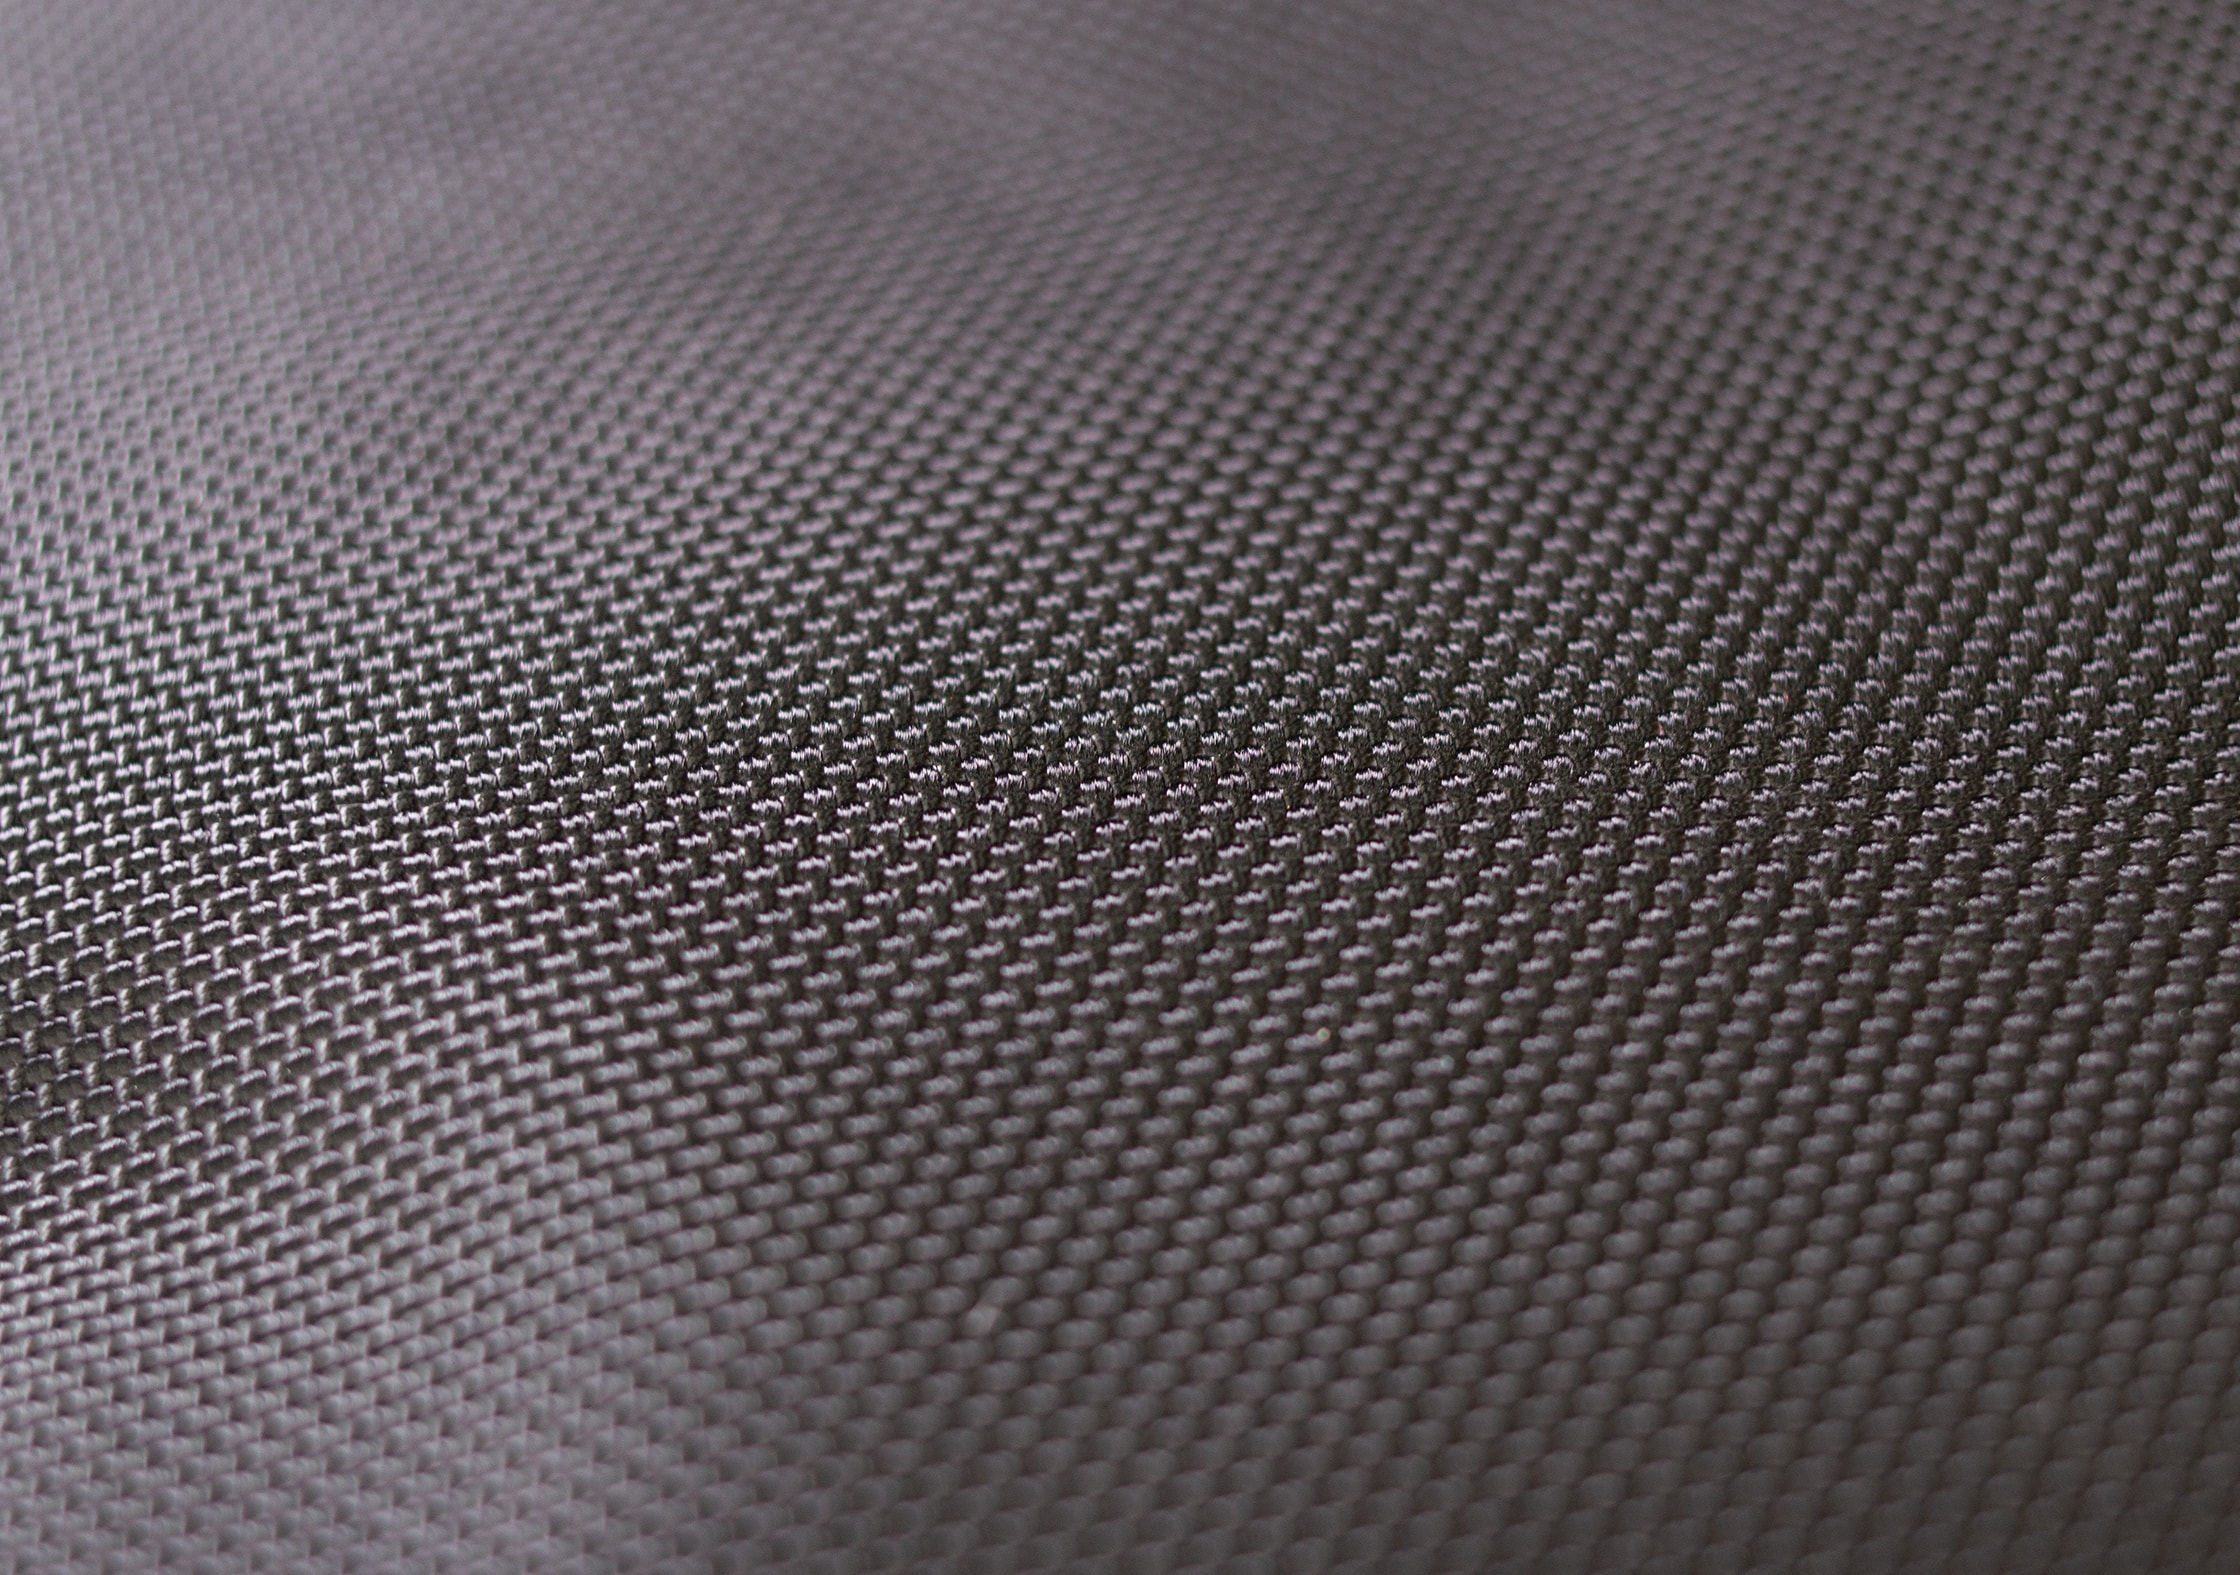
This stuff is pretty much guaranteed to hold up over time.
The bag has a nice black-on-black aesthetic, which is very similar to the original—and a very pleasant sight for our eyes. As far as buckles and zips go, there are Duraflex buckles as well as different flavors of YKK zippers all around the exterior and interior of this pack. Some of the zippers are Aquaguard (super water-resistant) and all of the exterior zippers have storm flaps (that piece of fabric that often covers zippers) for some added water resistance. #Nailedit
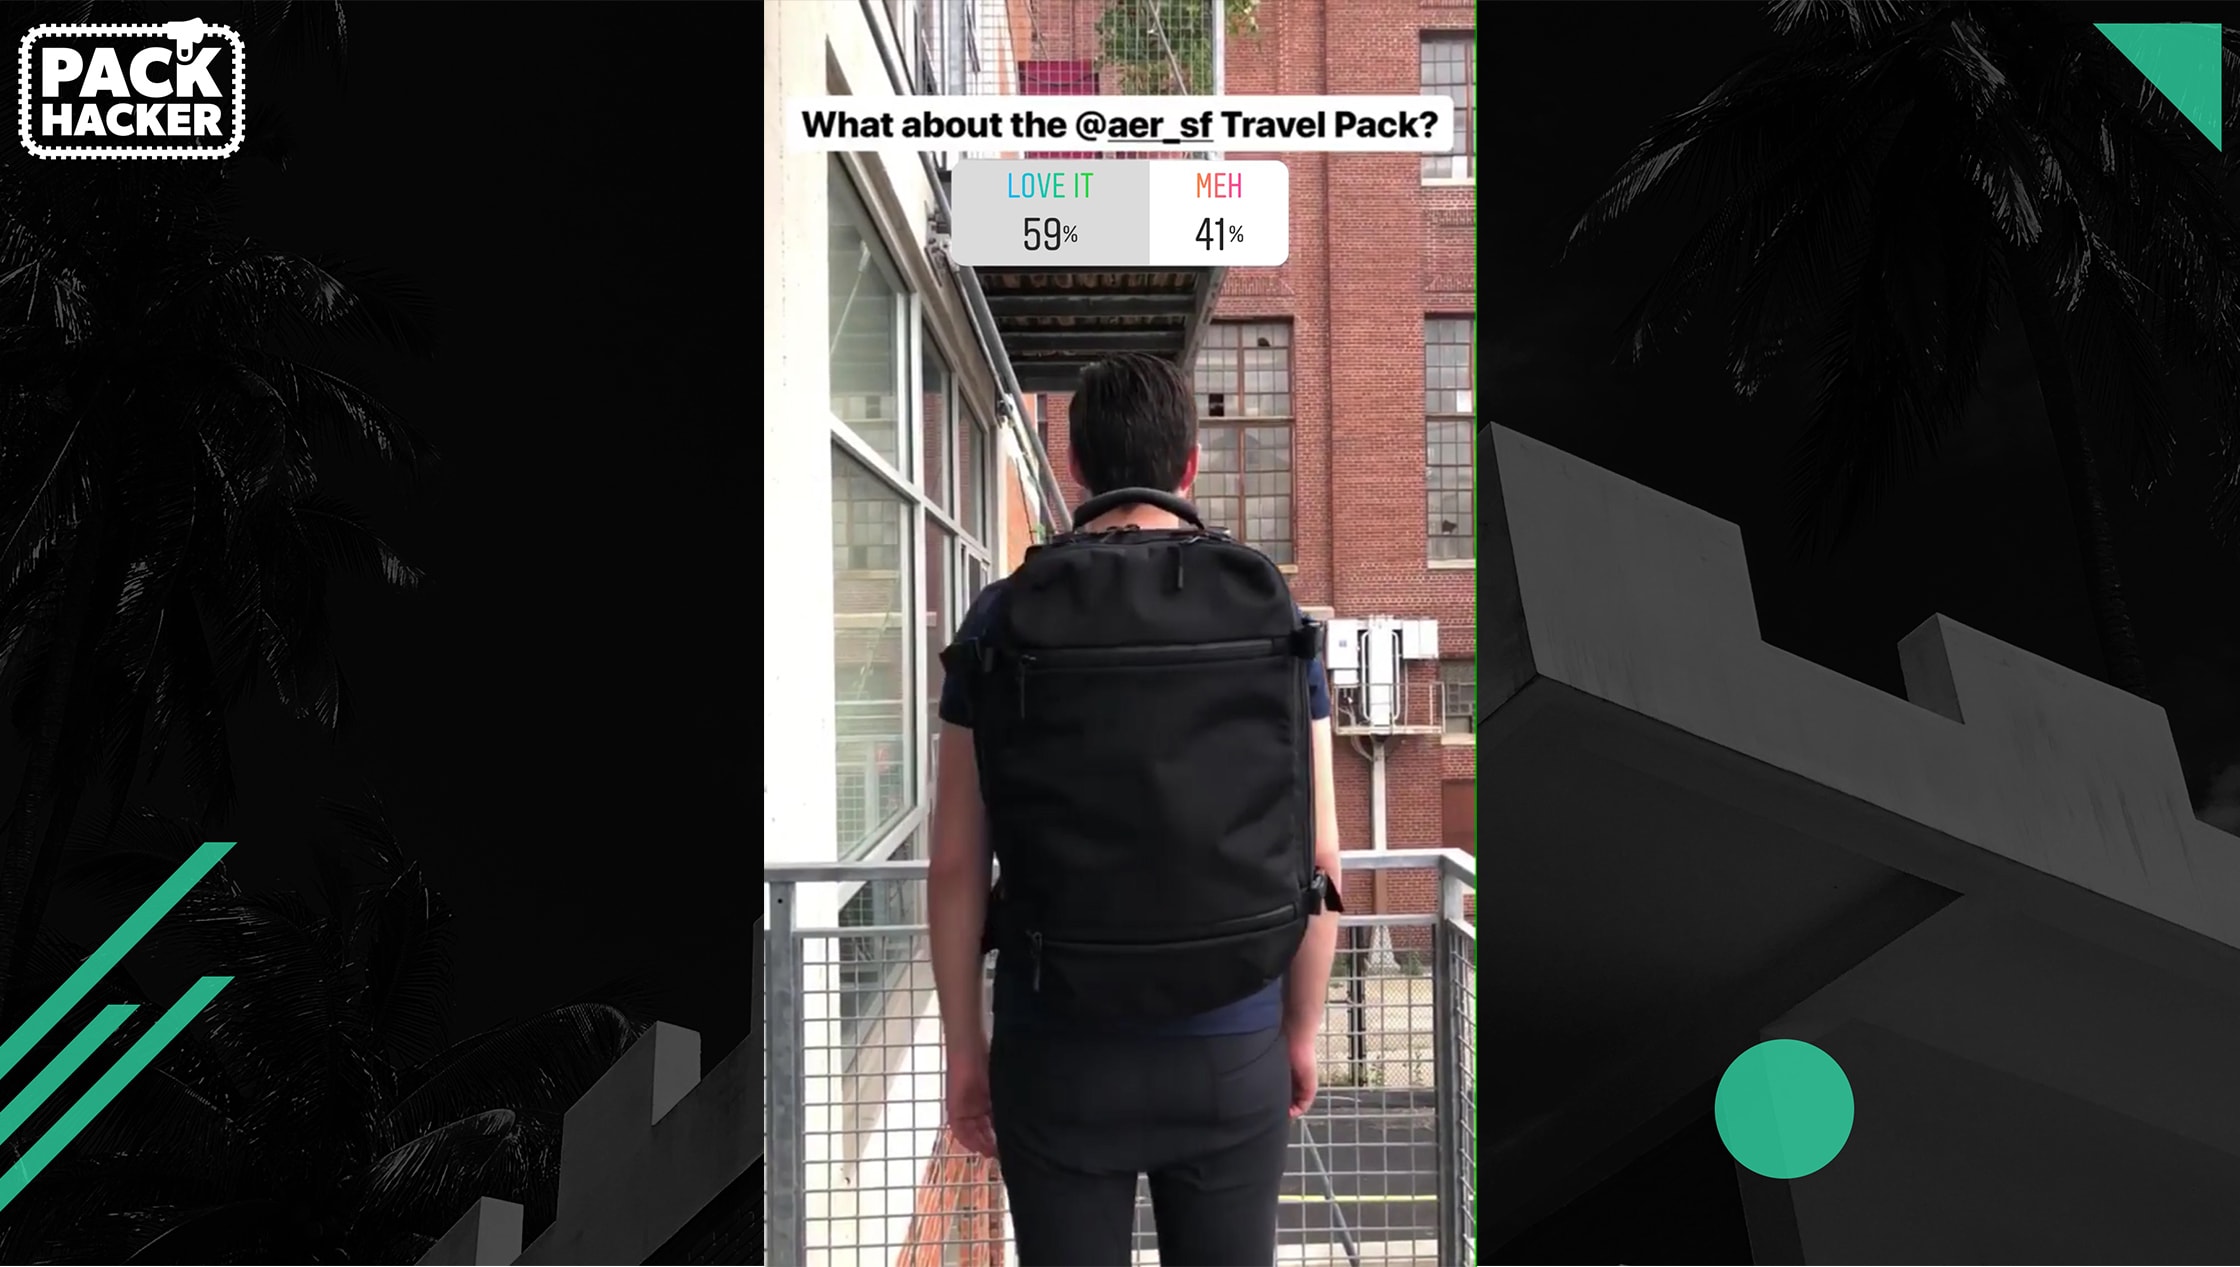
Beauty is, however, in the eye of the beholder. We should note that we polled our Instagram audience to get their thoughts on the aesthetics of the Aer Travel Pack 1, and the results were about 60/40 in favor of it. We were definitely big fans of the original pack and this one seems to take all the styling from the original and boost it up a few notches.
(By the way, if you wanna get in on our Instagram polls and a whole bunch of other travel-and-gear-themed content, be sure to head over to our Instagram!)
To wrap up the materials, there are a few different foams used on this pack. There’s some EVA foam, EPE foam, and sponge foam in areas like the mesh back panel, the straps, and the side handles.
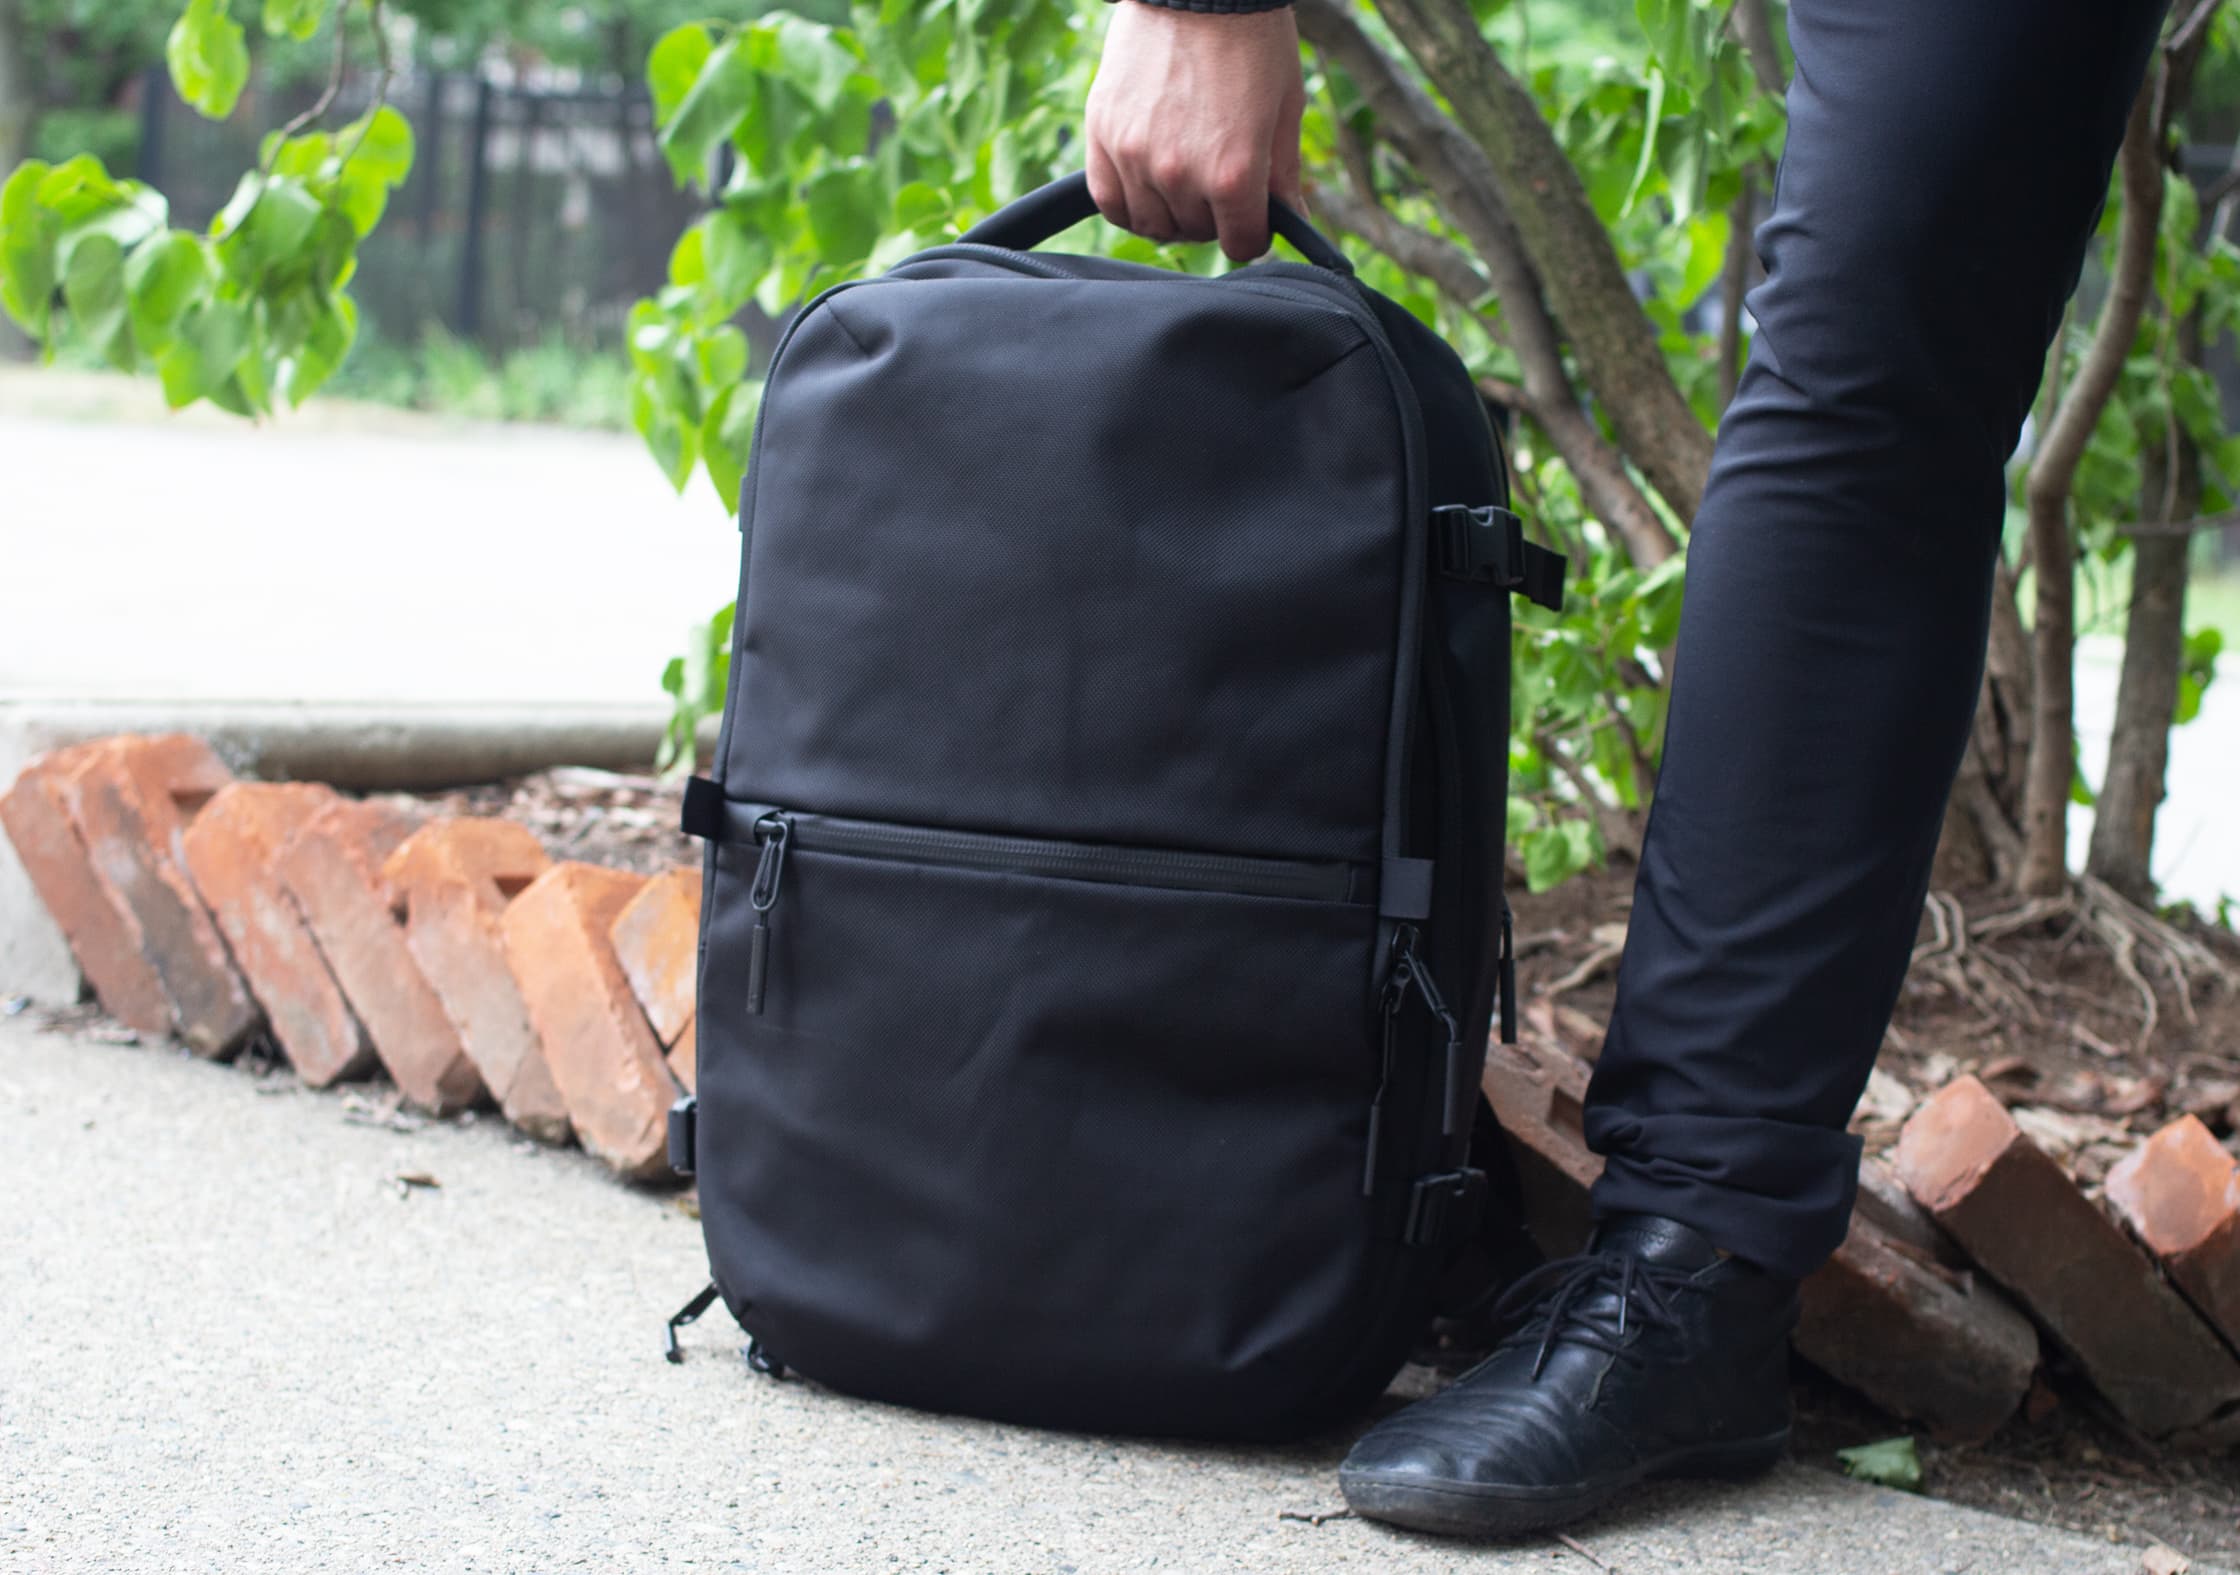
And one final note! We’re pleased to say that there aren’t a lot of dangling straps coming off of this thing, which adds to the overall professional and minimalistic look of the pack. It also means the Aer Travel Pack 2 is a distinguished member of the #danglefreeexperience club.
Who likes dangling straps? No one. Literally, no one.
Exterior Components
As far as exterior components go, there is a nice amount of doo-dads on this pack that provide a bunch of useful features, but Aer has pulled this off in a way that still keeps the minimalistic look of the pack. We think they’ve done a really nice job with this.
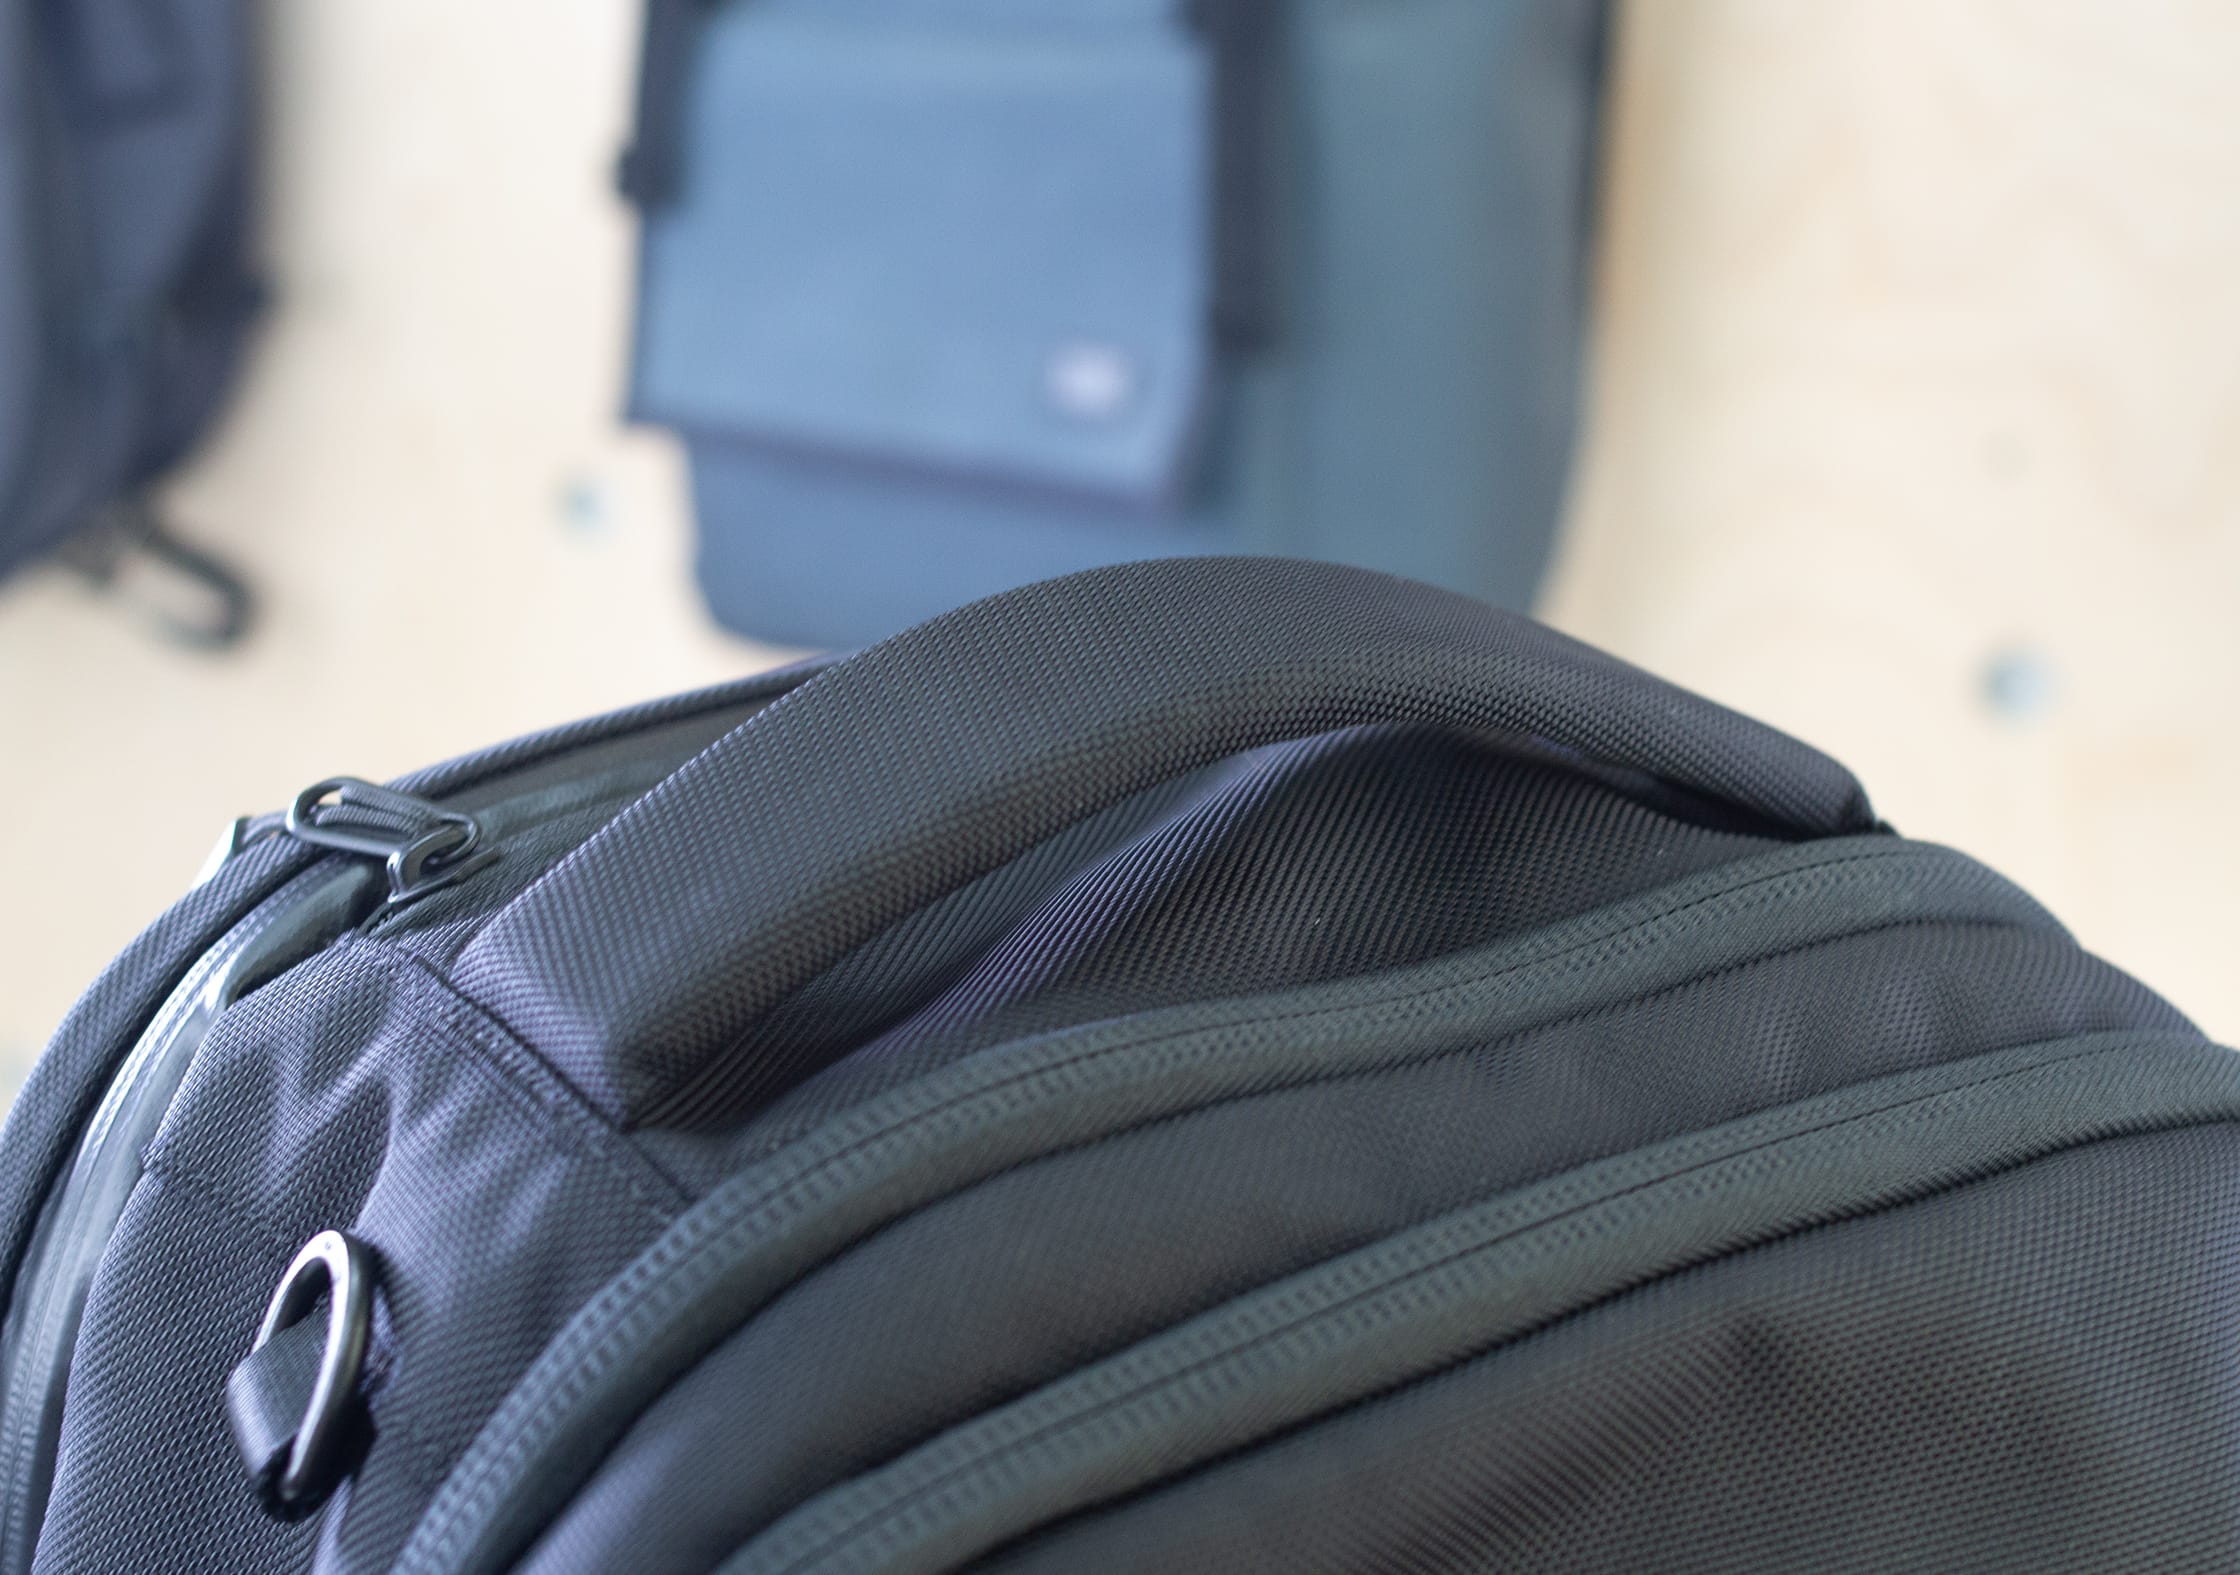
Starting off, there is a super beefy handle on the top of the bag and a less beefy grab handle on the side. These are great for any quick grabs, carrying this thing around, getting it out of an overhead bin, or in and out of a cab—whenever you need to just grab it for short distances.
These handles are a really good example of how Aer has continued to refine and update their design. In the Aer Travel Pack 1, there was a Velcro loop on the top handle that you could attach to the top of a roller bag handle. It was decent, but it felt a little clunky. This top handle feels much more streamlined and helps the bag keep that slick, clean look. (Plus, they’ve figured out a better way to handle the roller luggage scenario, which we’ll get into later.)
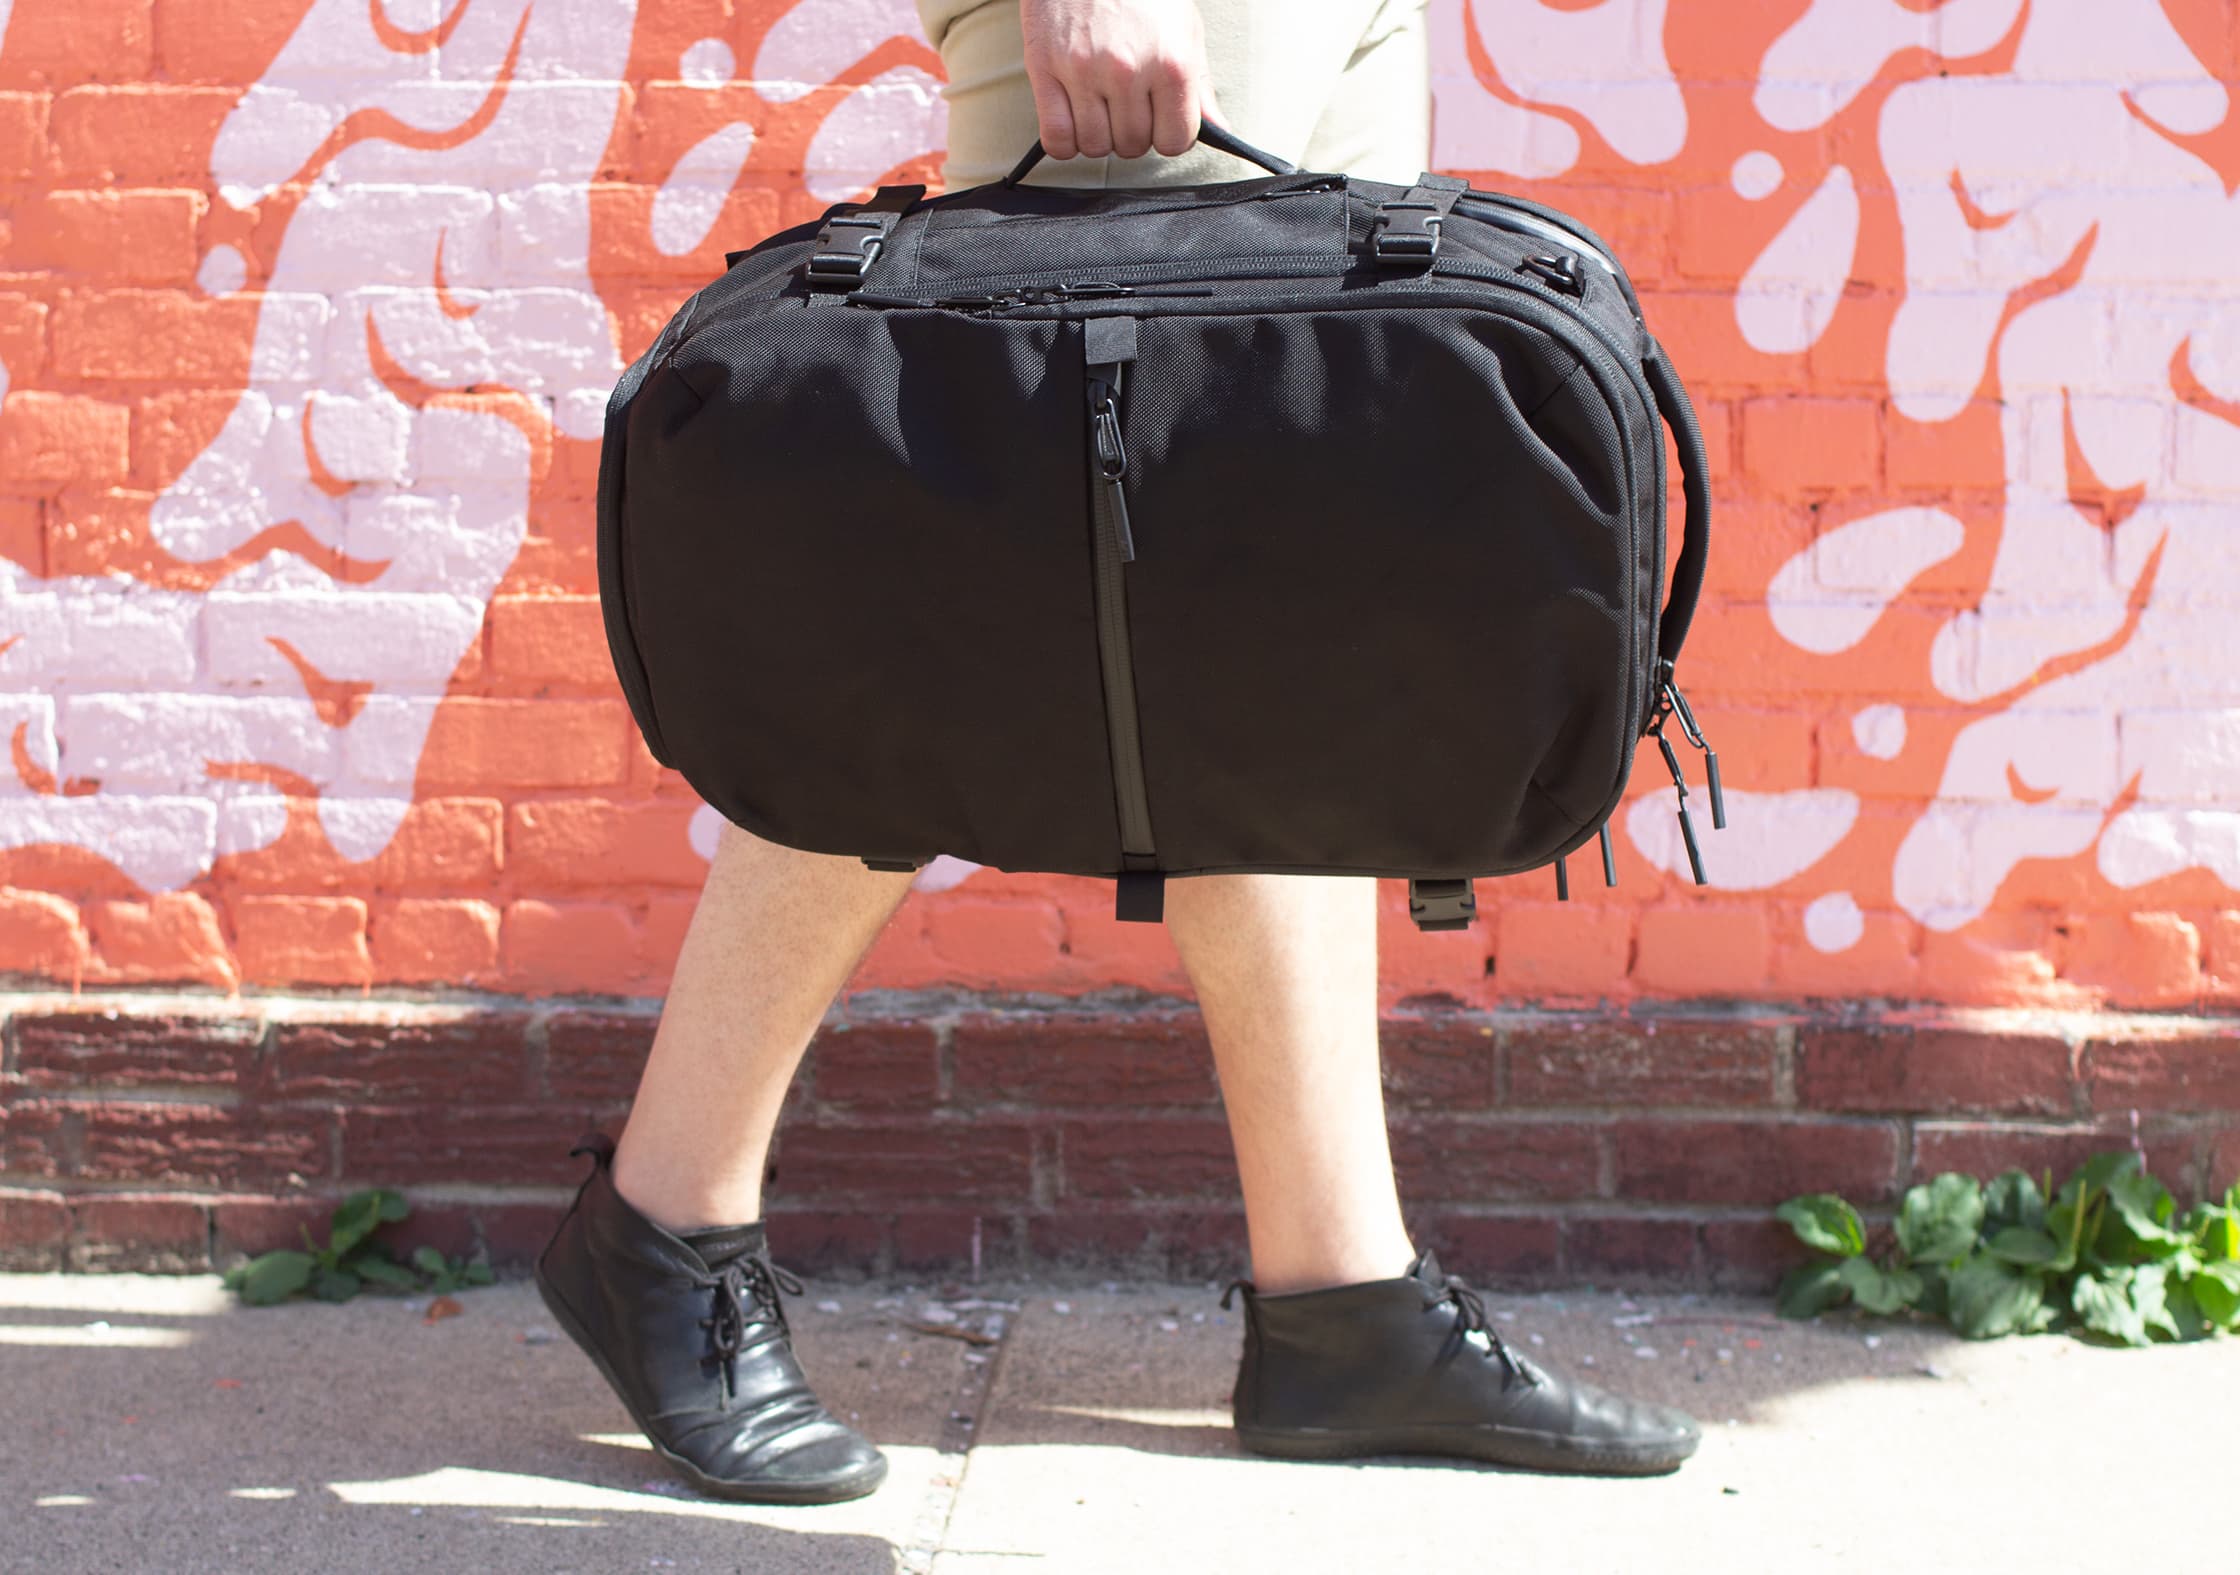
The side handle has also been updated—the density of the foam is about the same, but the casing is made of a slightly finer weave, so it’s a little bit softer to the touch. It feels a little bit better to grab than the old pack.
These are just a few of the little details that have come together to make this a great pack. Not that the original wasn’t a great pack—but Aer seems to be fully aware that there’s always room for improvement!
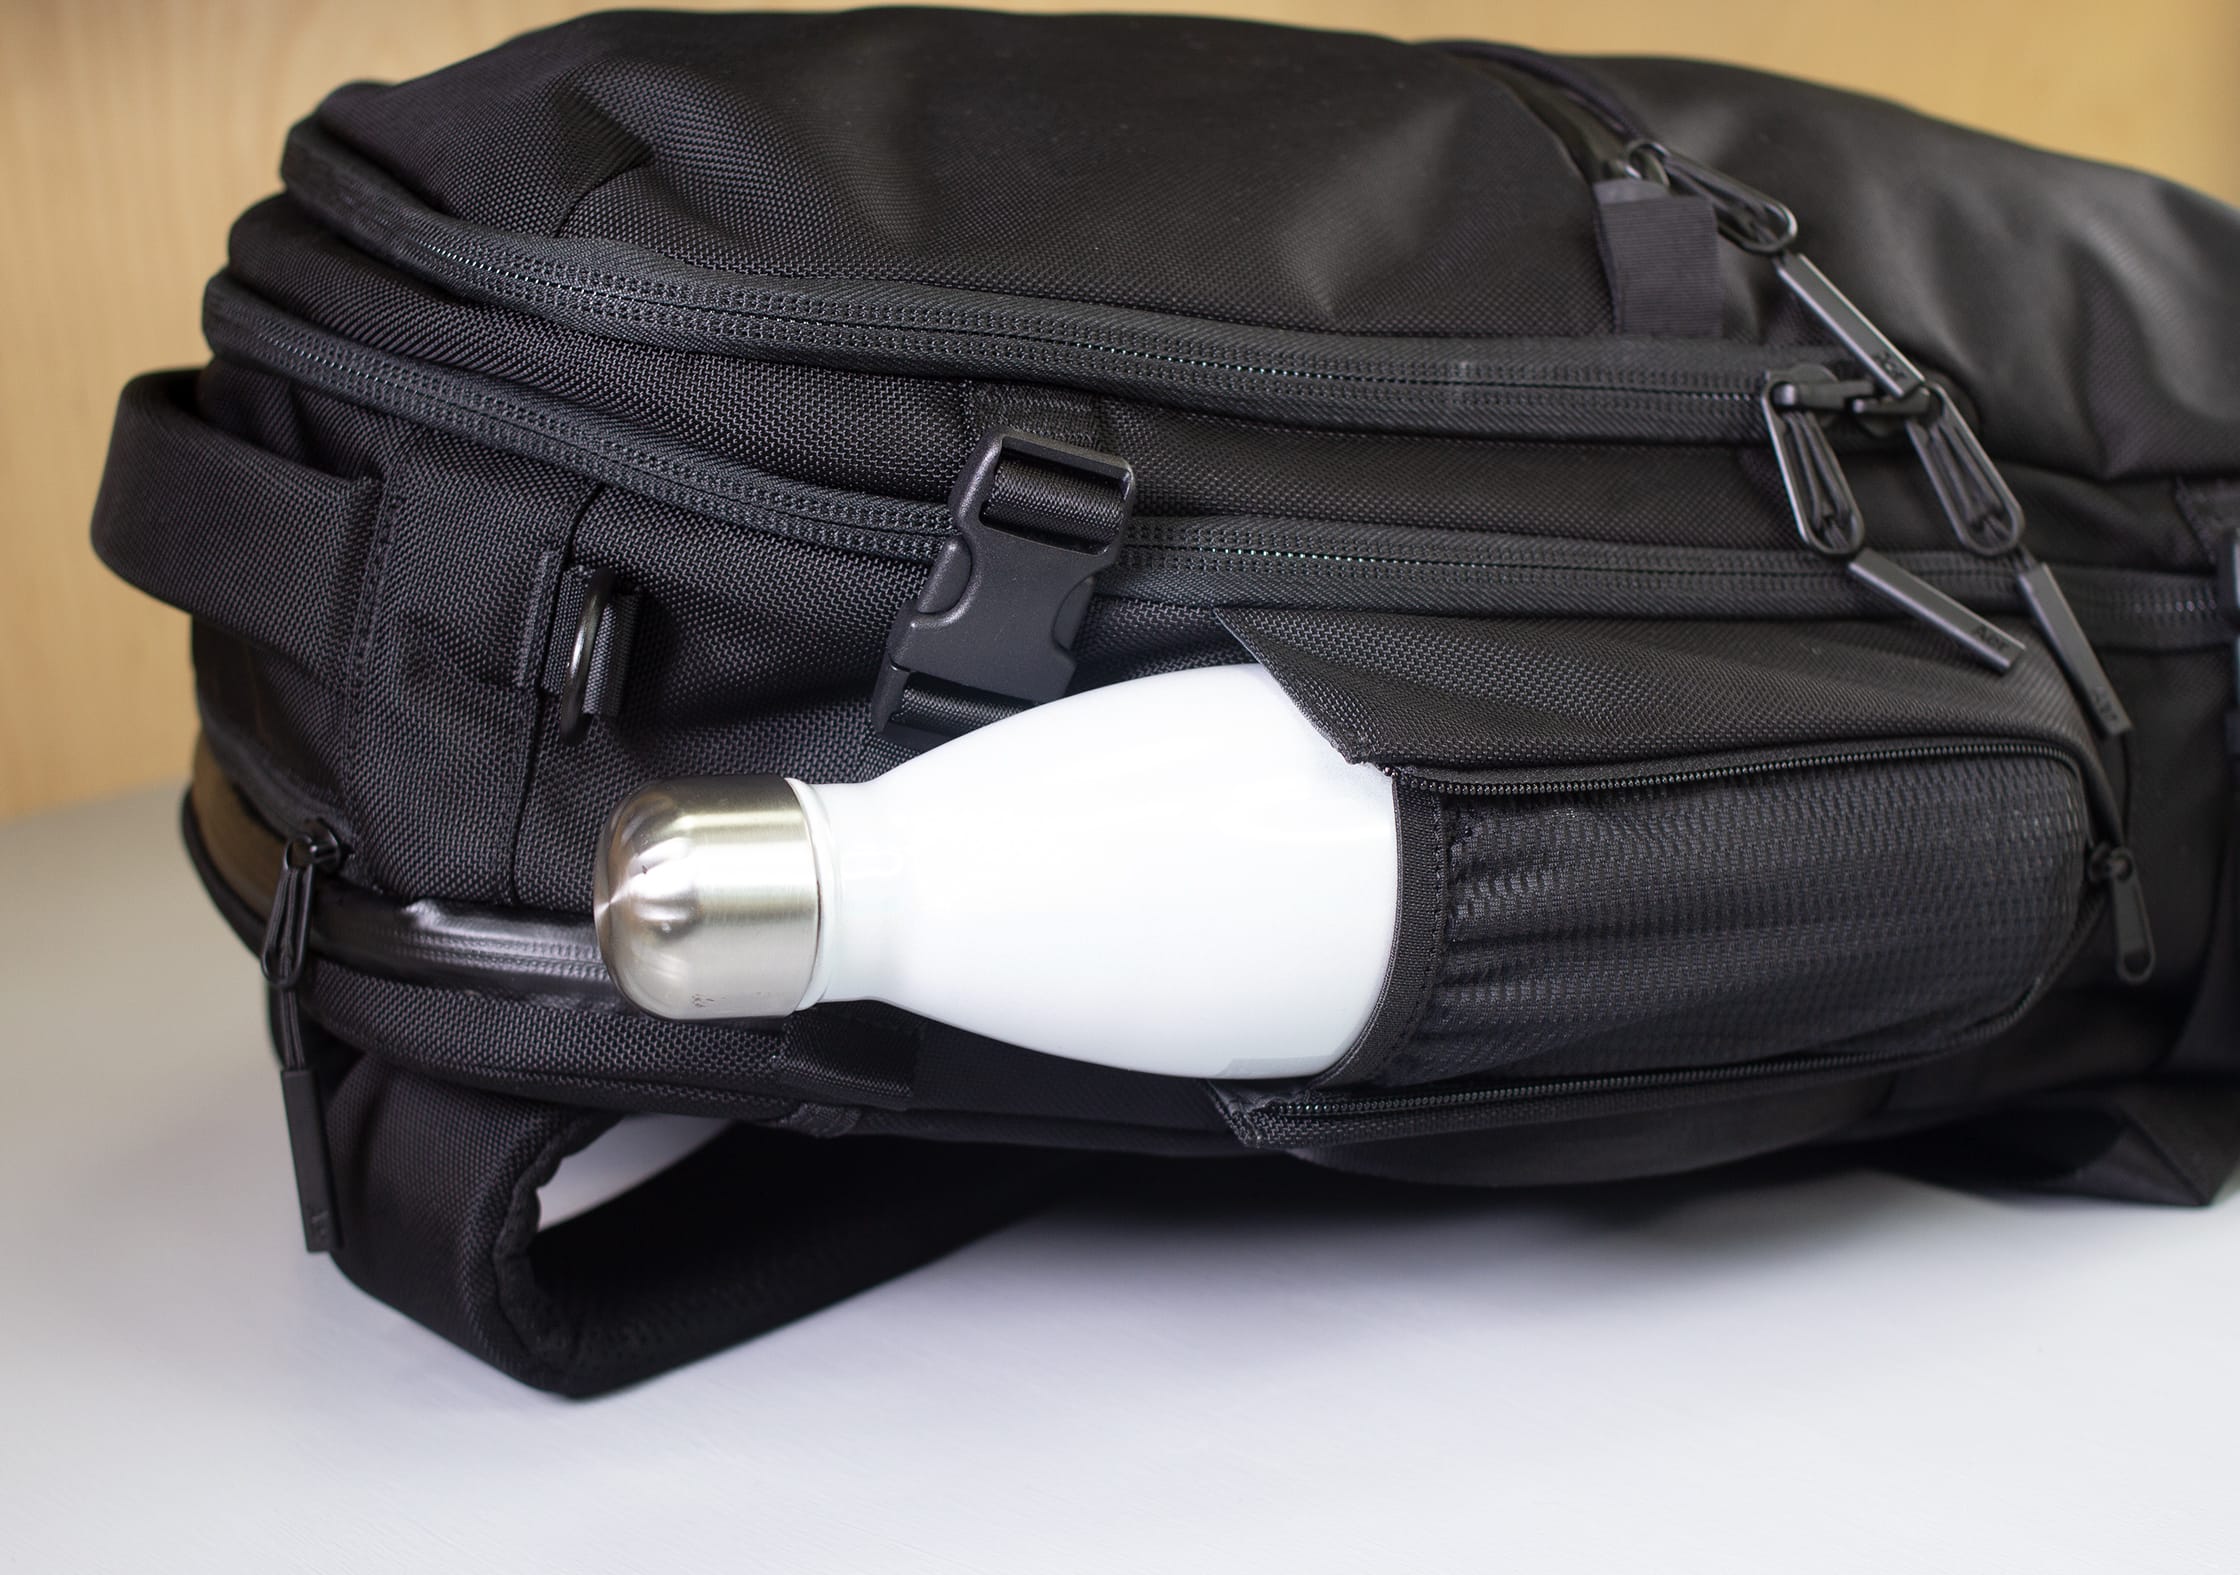
The next exterior component is Aer’s classic stealth water bottle pocket. This is tucked away on the side of the pack—you kind of think there’s a little seam on the side and then you’re like, “Ooh, what’s that?! it’s a zipper!” BOOM!
Unzip that bad boy and you’ve got a long pocket that can be used to secure water bottles, umbrellas, etc. We really like how it stays flush against the pack when not in use, and it looks really well-integrated. There’s not a bunch of mesh hanging out like you might see on other bags.
There is a D-ring right above that water bottle pocket—and, to be honest, we weren’t entirely sure what it was for at first, so we asked Aer and got this response:
We added it so you can attach your keys or other small items like a luggage tag, etc. The original purpose was actually for a detachable shoulder strap which we had in earlier versions of the bag, but it wasn’t a feature people were really asking for.
So, there you have it—you can attach smaller items there to your hearts content. And good call on nixing the shoulder strap, Aer! (At least, we think so.)
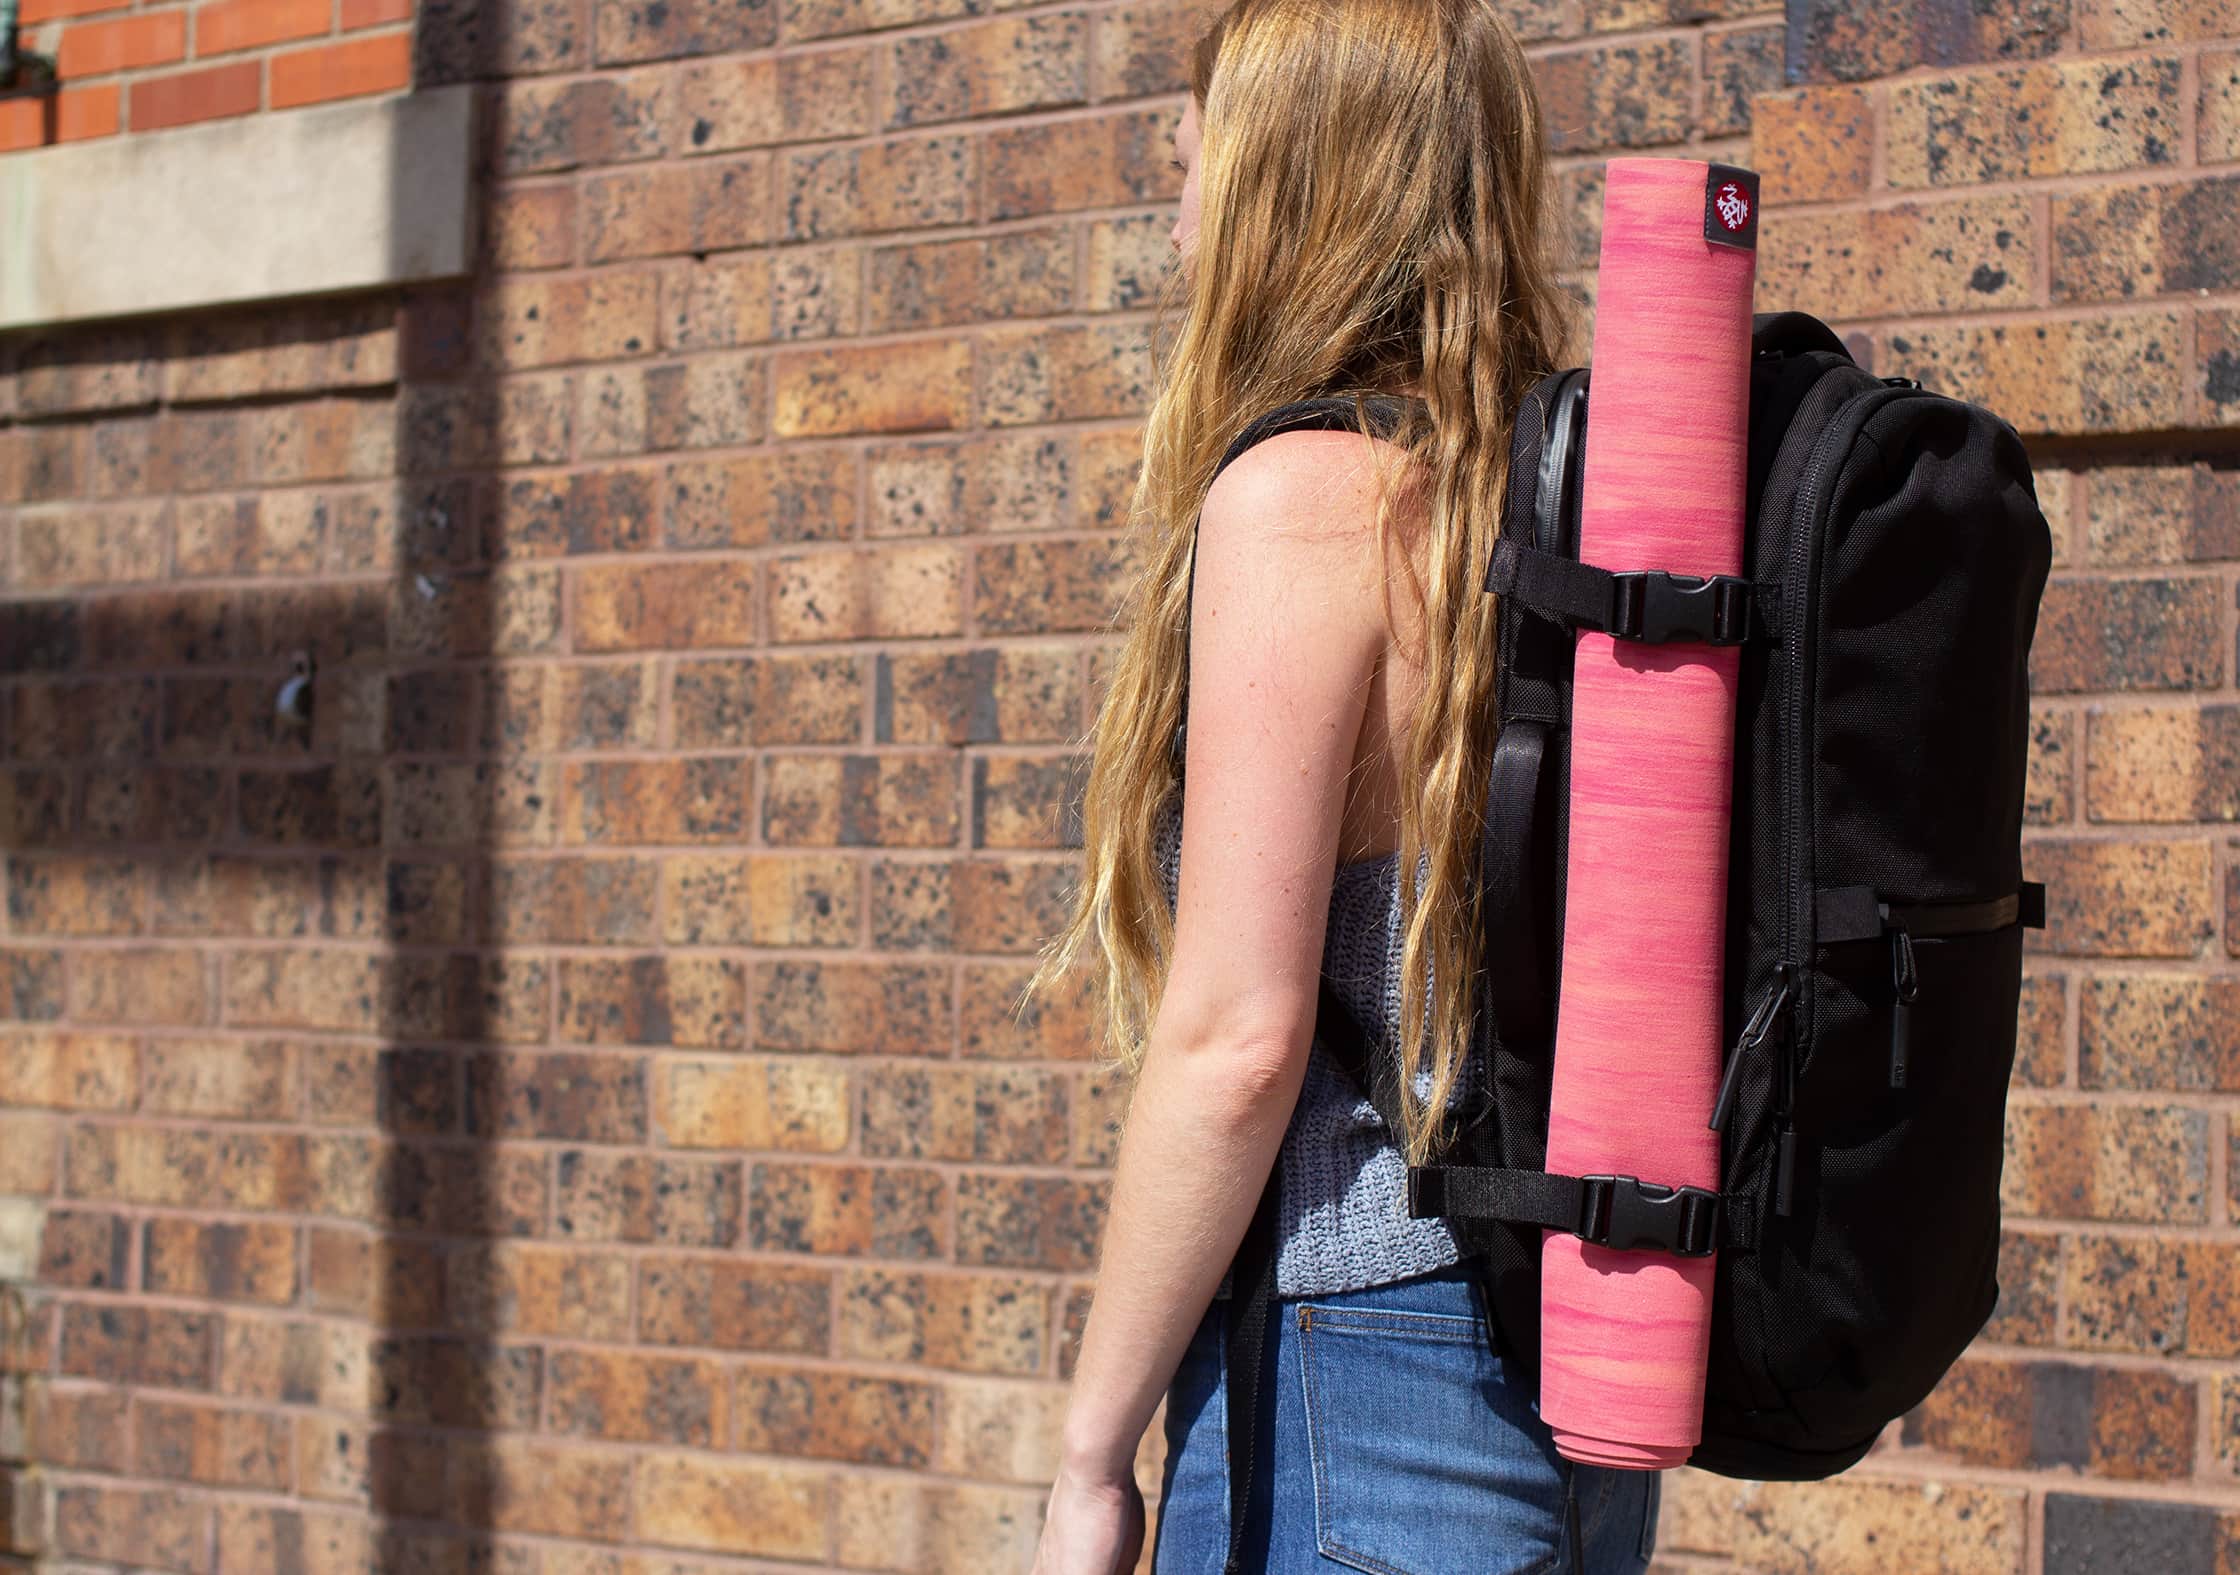
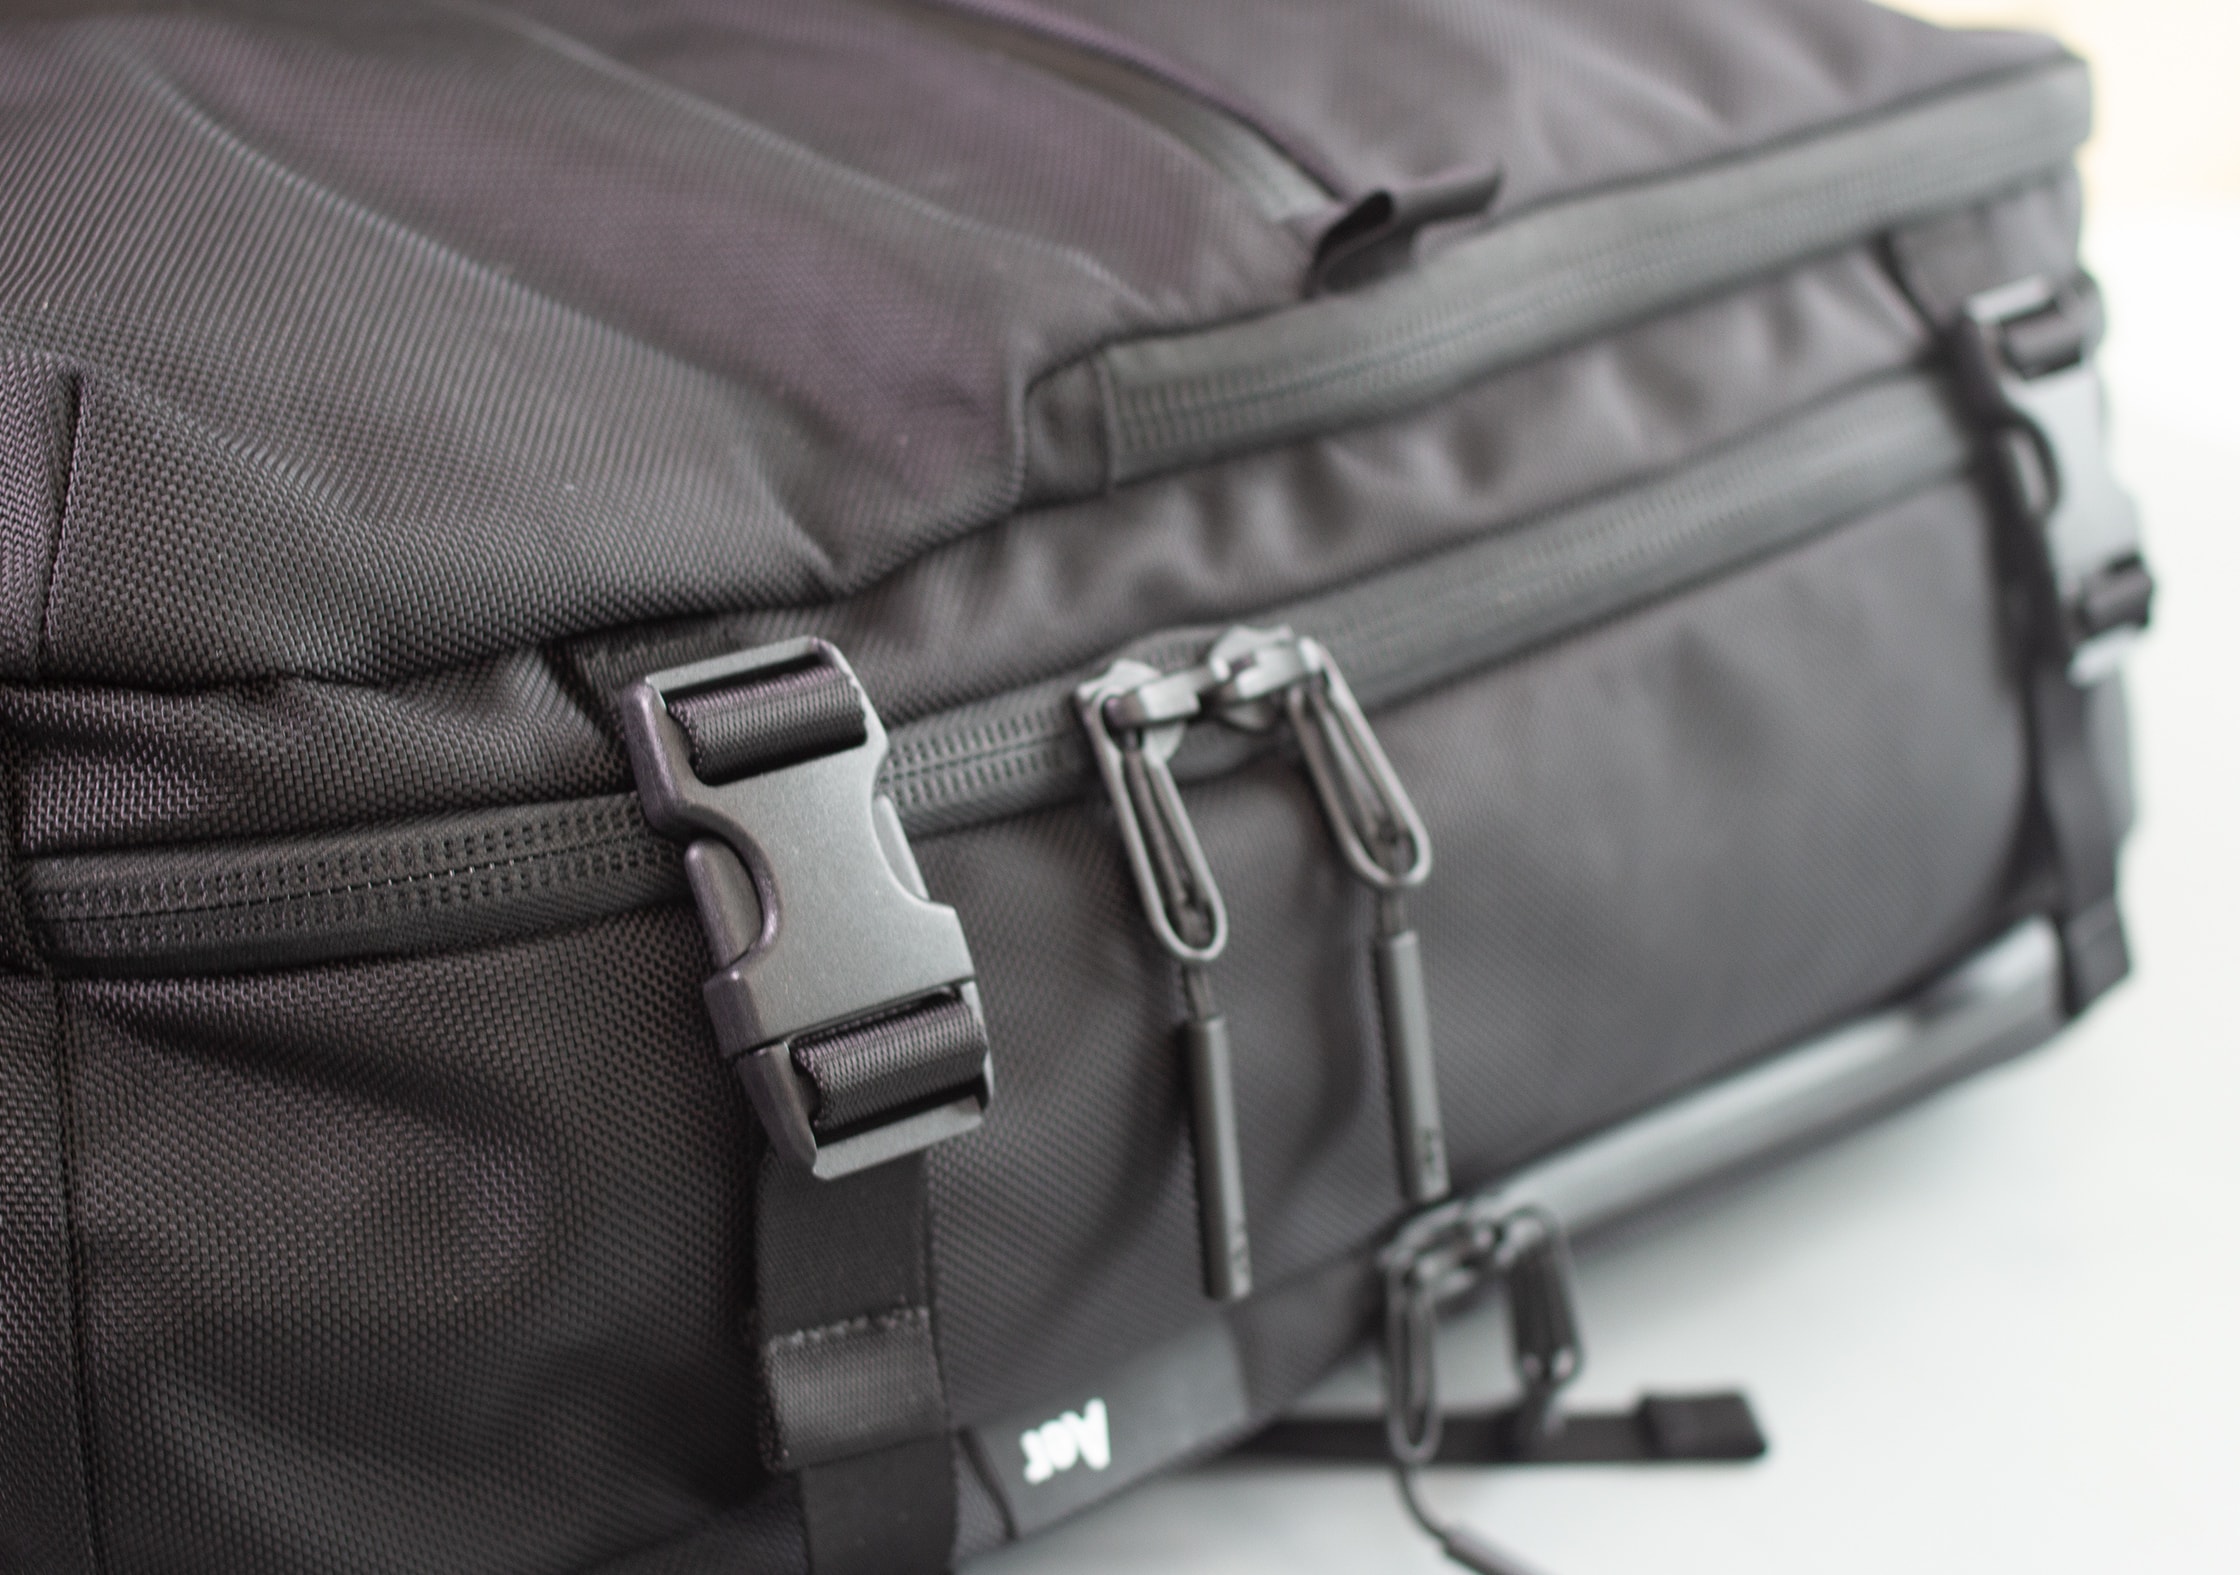
There are compression straps on either side of the bag, and once again, we think Aer has done a great job with this for multiple reasons. You can strap items onto the side of your pack here, like a yoga mat or a jacket—but these straps also really compress the bag down.
If you want to use this bag as a daypack during your travels, compressing it down can give it a much lower profile and makes you look a little less ridiculous. There’s nothing that says “tourist” quite like heading down to the beach with a 35 liter travel pack that sticks a solid foot-and-a-half off your back.
Don’t be that guy. Use compression straps. (Or, snag a compressible daypack, like the Matador DL16!)
The only problem we’ve noticed is that these straps make accessing the main clamshell a bit tedious, as you have to unbuckle the compression straps to open it. This is a problem that many bags have, but we’ve seen some nice solutions to prevent it… We kind of wish Aer had put more thought into this compression system to avoid this, but it’s not a major issue.
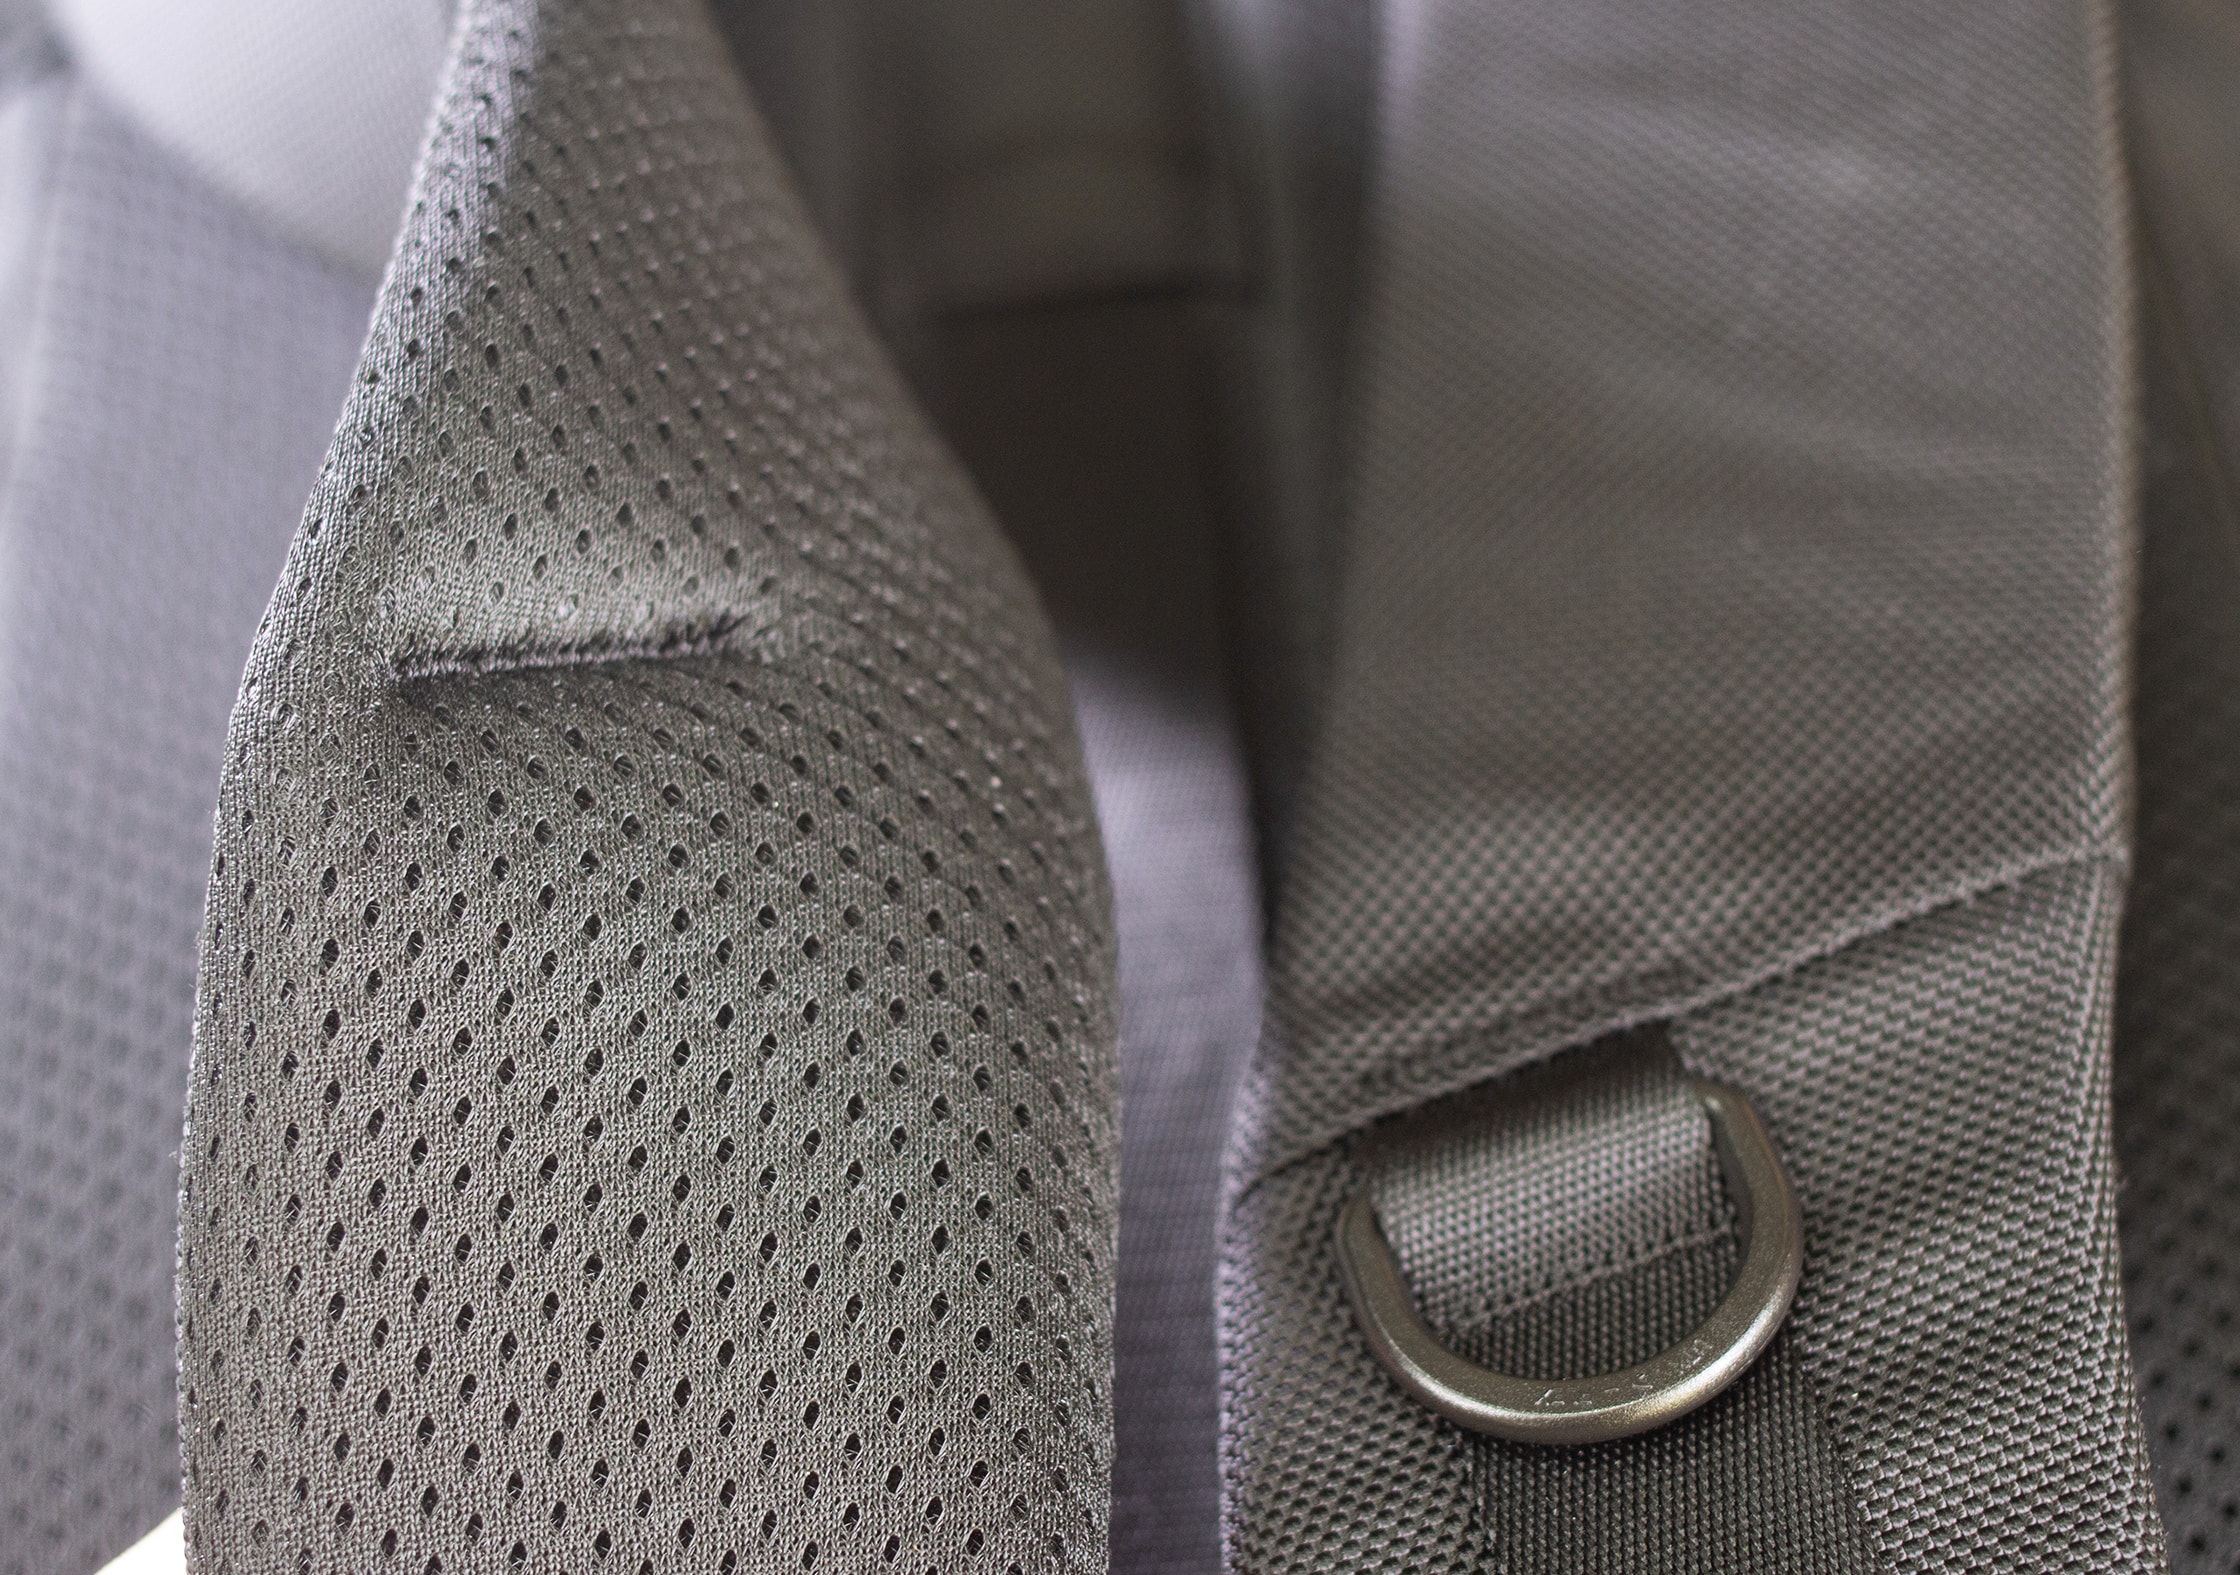
Moving on to the harness system, you’ll find some pretty thick straps here. It’s important to note that one of the cons in our Aer Travel Pack 1 review (that we posted about a year ago) was that the foam wasn’t quite dense enough and the straps weren’t quite as thick as we’d like to see. We’re happy to say that they’ve made these quite a bit thicker! They’ve definitely taken feedback from their customers and reviewers like us, and incorporated that into this new design. Big props to Aer, they’re clearly always trying to improve—and for that, we thank them!
There is an adjustable and a removable sternum strap, which is pretty standard. We should note that it’s securely attached to the shoulder strap, too—it’s not going to randomly fall off, as we’ve seen in some other bags that have slightly fancier sternum strap systems.
There is a singular D-ring here as well, which you can use to attach… certain… things…? This is really up to you—we have yet to find a great use for this.
So, outside of what we’ve discussed above, there are a few additional changes with the harness system on this bag versus the original.
- There is an option to add a hip belt, which is fantastic. (FYI: It is sold separately!)
- The load lifters that were on the original bag have been removed from this iteration.
Yes, yes. A true rollercoaster of emotions. We, too, went through quite a high and then a devastating low as we discovered these two changes. Once we got over the loss of our beloved load-lifter straps, we decided to send Aer a quick message, asking them why they thought to do such a tragic thing. Their response?
In terms of the load lifters, one of our goals was to clean up the design and reduce dangling straps and weight. We found that the load lifters weren’t as effective as can be on a bag this size, so we removed them.
Aer Travel Pack 2 Harness System in Use
Well, we can’t really argue with that. While the load lifter straps on the Aer Travel Pack 1 did provide a nice boost to the carry, they weren’t necessarily groundbreaking—and you would really only benefit from them with a very full pack. We can also confirm that they did not provide for a #danglefreeexperience, and this setup is much cleaner.
Do we miss the load-lifters? Kind of. Is it enough for us to throw this bag out the window? Most definitely not.
At the end of the day, this is only a 33-liter bag. It doesn’t necessarily need load-lifters, but you’ll probably notice that the bag has a tendency to sag down your back if you have it really jam-packed. We think they made a logical choice here—the lack of dangling straps and clean look you get from removing these seems to be well worth the slight sagging you’ll find from time to time.
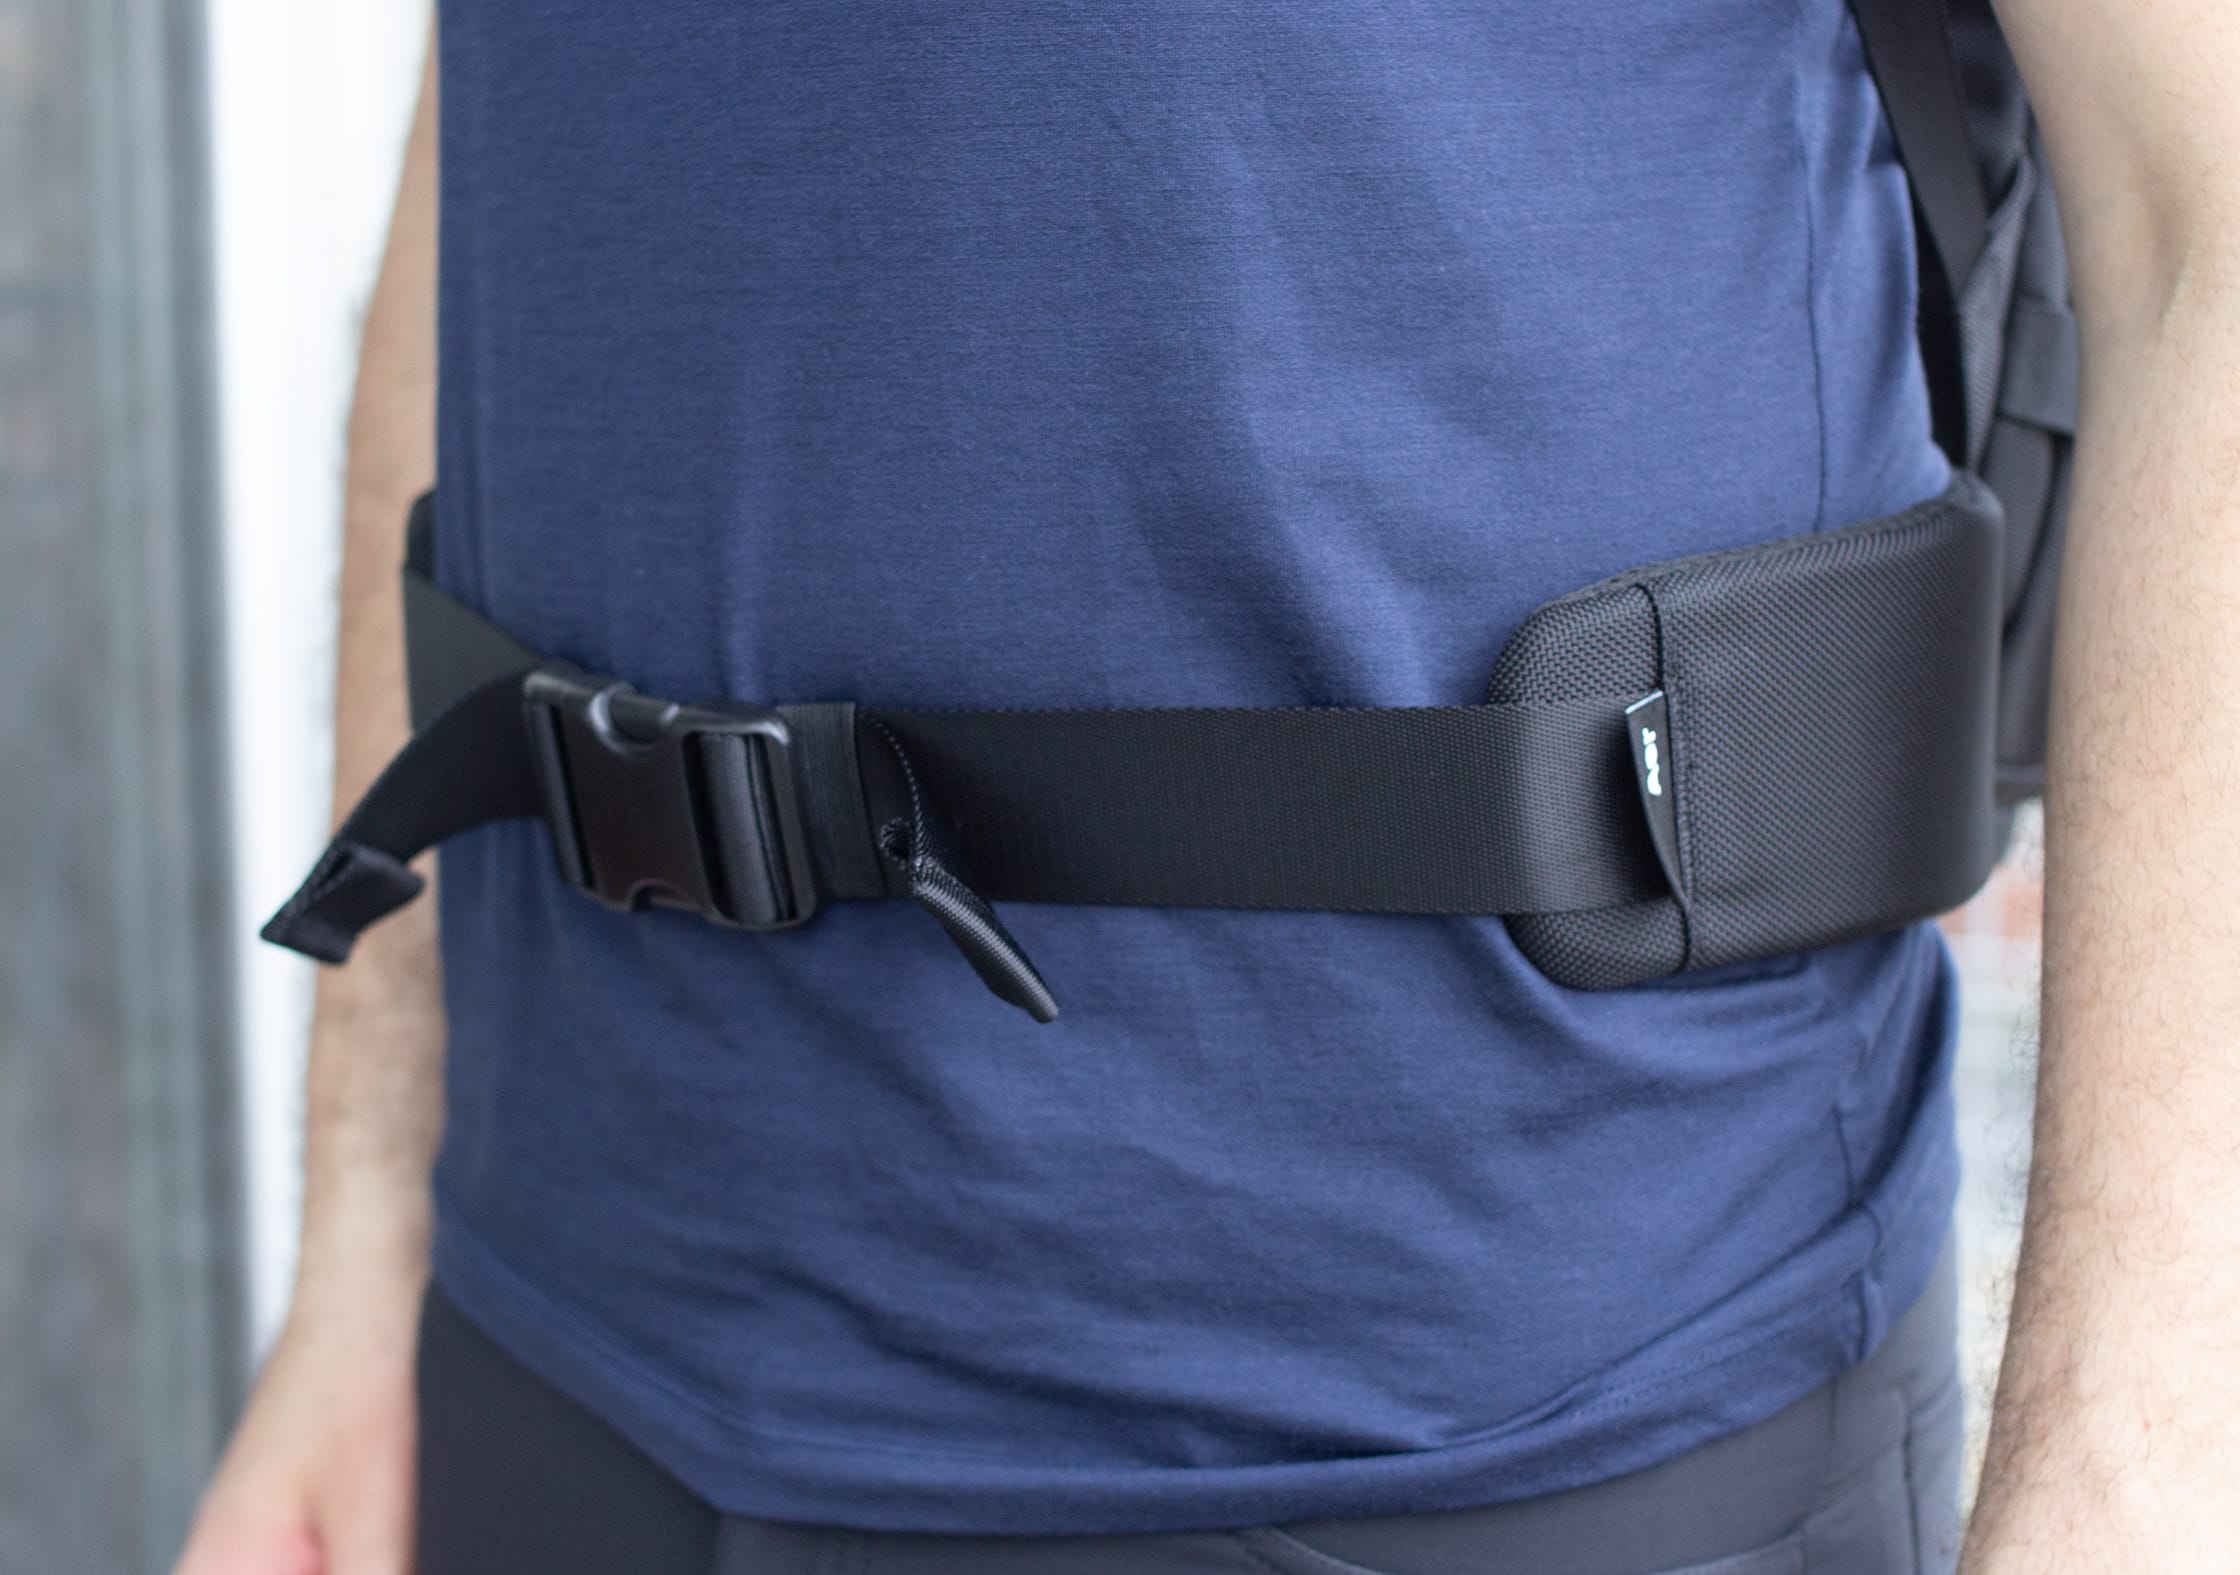
But enough on that—let’s remind ourselves that we have an awesome hip belt on this bag now! We think this is pretty much the perfect hip belt for a bag of this size. It’s removable, it’s got the right amount of padding without being bulky, and it’s about the right size. What more could you want?
Aer has really nailed it here! Although… we do have one minor complaint. This thing can poke you in the sides if it’s flying around and not folded right. This is very minor, and as it breaks in it should be less of an issue. But… we like to nitpick.
Also, keep in mind that there is no option to hide this harness system. Some people really love the option to hide those straps—but for the most part, we use our backpacks as backpacks, so we don’t really see the need for hiding the straps. Your mileage may vary.
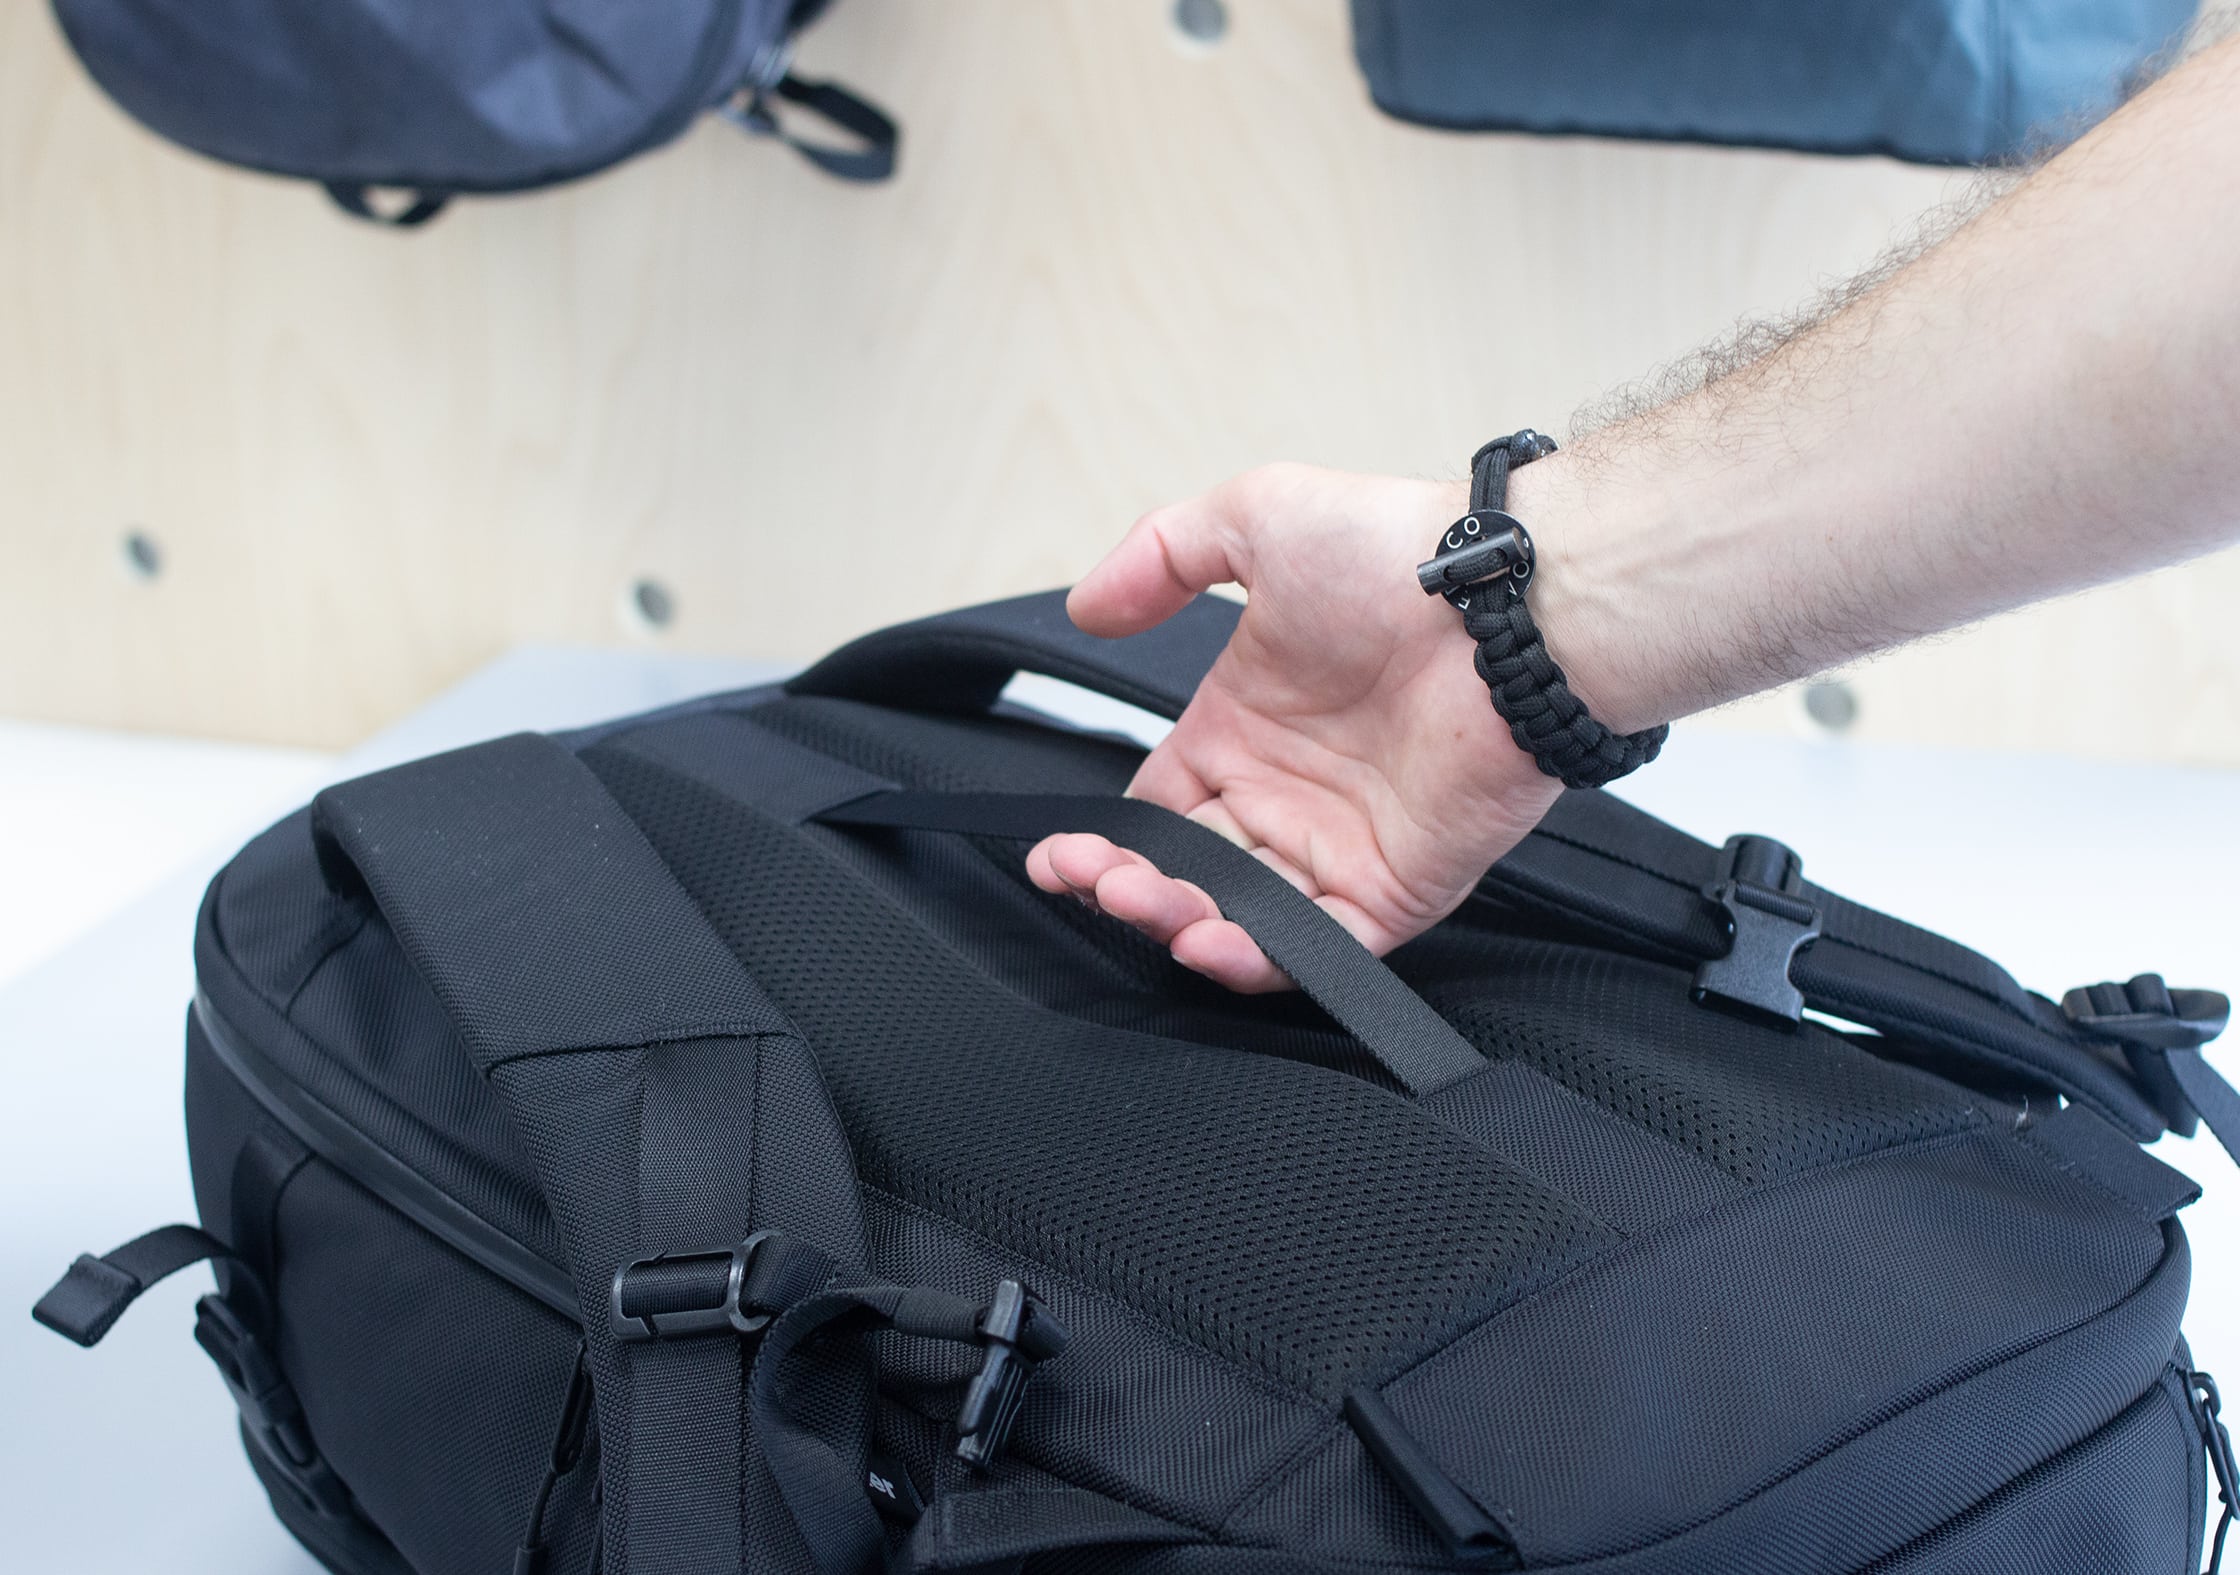
Lastly, on this back panel there is some padded mesh and a grab panel that you can use to pick the bag up (albeit, at kind of an odd angle). This is also a luggage pass-through, so if you’re using a roller bag you can just slip the bag on top and pass it through this handle.
If you’ve been following us for any amount of time, you probably know that we’re huge fans of one-bag travel, and therefore will have virtually no use for this feature. But it’s there if you want it.
Side note: If you want some tips on how to lower the amount of gear—AKA, clothes—you’re packing on your trips, check out our merino wool guide for a crash course on the most magical fabric on the planet. It’ll save you space and it might just save your life! (…If you frequently vacation in the Arctic or find yourself in situations where a lighter pack means the difference between life and death. Not terribly common, but you never know what could happen out there!)
Inside the Pack
Much like the Aer Travel Pack 1, there are a bunch of great pockets and organizational features going on inside this thing. We’ll start with the quick grab pocket on the top.
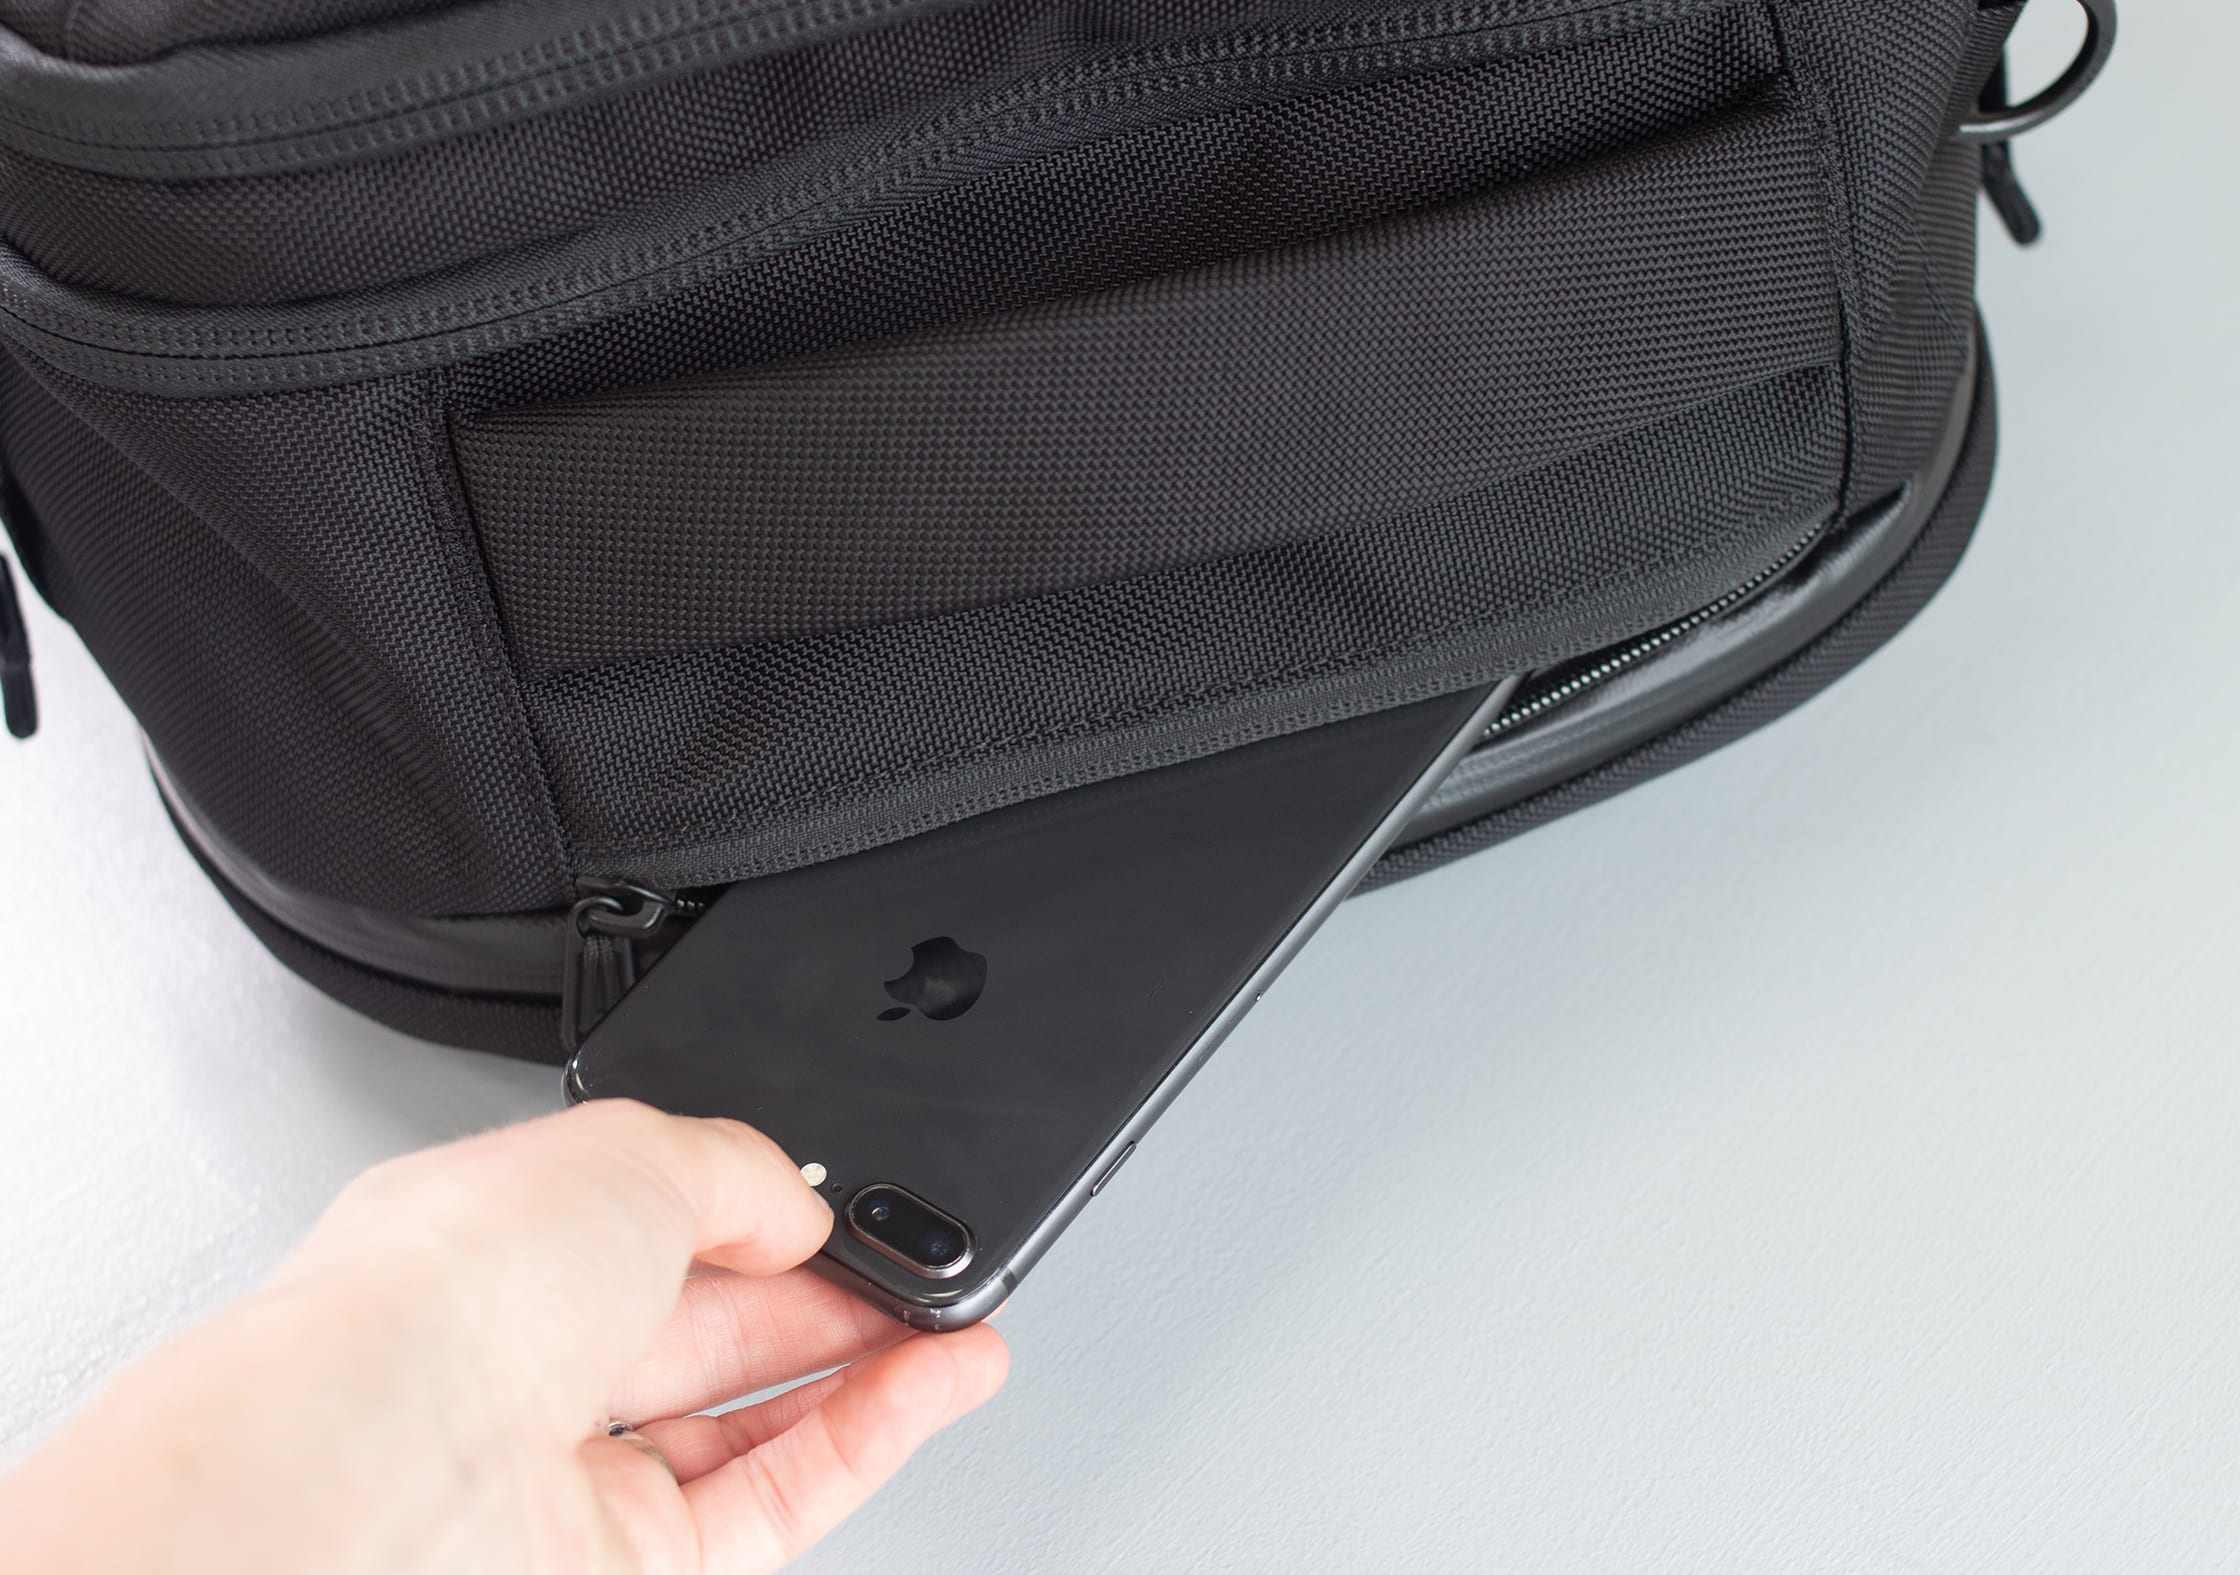
This pocket is very similar to the old quick-grab pocket, but they have made one slight change—it is now quite a bit wider. On the Travel Pack 1 it was a bit of a challenge to fit a larger phone in here—like an iPhone plus—but now it easily slides in. Big win here, and a total no-brainer.
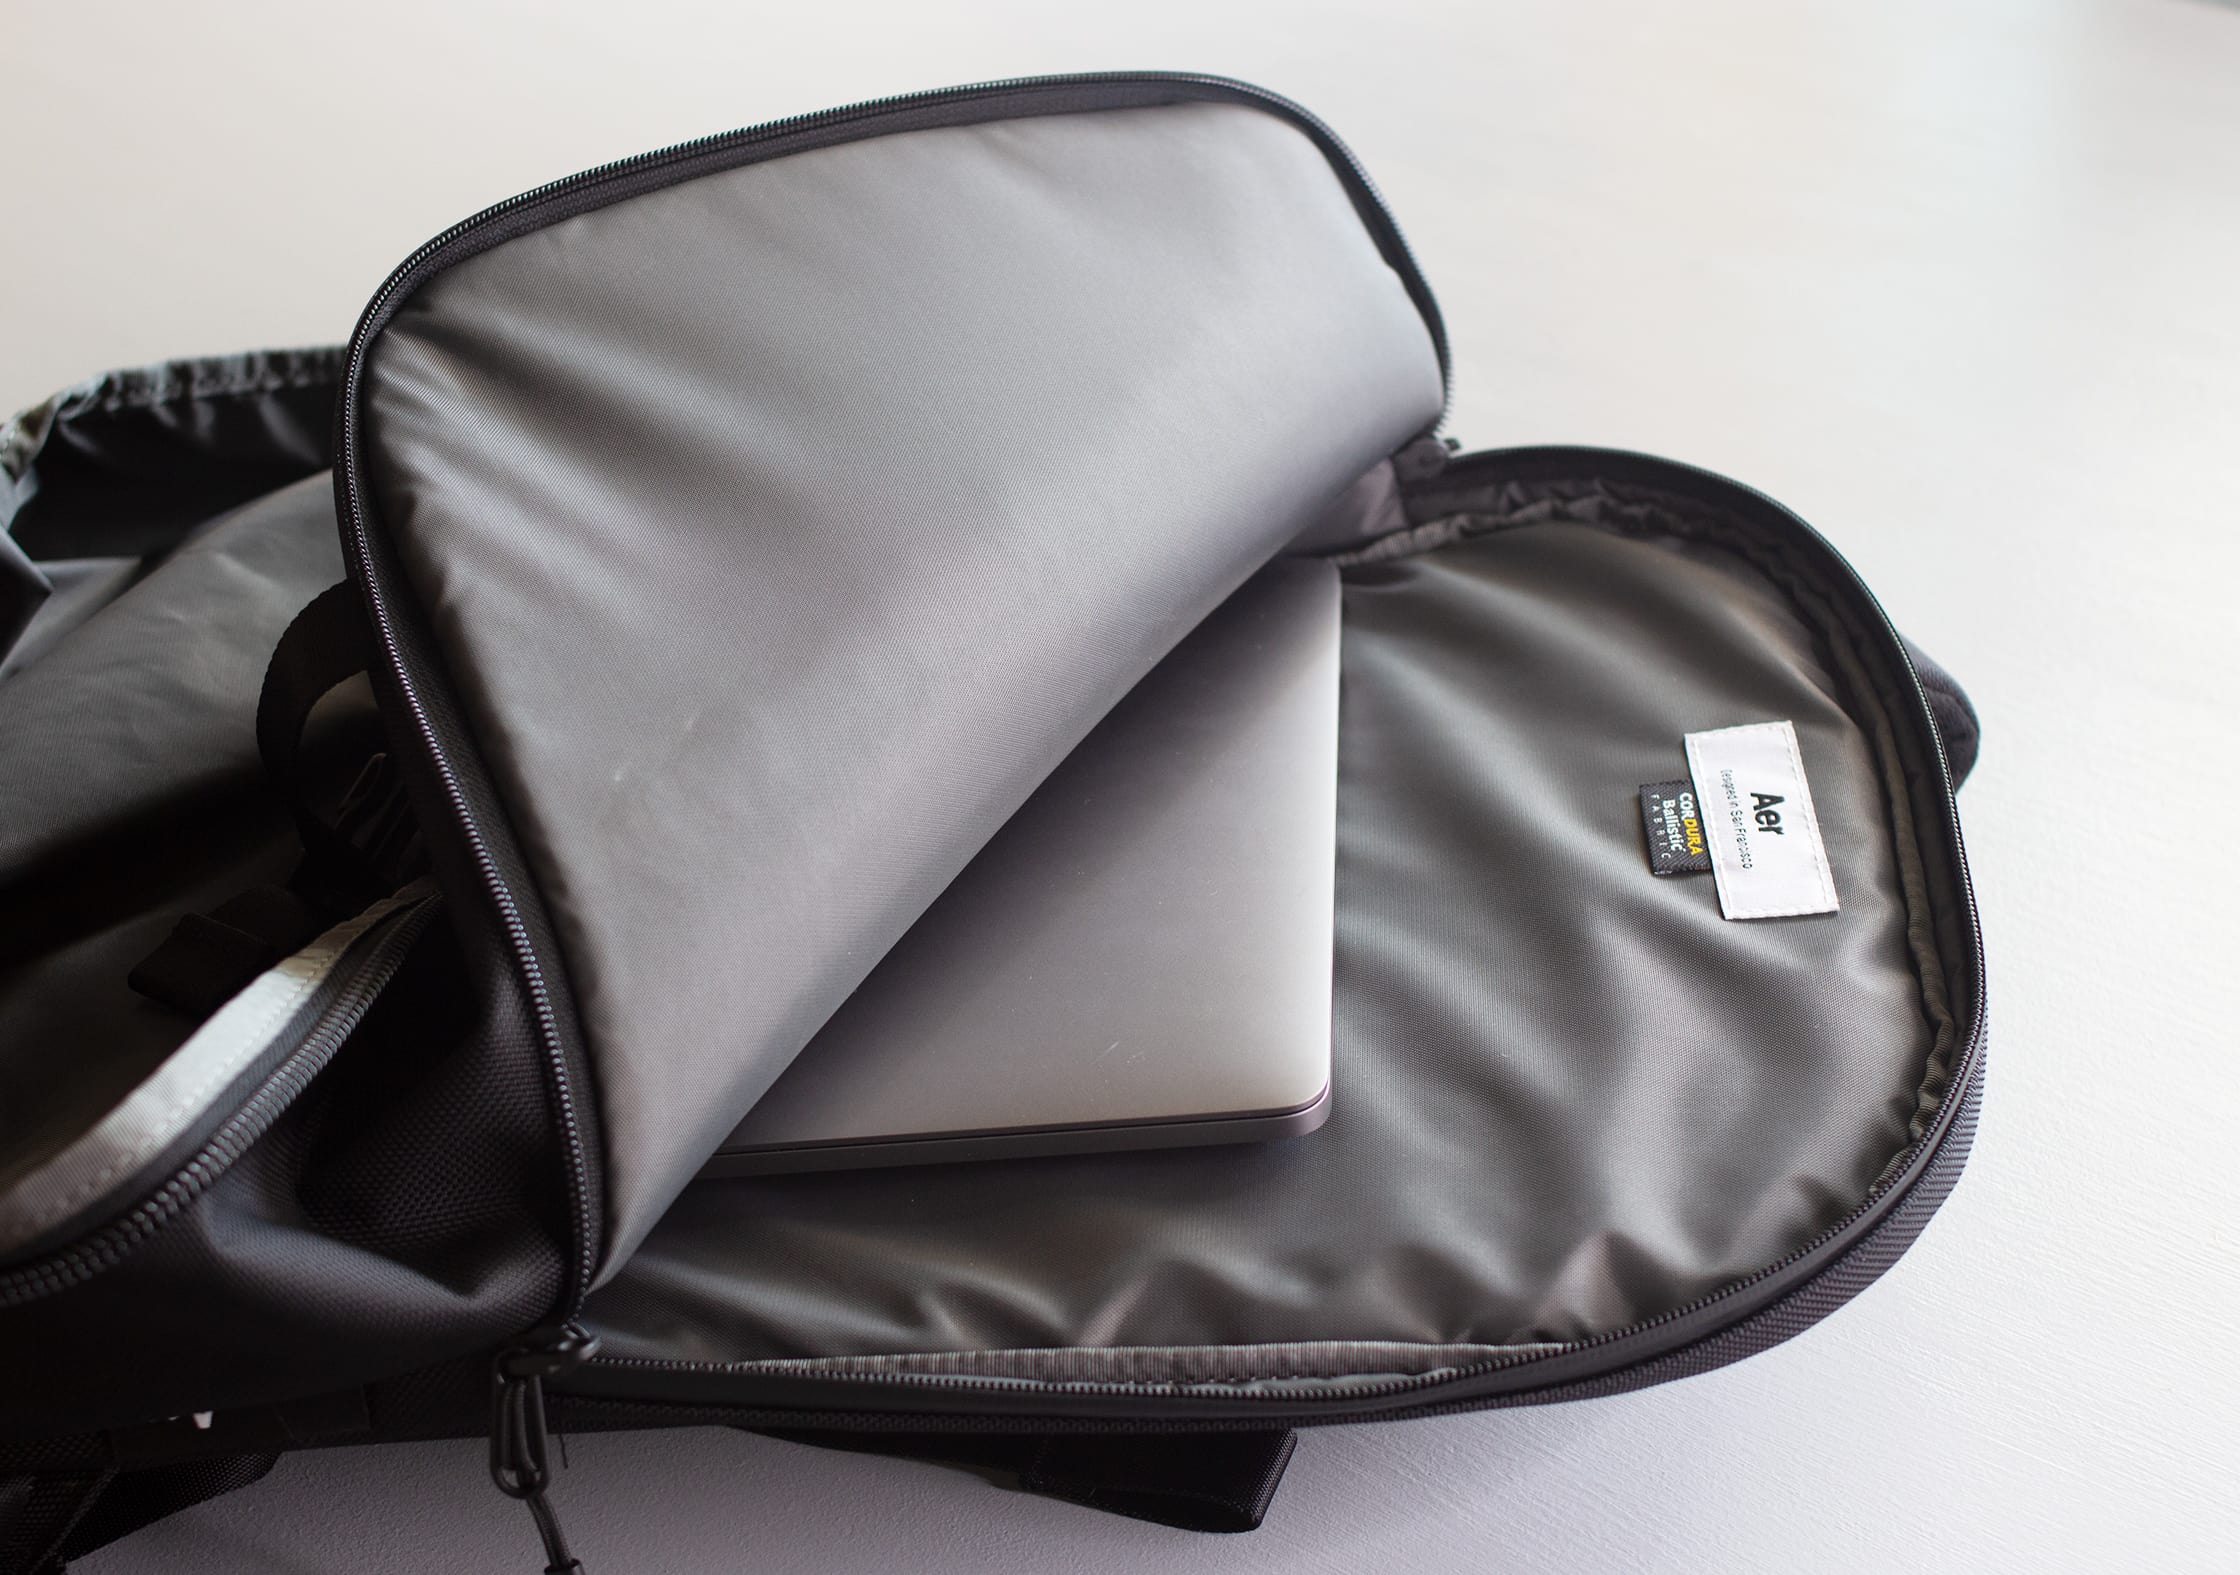
On the backside of the bag is the laptop compartment. This is a pretty straightforward, no-frills compartment, but we do have a couple things to mention. On the positive end of things, there is a YKK AquaGuard zipper. The zips on the Aer Travel Pack 1 were not AquaGuard or weather-resistant, so this is a nice added feature. We’ve tested the original bag in a downpour and had some water seep in, so we’re really excited and glad that Aer decided to include AquaGuard zips on this version. It definitely helps with additional weather resistance in the place where you need it most—your laptop compartment!
However, we do have one nitpick with the design of this laptop compartment. One trick that a lot of companies will do is they’ll actually incorporate a false bottom design. So the laptop compartment would cut off a few inches above the bottom of the bag, meaning your laptop won’t be coming in contact with the ground if you drop your bag.
This seems like an obvious design choice to us, but Aer did not do that with this laptop compartment. Although there’s some pretty good padding on the bottom, it’s not quite as secure as it could be, which is kind of disappointing.
The compartment is also super big—there’s room for varying degrees of laptop sizes in here—so it wouldn’t have really cut into the size of the compartment. Small nitpick, not a huge deal, but just something to bring up. Seems like it would have been simple enough to throw in a false bottom here.
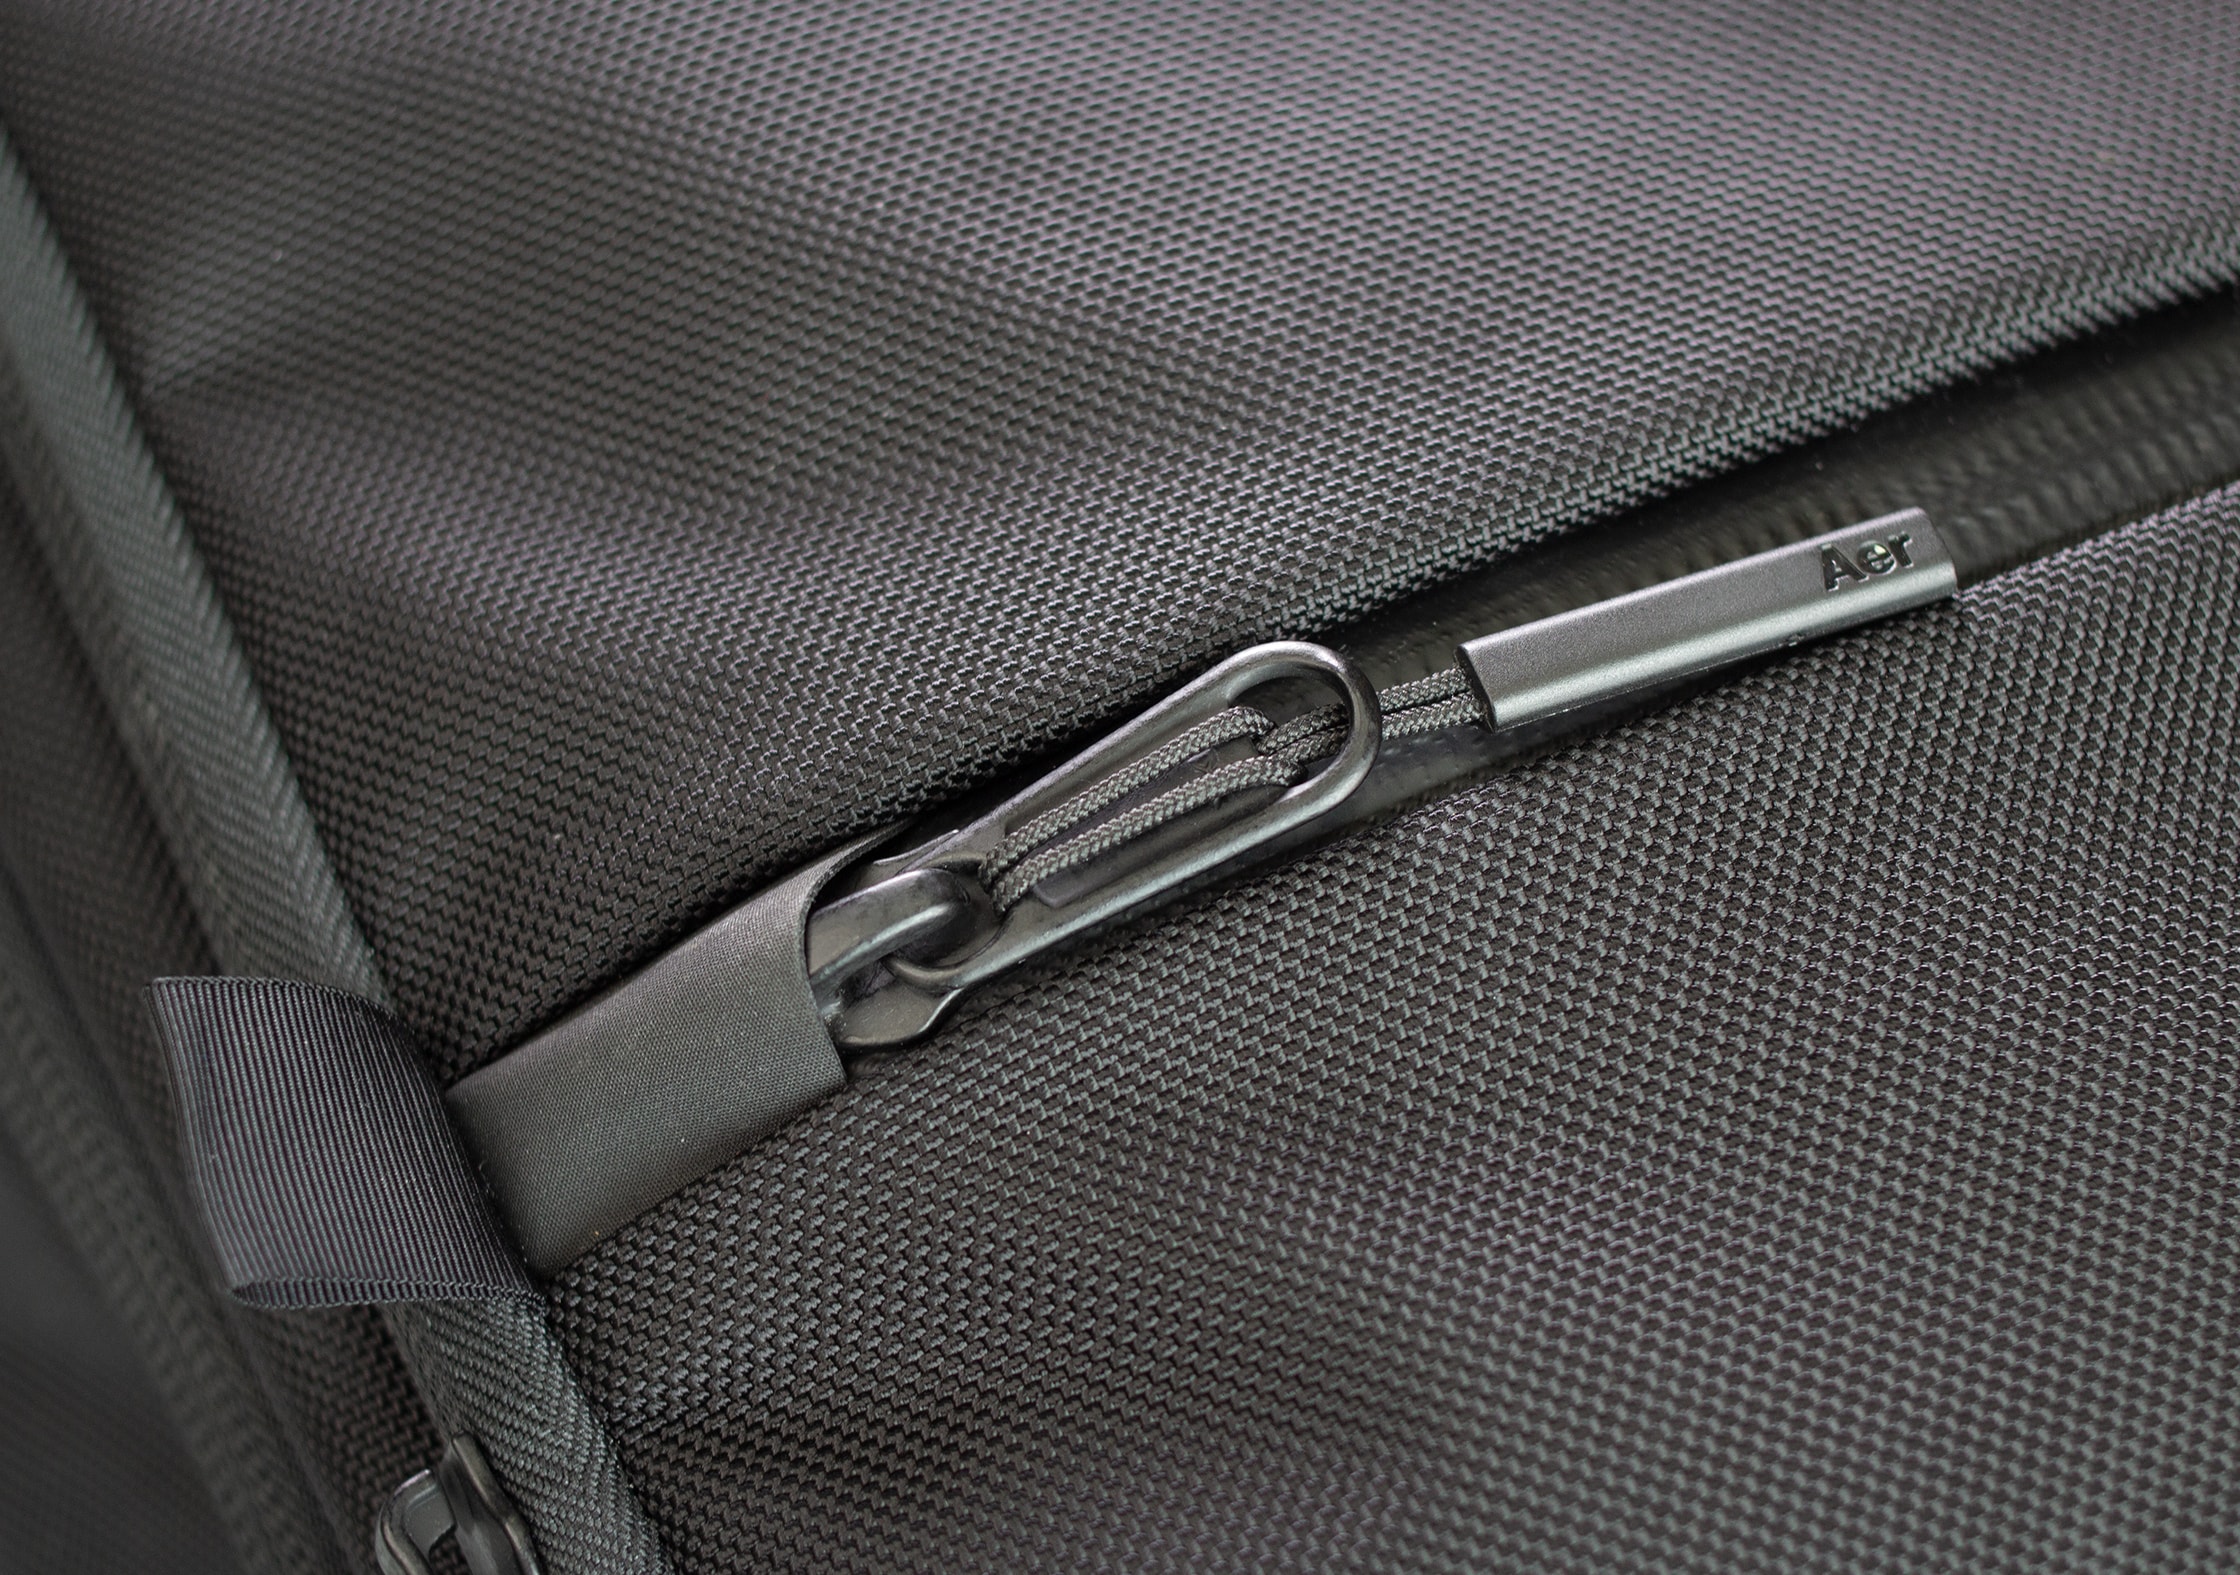
Moving on to the front of the pack, there’s a big, beefy YKK #10 Aquaguard zipper system here. This thing is massive. It’s a little bit overkill for a pocket like this, but it does really fit that classic Aer aesthetic. It really ties the bag together, and that black strip running across just screams “AER!” to us. Plus, we’re not going to complain about the added durability.
One small feature they’ve added here is a separate zipper garage, which will also help with the weather resistance in this pocket. And there are also two small tabs on the side that you can use to hold when you’re zipping this pocket up, which actually help quite a bit. Like, enough that we felt the need to mention them in our written review.
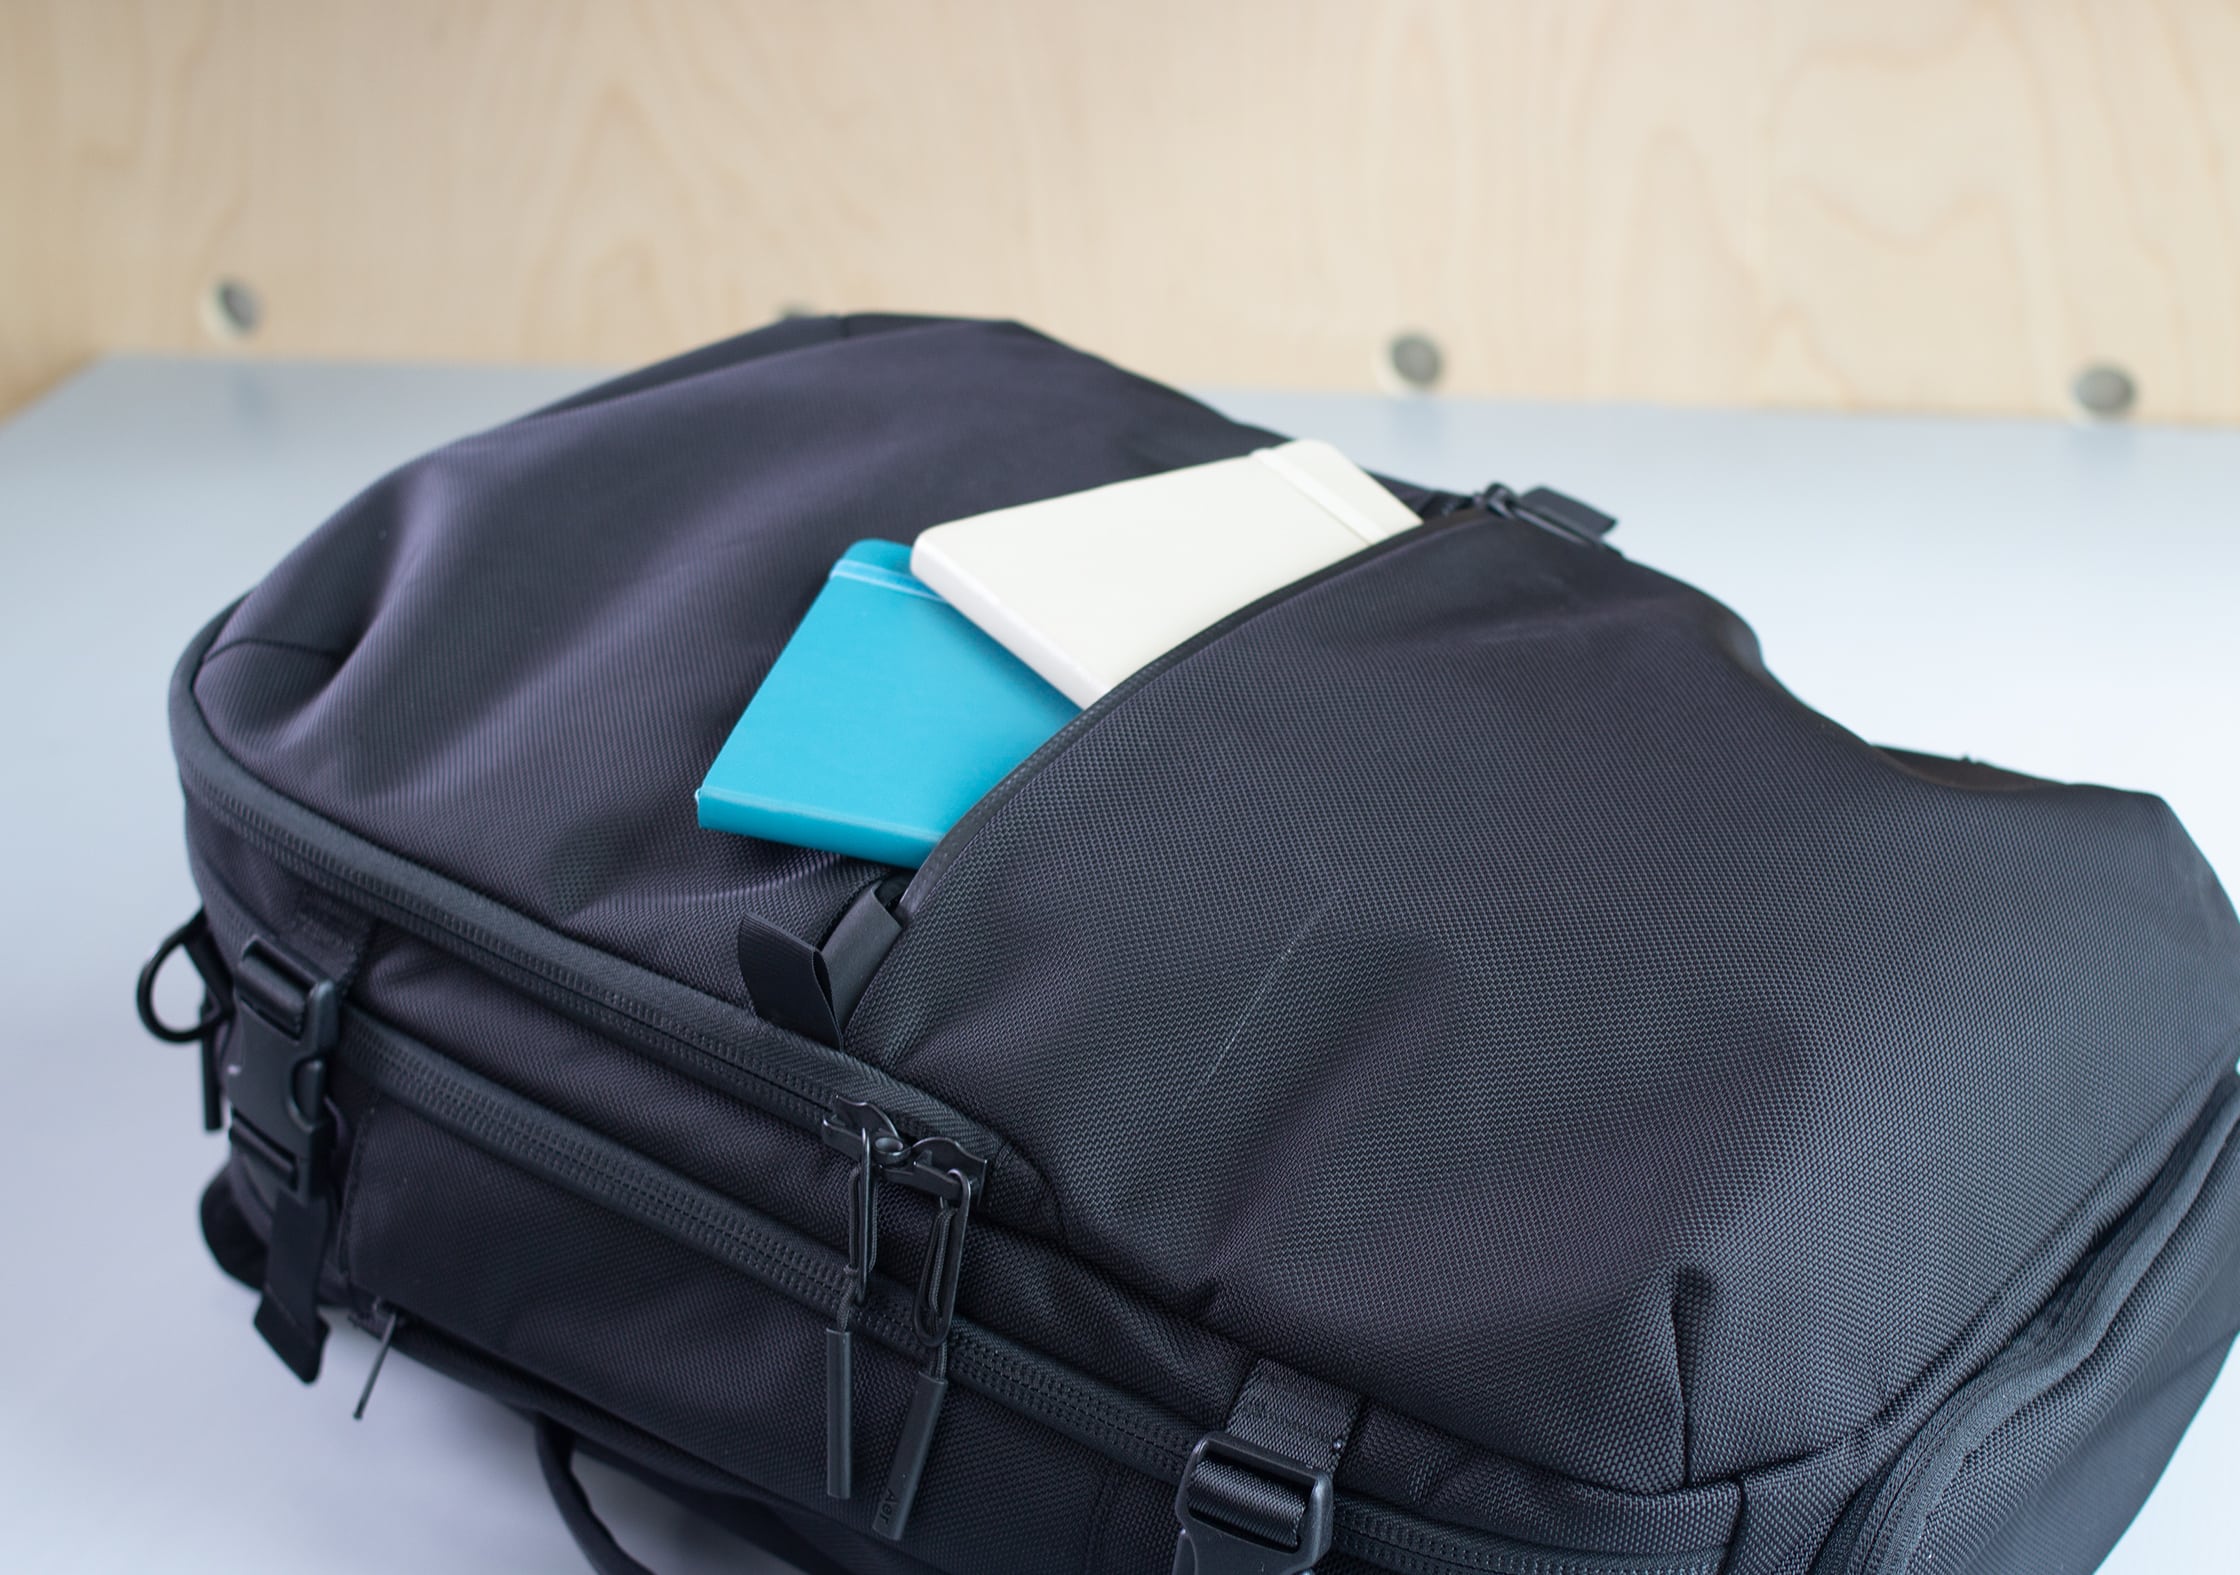
That zipper opens right up to a larger pocket on the bottom half of the bag which gives you plenty of room. It’s important to note that the top half of this exterior area is not a pocket. We actually like that they’ve decided to design it this way as you won’t have anything cutting into the organizer system.
Speaking of organizer systems… let’s take a quick peek through that.
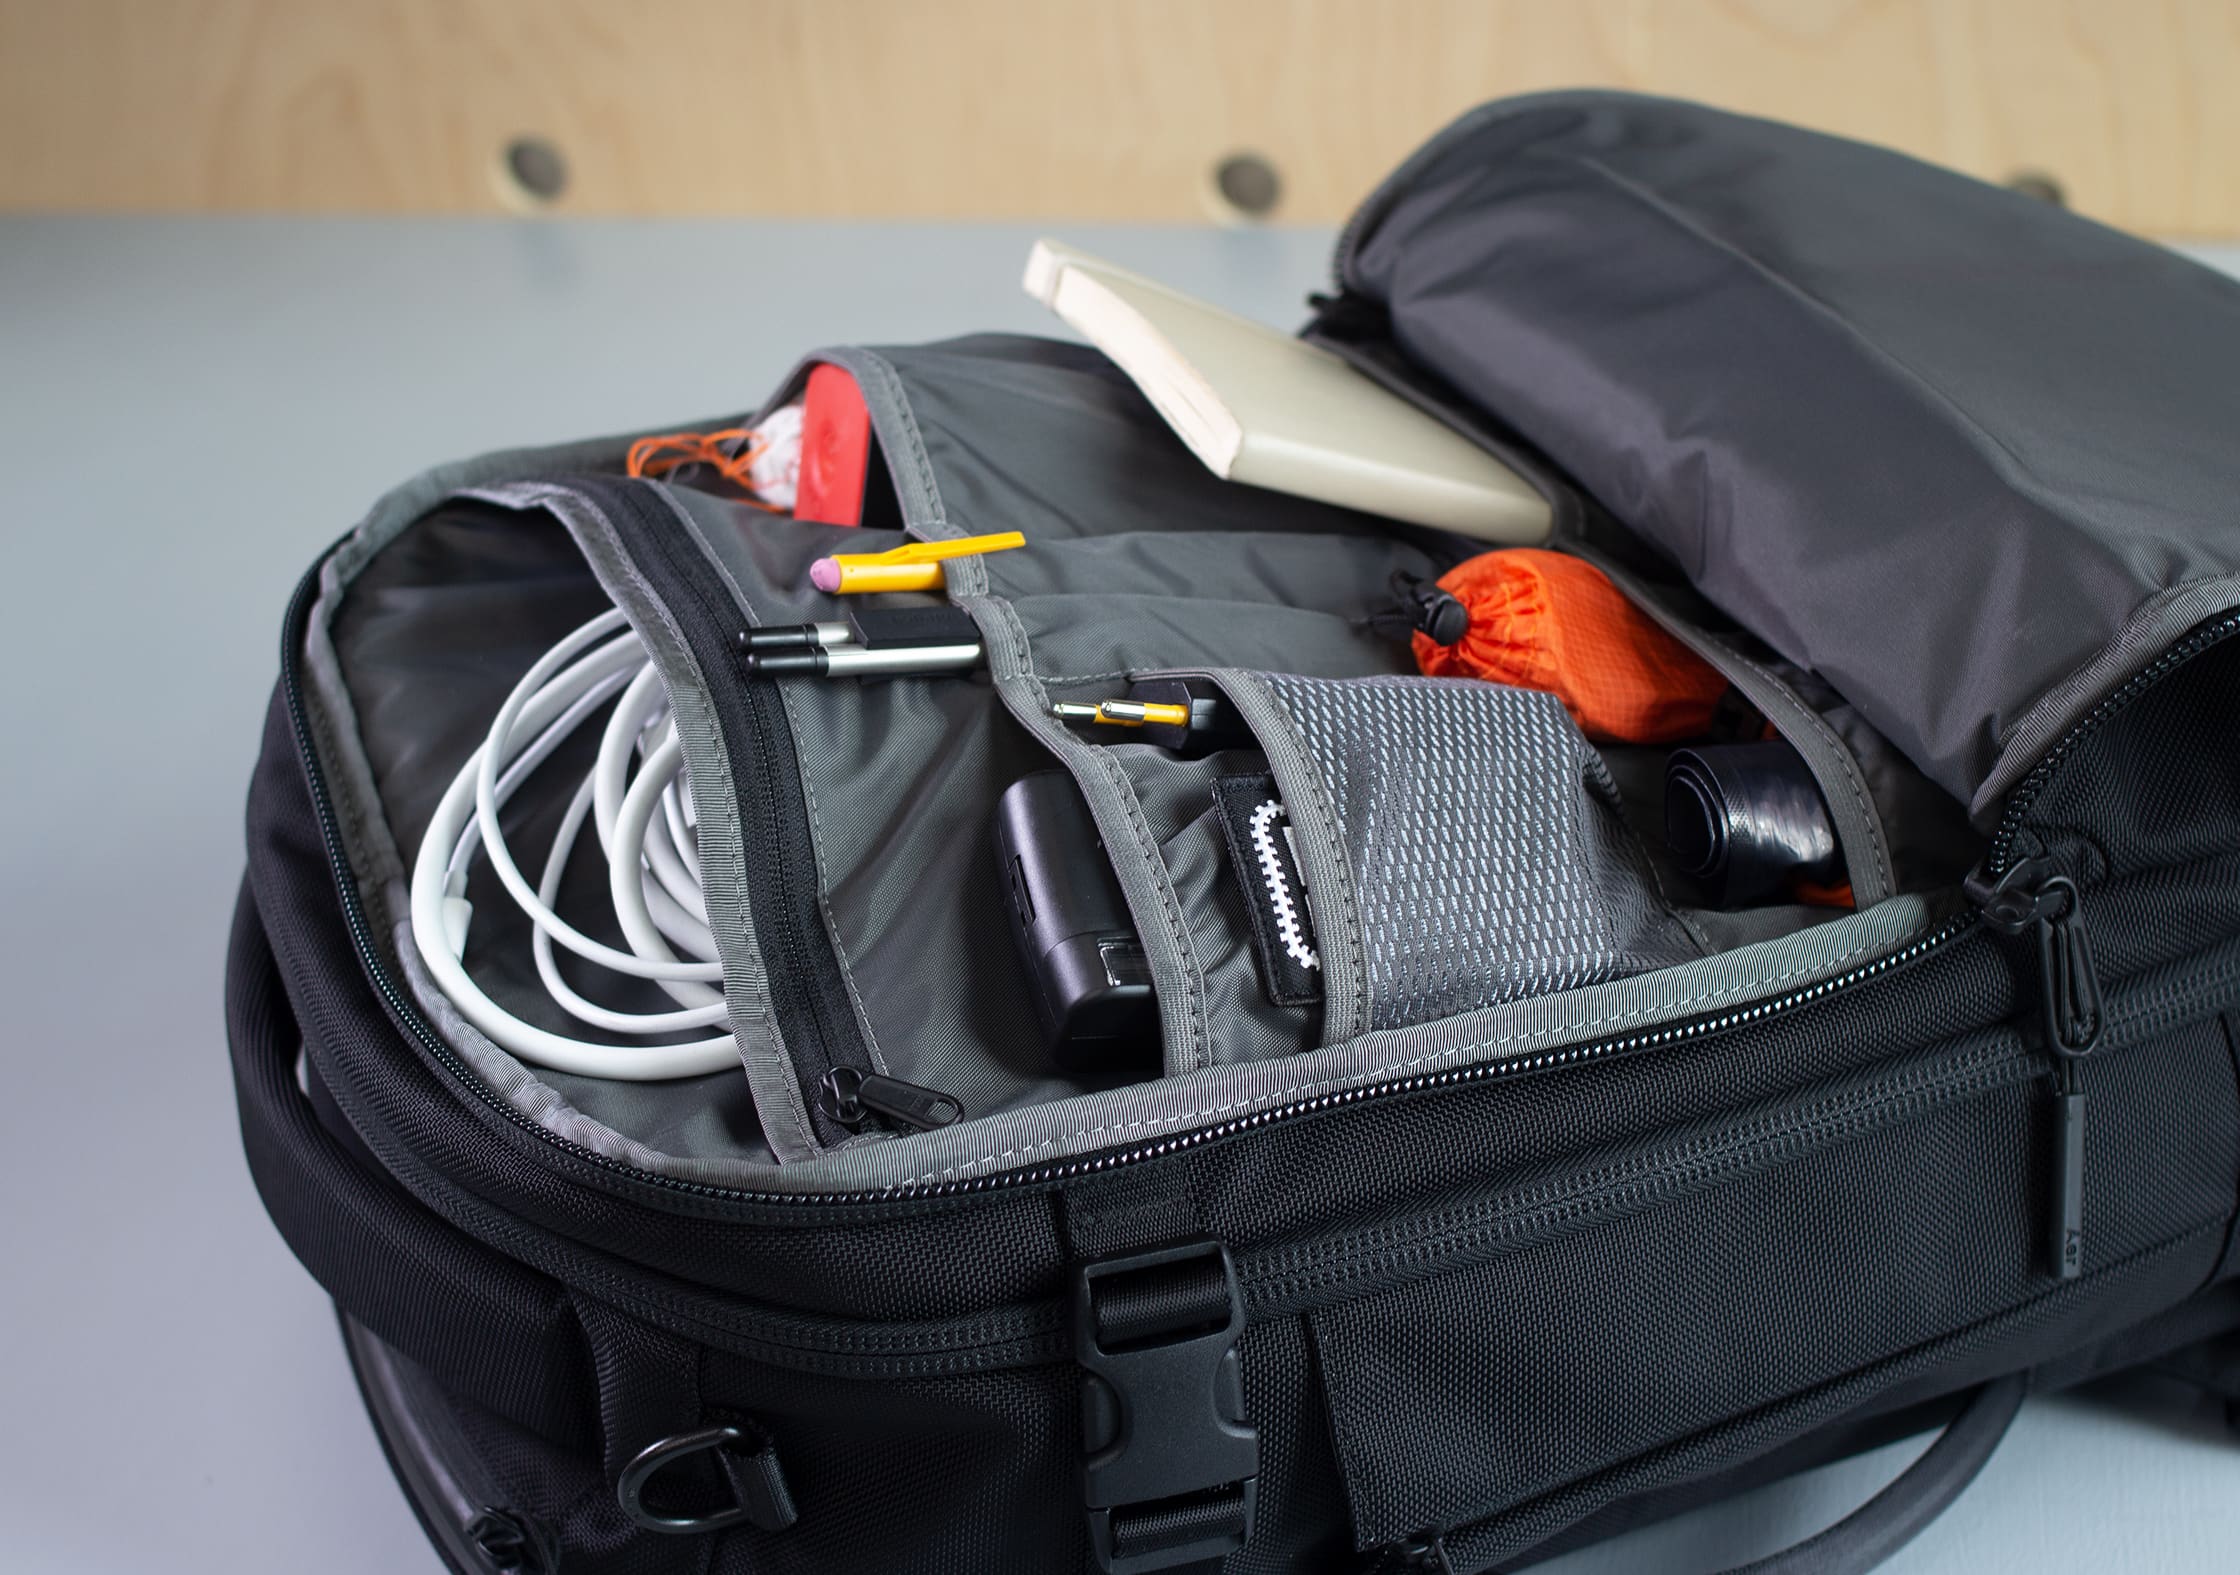
Opening up the organizer system, you’ll see two half-pockets on the bottom that go down about six inches. There is a mesh pocket above—with a little bit of elasticity—and then a corresponding liner pocket behind that, as well as one on the other side. Decent stretchiness here.
Plenty of organization with all of these pockets, and there are also two spots for a stylus, pen, or pencil. There is a zipper compartment up top with a YKK #5RC zipper. And there is also a plastic keychain ring.
Yeah, a plastic keychain ring. Tisk, tisk. Unbelievable… We’d usually prefer metal, and as we continue to try to nitpick this bag and find cons with it, we’re going to say that’s a con (it’s not really). This is a huge deal to us (it really isn’t).
We have to say that the best part about this organizer section is that if you want to use it, you can—and it’s great. But if you don’t want to use it, that’s fine too. If you’d prefer to use packing cubes or pouches, this thing just lays flat—very similar to the Tortuga Setout—and doesn’t cut into your space and force you to use it.
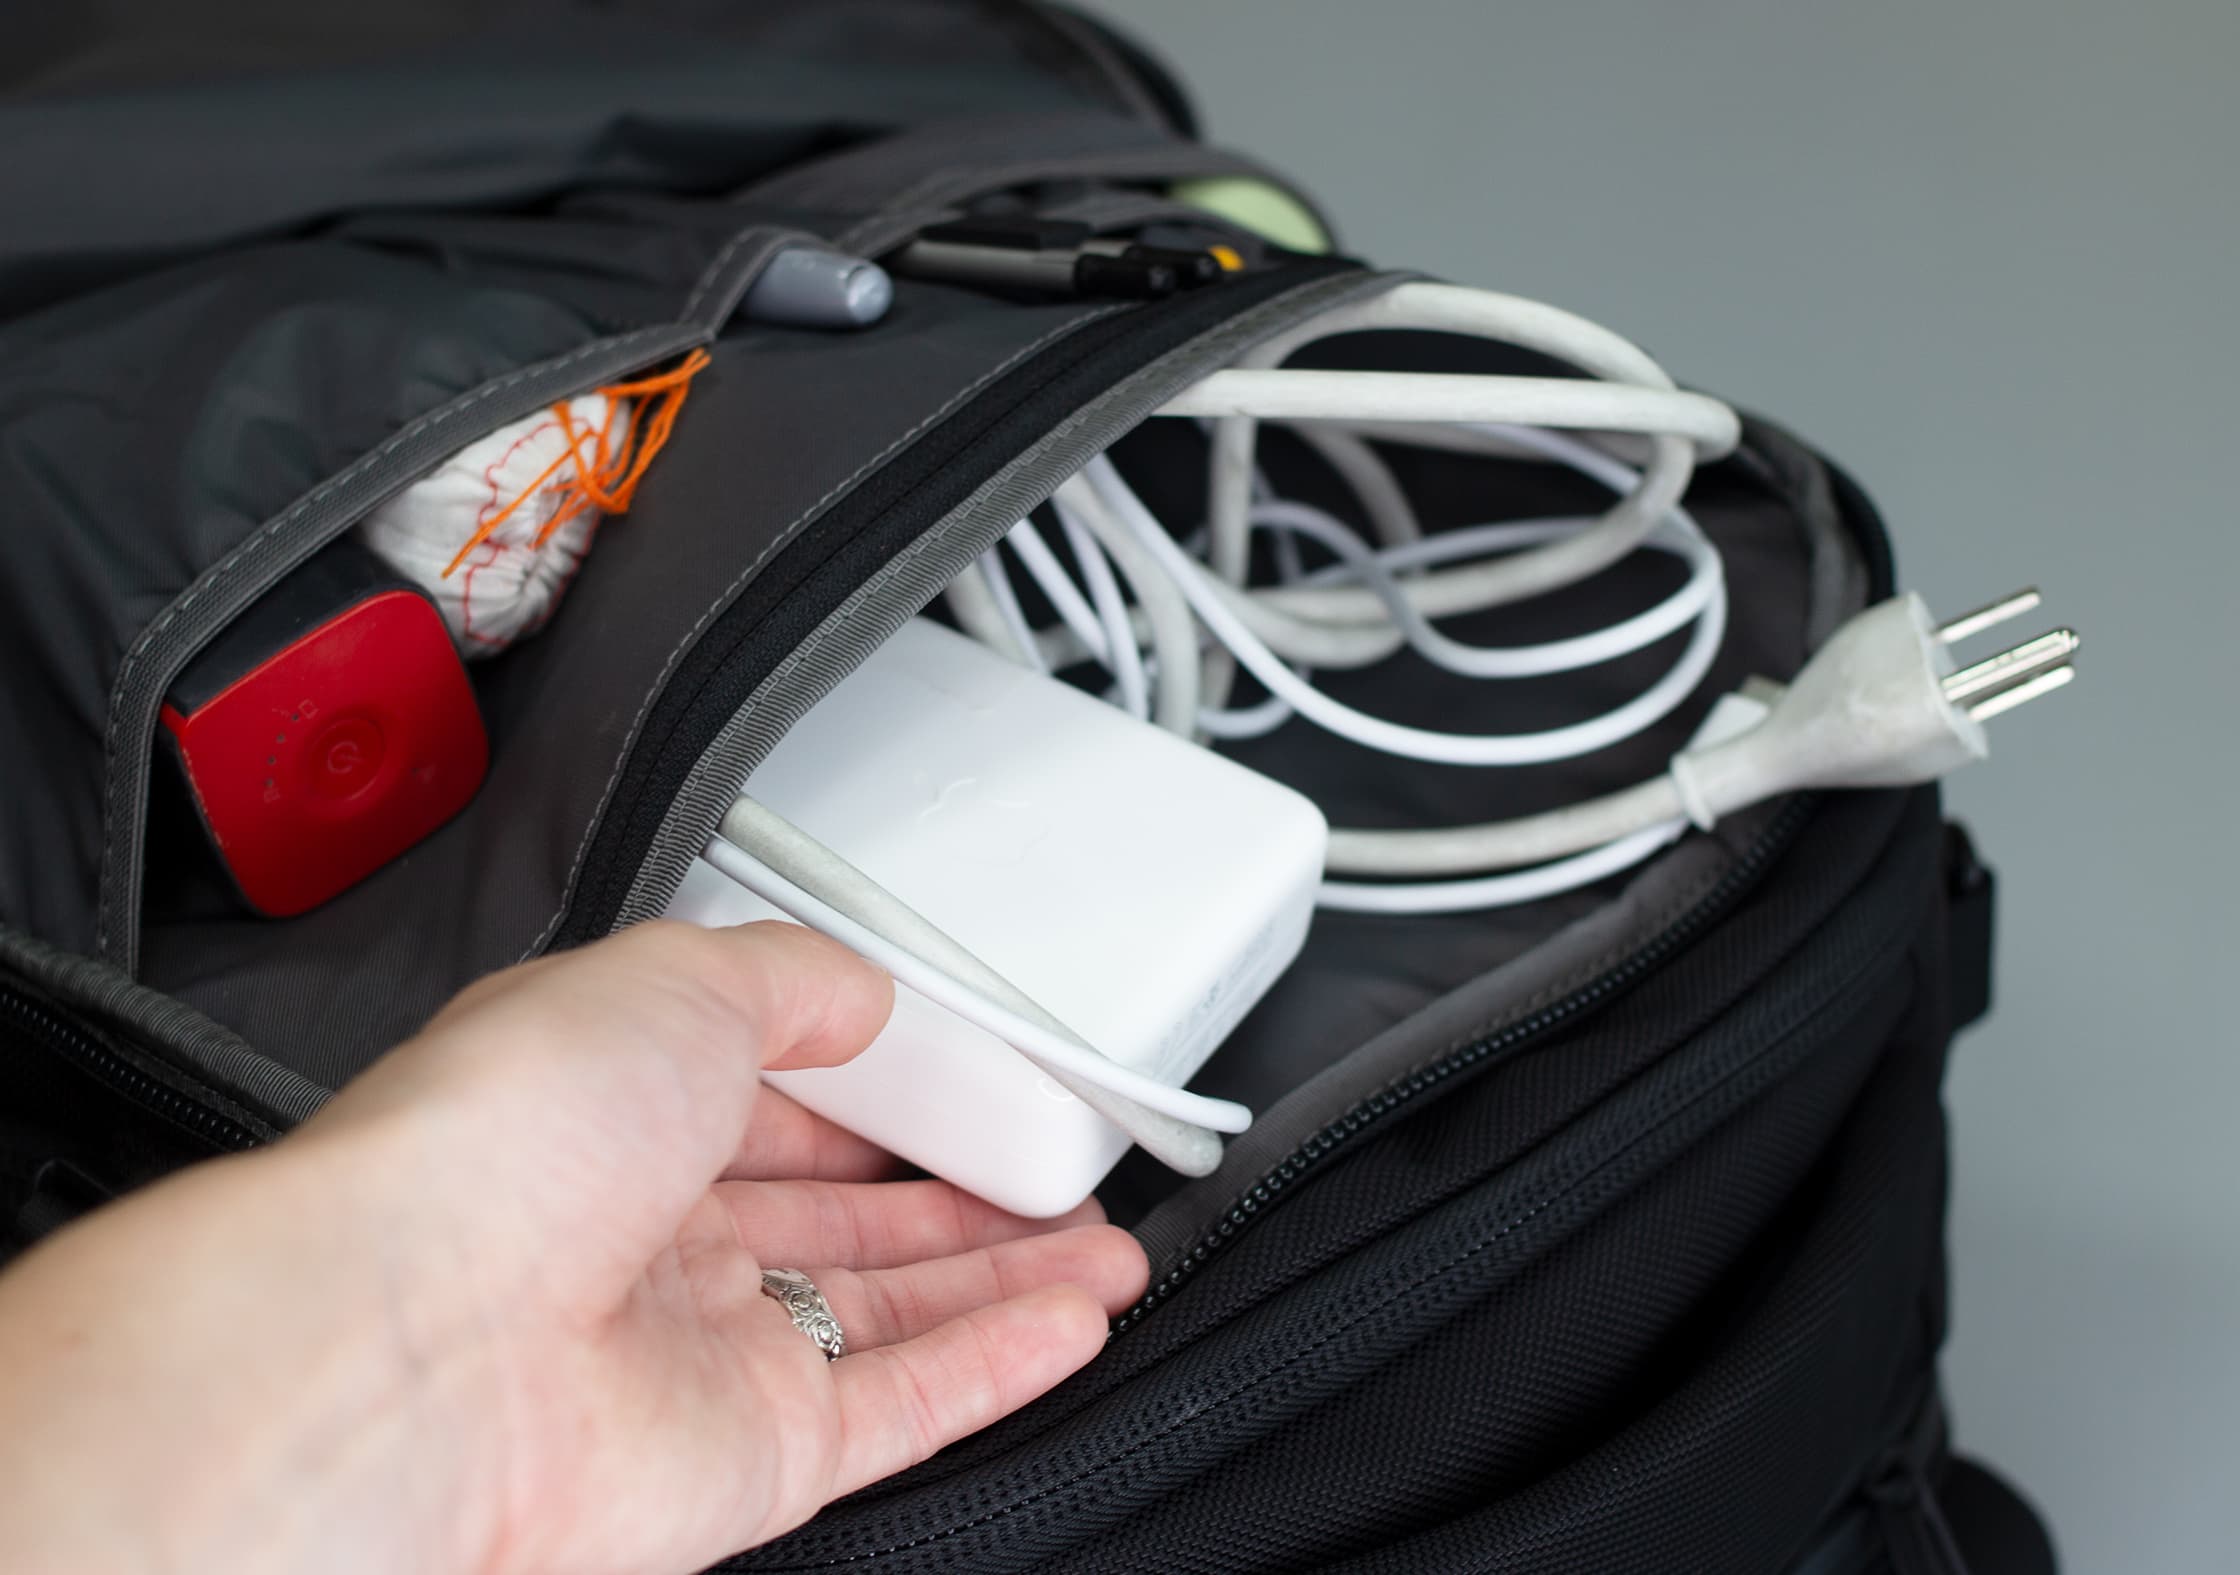
The last bit in this section is a divider pocket behind the zippered pocket. We’ve been using this as a catch-all for cables and chargers—bulky MacBook chargers fit perfectly here—and it usually just turns into a jumble of cables, for better or worse. FUN FACT: Apparently, there is a German word to describe this phenomenon! Kabelsalat, which basically translates to “cable salad.” Yum.
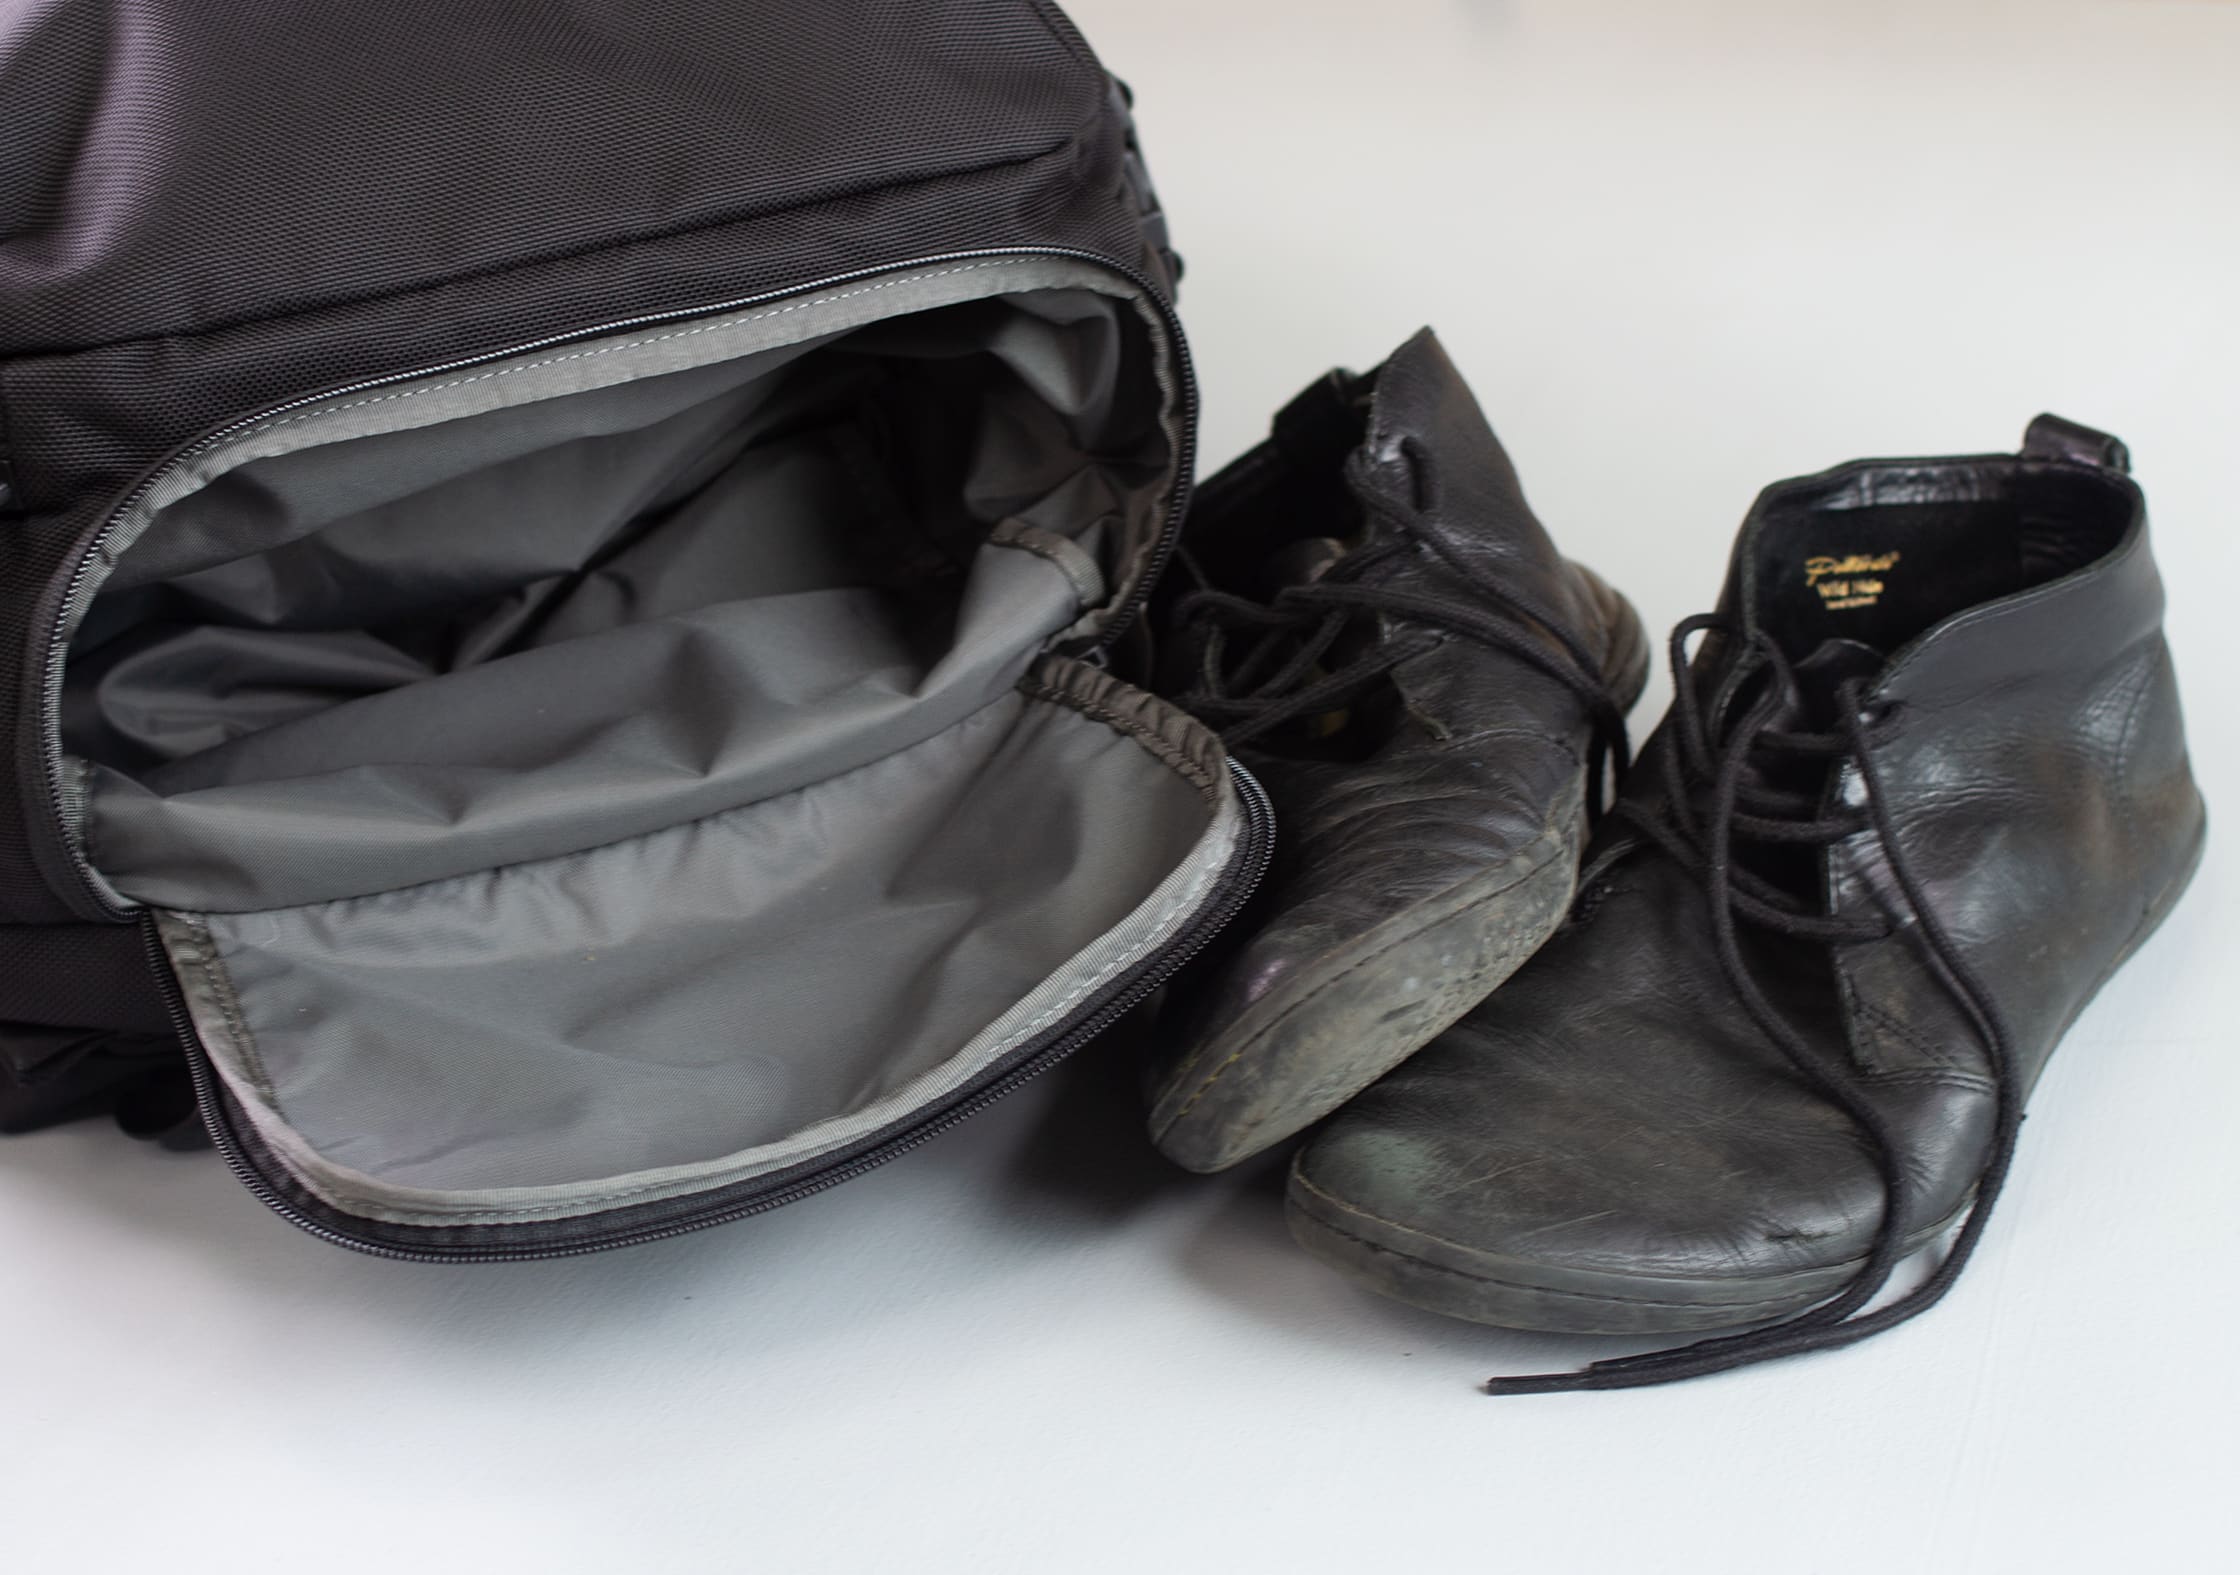
Moving on, one of our favorite features on this bag is the separate shoe compartment on the bottom. Another difference to note between the Aer Travel Pack 1 and 2 is that they’ve chosen to remove the ventilation holes here. Although that ventilation helps with your smelly shoes, removing them means that no additional moisture will get in as you’re setting this bag down. We think this was largely a good move by Aer, the benefits of the ventilation holes are kind of a moot point when your shoes end up getting soggy and wet.
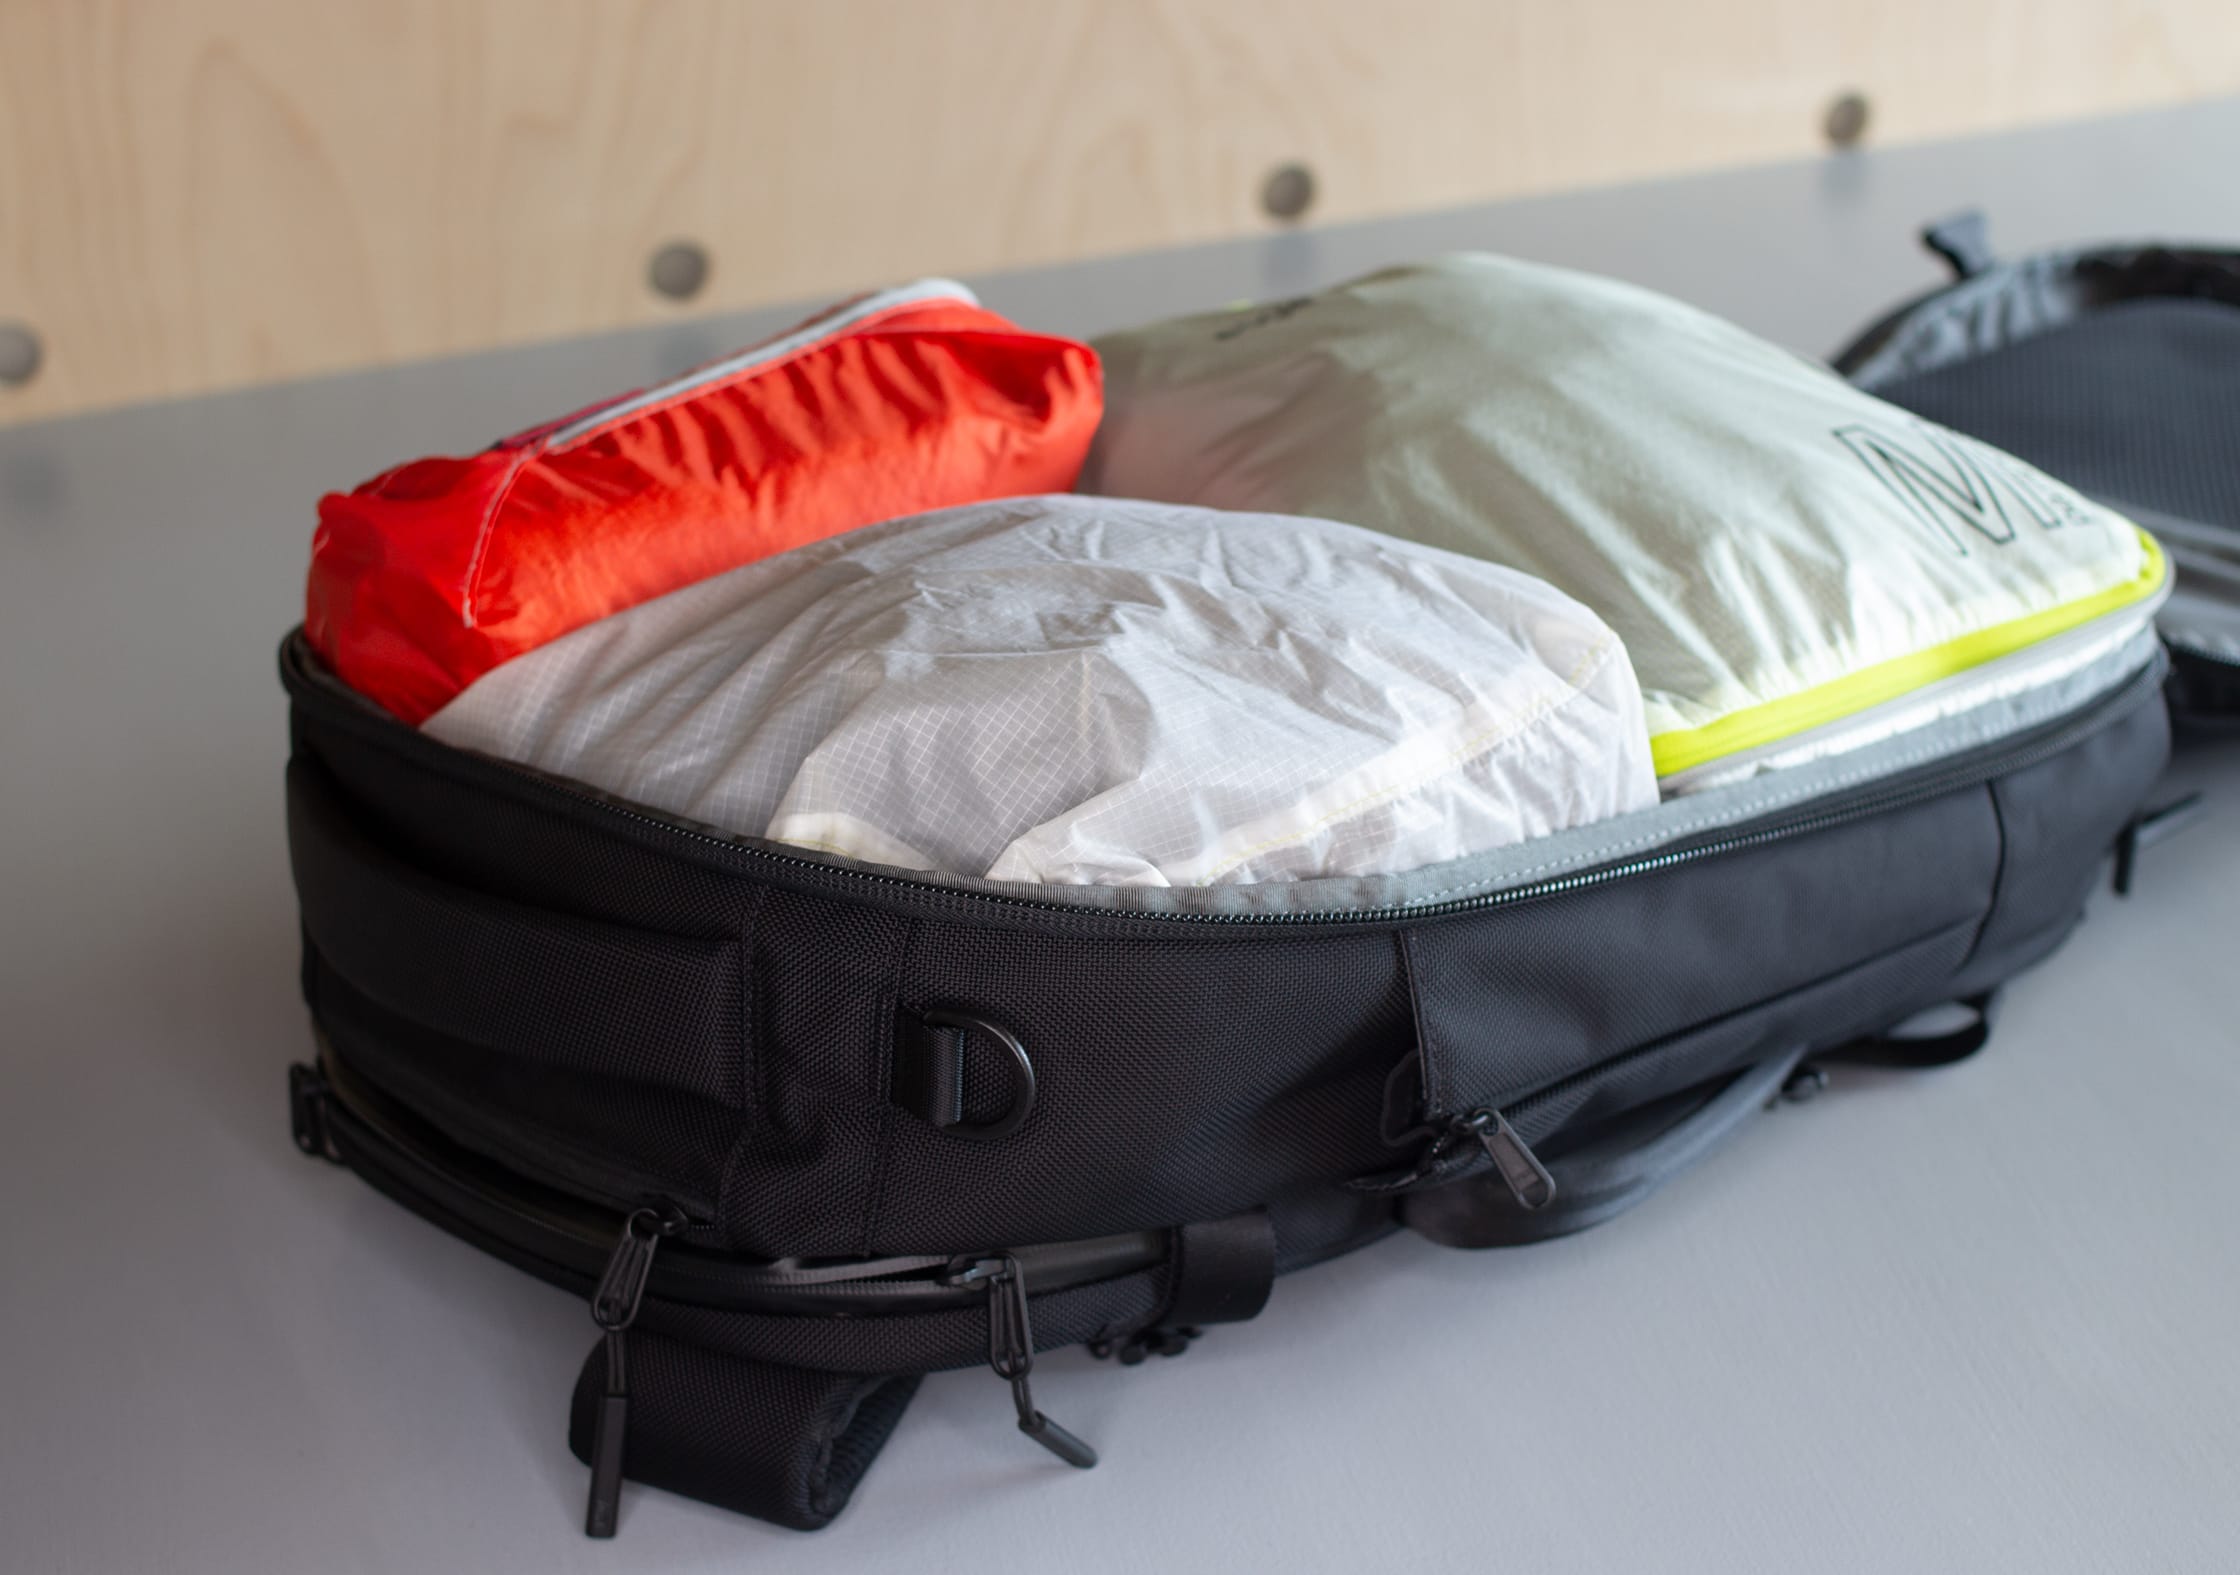
On to the main event, the main clamshell opening! First of all, it’s important to note that you’re going to need to unbuckle the compression straps should you want to fully open up that main compartment. Could be like a slight pain—we’ve seen some other bags handle this a bit better—but just something to note. And upon opening you will be met with a glorious, giant bucket compartment.
It’s important to note that any items in the shoe compartment or in the quick access pocket at the top will cut into the overall liter capacity of this main compartment here.
This area is great for packing cubes (we’d say almost mandatory). We always recommend packing cubes—the Eagle Creek Pack-It Specter Cubes are some of our favorites—as they give you the ability to organize and customize the interior of these large clamshell pockets. They work very nicely in this bag, that’s for sure.
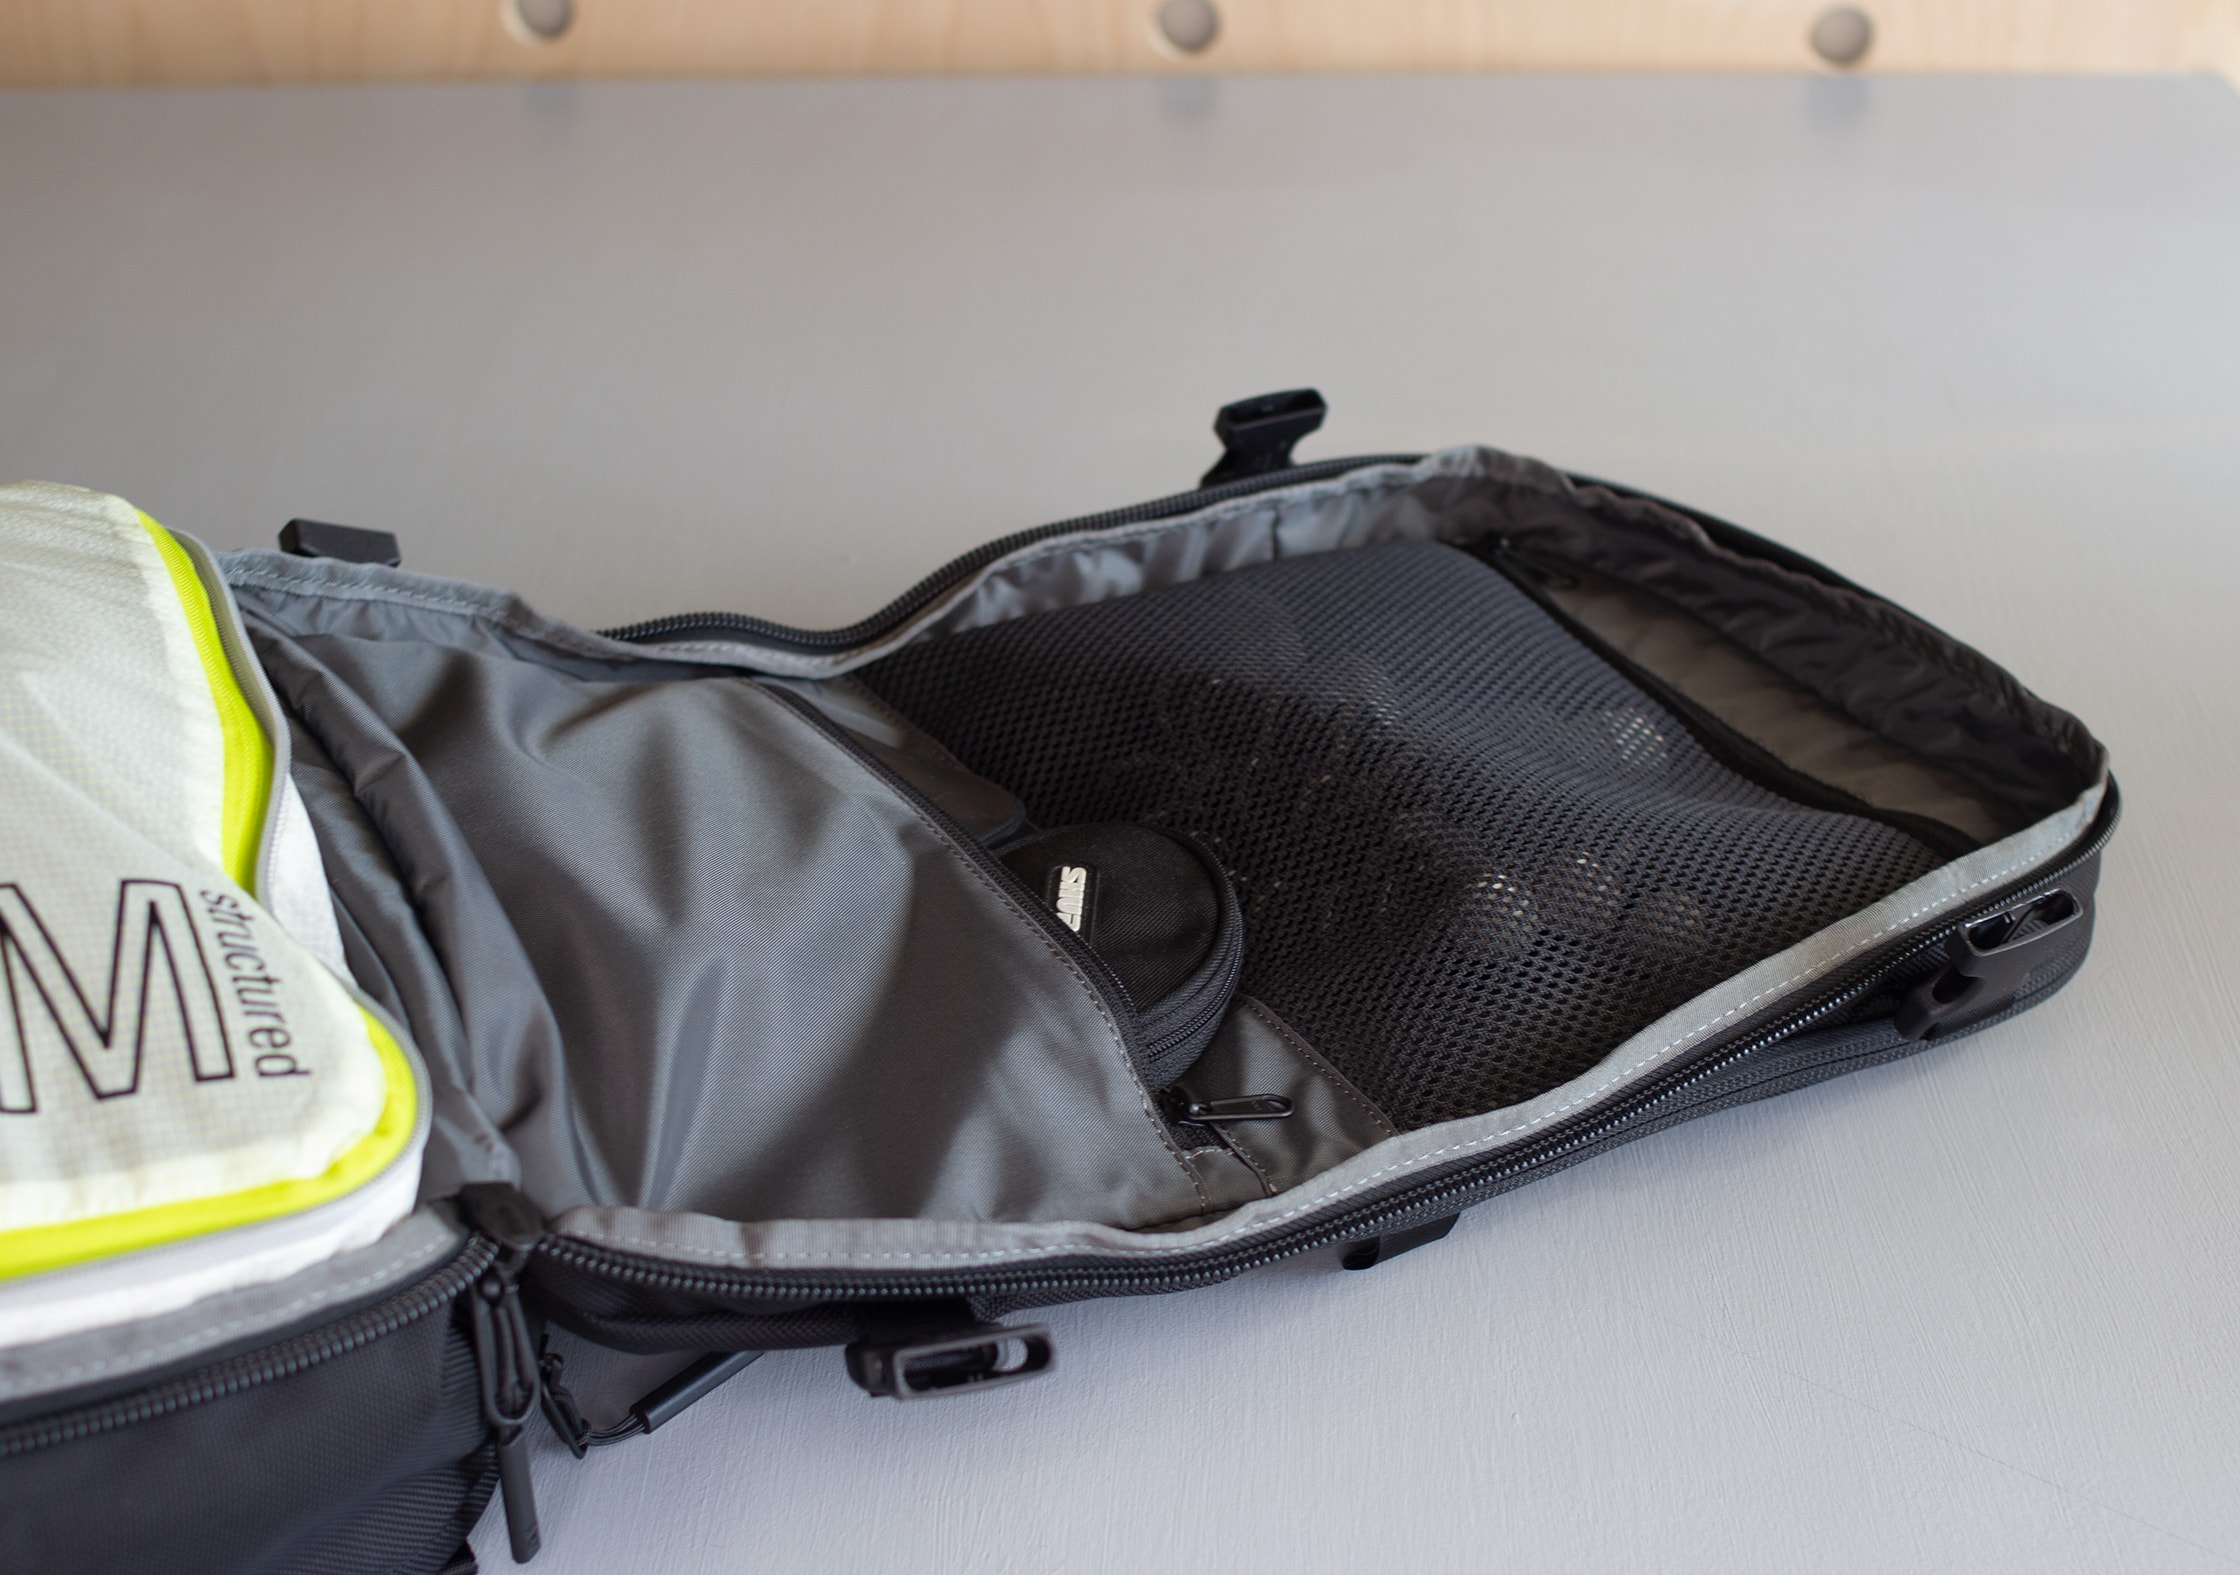
On the front side of the clamshell there’s a mesh pocket at the top (with a nice YKK zipper) that is good for flatter items. It’s not a 3D pocket, so it doesn’t stick out too much, but you have a little bit of variance here. Below that is arguably the most secure pocket in the bag, a decent-sized zippered compartment. This is great for more valuable items that you want to keep away from the main compartments and the exterior of the pack.
Durability & Testing
At the time of this review, we’ve been testing the Aer Travel Pack 2 for about two and a half weeks in Detroit. (Although we normally like to test packs for longer, we got this one before release and wanted to get this review out to you guys on release day!)

We have put the Aer Travel Pack 1 through the ringer, though—with trips to Minneapolis, Detroit, Nashville, California, and even Russia as one of our contributors went to the World Cup there. It has held up super well and still looks slick. The 1680D ballistic nylon hardly has any marks on it, outside of maybe one tiny blemish after six months of use. Hardly even noticeable. A lot of the durable materials have held up through extensive testing on our end.
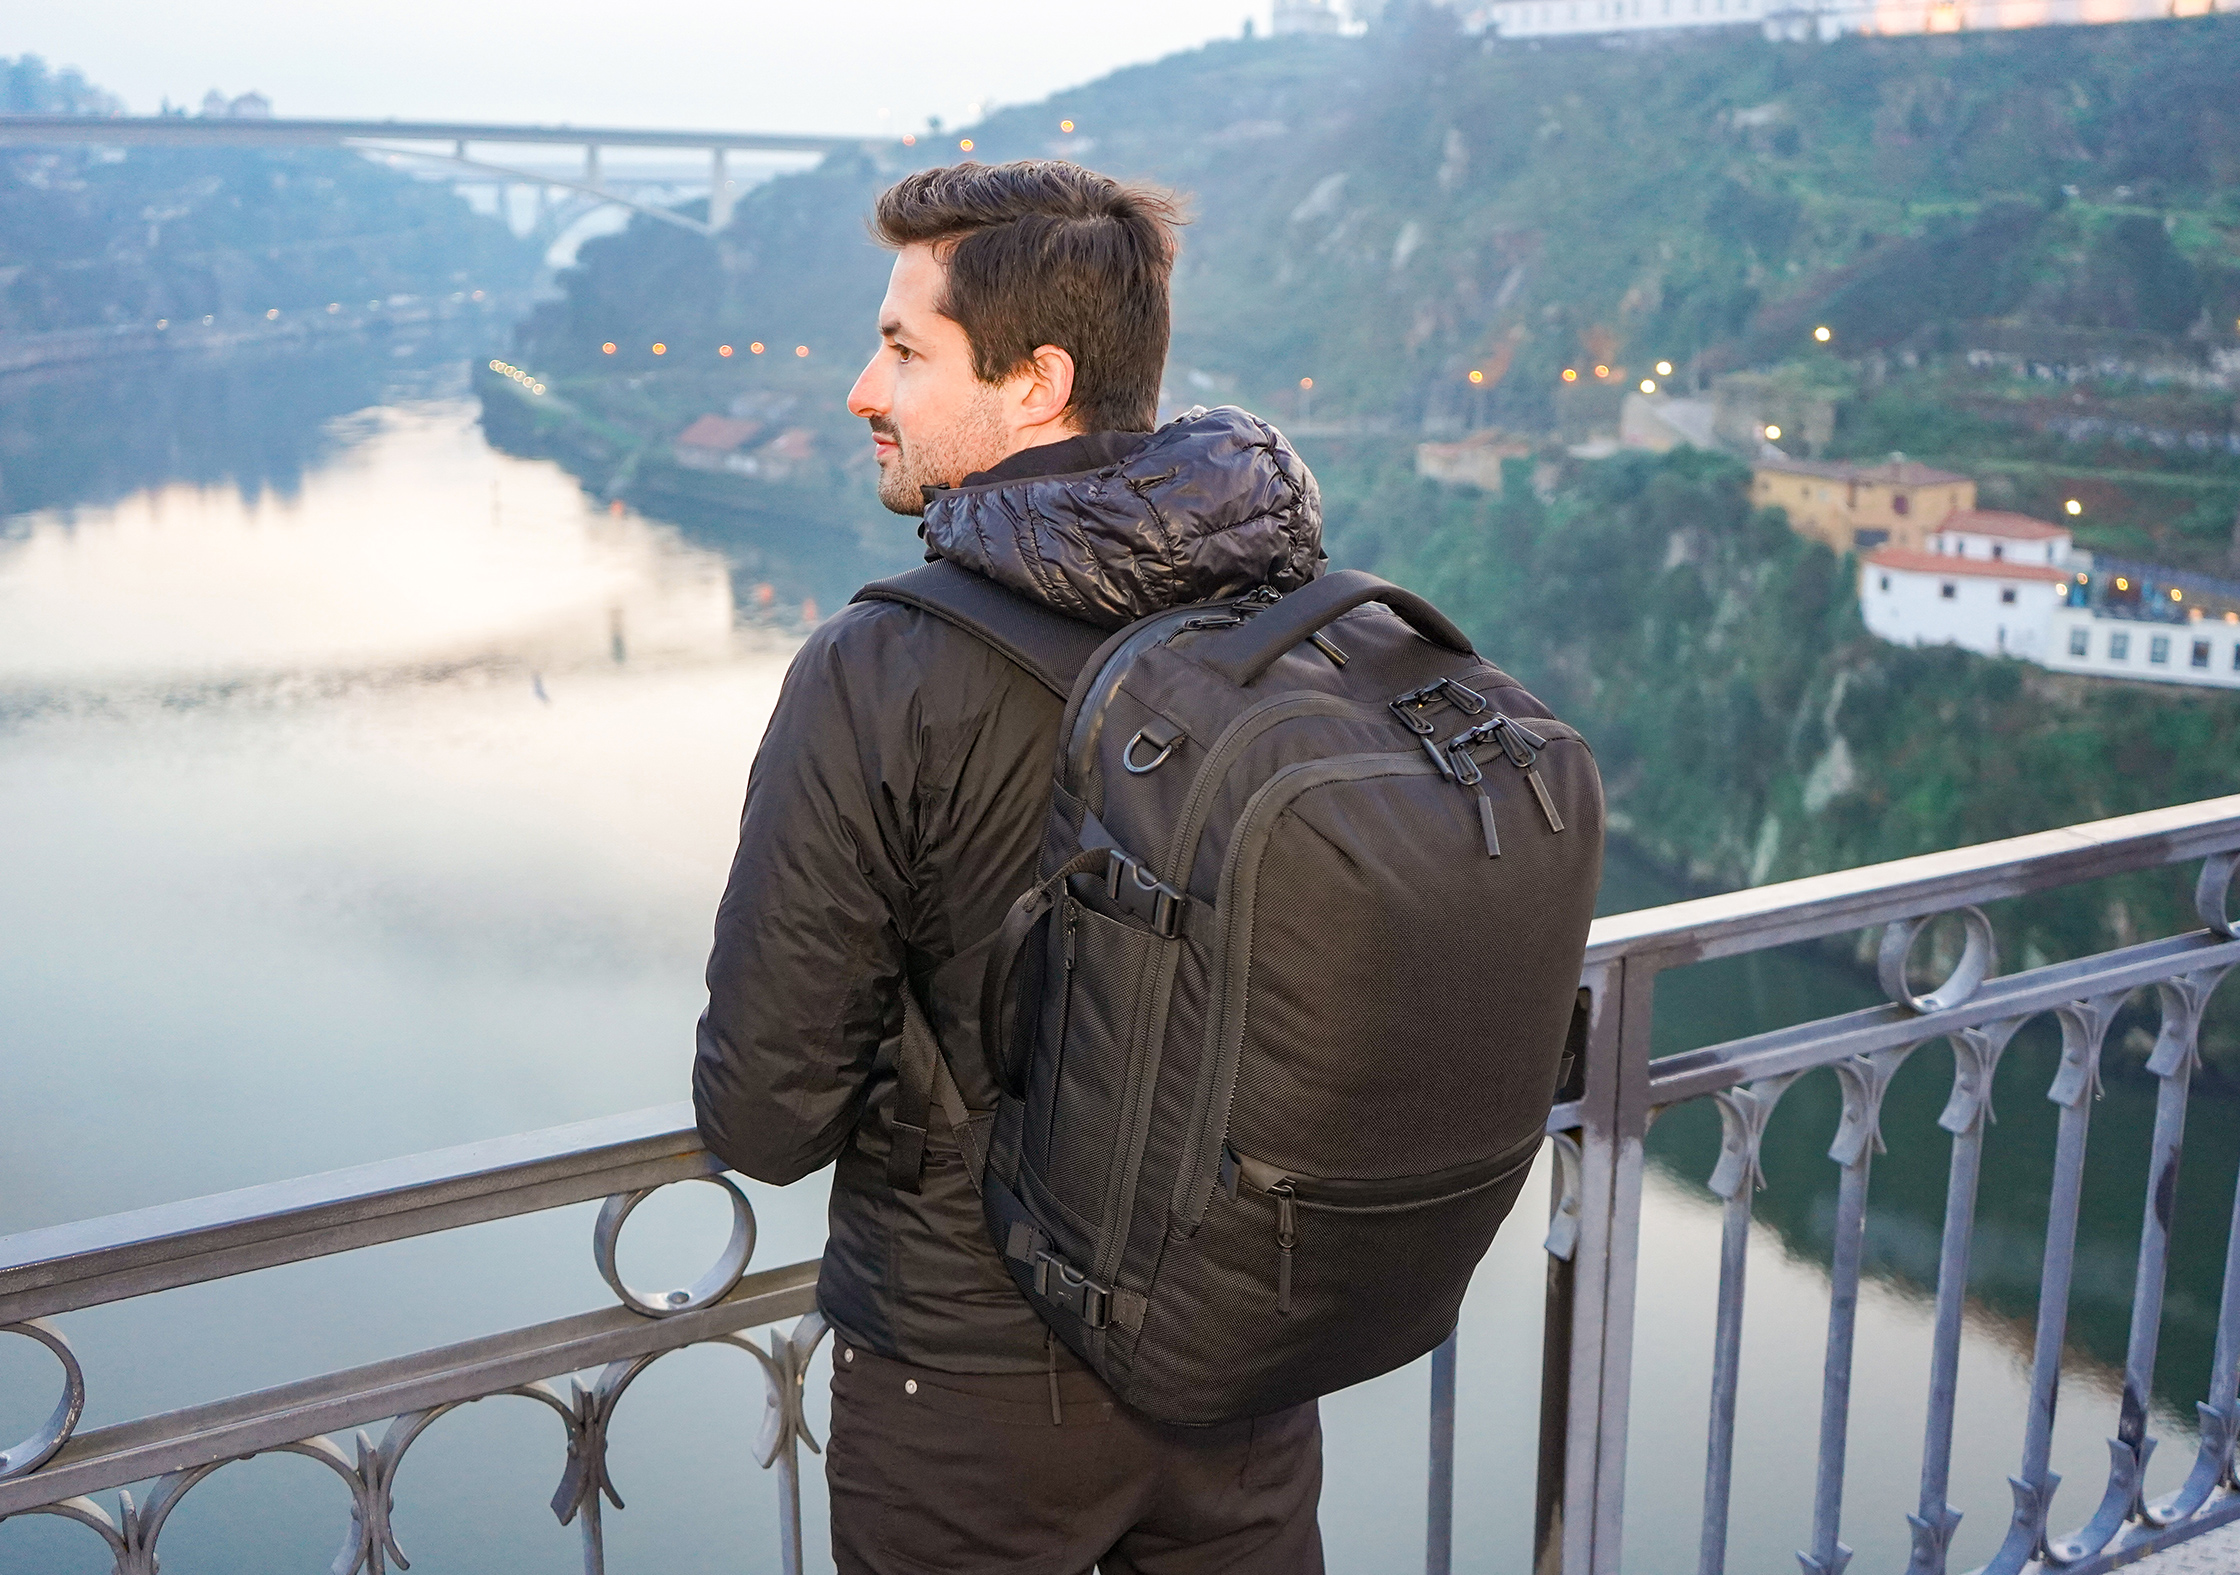
Needless to say, the Travel Pack 2 has held up extremely well in terms of durability during our two and a half weeks of testing—and we don’t envision it having problems anytime soon.
Usage Timeline
Condition: Excellent
Looks really slick, feels solid, loving the hip belt!
Condition: Excellent
Really enjoying this pack. Great features and durable materials.
Condition: Excellent
This bag has been on a month-long trip with us to Porto, Portugal. It’s been great to use as a dedicated travel backpack when in transit, and a day pack with cinched-down compressions straps at our destination.
Condition: Excellent
Still holding up well!


Get your questions about the Aer Travel Pack 2 answered from our team and the Pro Community right here on the page. Plus, join discussions with other members about gear, guides, and more.
Join Pack Hacker Pro or, Sign In